Call +(254) 703 030 000 / 751 483 999 / 721 704 777
.....Read More
Frequently Asked Questions
What are mounted points used for?
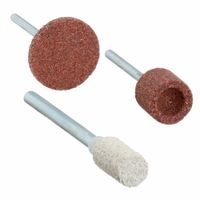
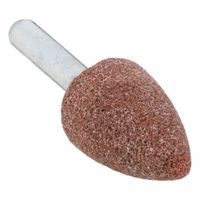
Mounted points are small grinding tools used in various industrial and manufacturing applications for precision grinding, deburring, and finishing. They consist of abrasive grains bonded together and attached to a spindle or mandrel, allowing them to be mounted onto a rotary tool or machine. These tools are essential for tasks that require detailed work on small or intricate parts.
Primarily, mounted points are used for:
1. **Grinding and Shaping**: They are ideal for grinding and shaping hard-to-reach areas or small surfaces where larger grinding wheels cannot be used. This includes internal grinding of bores, molds, dies, and other complex geometries.
2. **Deburring**: After machining processes, mounted points are used to remove burrs and sharp edges from metal parts, ensuring smooth finishes and preventing potential injuries or malfunctions in mechanical assemblies.
3. **Surface Finishing**: They provide a fine finish on metal, glass, ceramics, and other materials. This is crucial in industries like aerospace, automotive, and tool manufacturing, where surface quality is paramount.
4. **Polishing**: Mounted points can be used with different abrasive materials to polish surfaces to a high shine, which is important in both aesthetic and functional applications.
5. **Material Removal**: They are effective in removing excess material from castings, welds, and other components, helping to achieve the desired dimensions and surface quality.
6. **Tool and Die Work**: In tool and die making, mounted points are used for precision work on molds and dies, ensuring accurate and detailed features.
Overall, mounted points are versatile tools that enhance the efficiency and precision of various manufacturing processes, contributing to the production of high-quality components and products.
How do you choose the right mounted point for a specific material?
To choose the right mounted point for a specific material, consider the following factors:
1. **Material Hardness**: Match the mounted point's abrasive material to the hardness of the workpiece. Use aluminum oxide for ferrous metals, silicon carbide for non-ferrous metals, and diamond for very hard materials like ceramics.
2. **Abrasive Grain Size**: Select a coarser grain for rapid material removal and a finer grain for a smoother finish. Coarse grains are suitable for rough grinding, while fine grains are ideal for finishing.
3. **Bond Type**: Choose the bond type based on the grinding application. Vitrified bonds are strong and suitable for precision grinding, while resin bonds offer flexibility and are good for high-speed applications.
4. **Shape and Size**: The shape of the mounted point should match the contour of the workpiece. Common shapes include cylindrical, conical, and ball-shaped. The size should be appropriate for the area being worked on, ensuring it fits into tight spaces if necessary.
5. **Speed and Power**: Ensure the mounted point can withstand the speed and power of the grinding tool. Check the maximum RPM rating to prevent breakage or inefficient grinding.
6. **Application Type**: Consider the specific application, such as deburring, finishing, or surface preparation, and choose a mounted point designed for that purpose.
7. **Durability and Cost**: Balance the cost with the durability of the mounted point. Higher-quality points may have a higher initial cost but offer longer life and better performance.
8. **Manufacturer Recommendations**: Follow the manufacturer's guidelines for the best results, as they provide specific recommendations based on extensive testing.
By considering these factors, you can select the most suitable mounted point for your specific material and application, ensuring efficient and effective grinding.
What are the different shapes of mounted points and their applications?
Mounted points come in various shapes, each designed for specific applications:
1. **Cylindrical**: Used for surface grinding and finishing flat surfaces. Ideal for deburring and smoothing edges.
2. **Conical**: Suitable for precision grinding in tight spaces and for creating tapered holes or surfaces.
3. **Ball**: Perfect for contouring and finishing curved surfaces. Commonly used in mold and die work.
4. **Oval**: Used for blending and finishing irregular shapes and surfaces.
5. **Flame**: Designed for detailed work in hard-to-reach areas, often used in tool and die making.
6. **Tapered**: Ideal for grinding in narrow slots and for precision work in confined spaces.
7. **Bullet**: Used for precision grinding and finishing in small, detailed areas.
8. **Wedge**: Suitable for grinding and finishing in corners and tight angles.
9. **Tree**: Used for contouring and finishing in hard-to-reach areas, especially in mold making.
10. **Inverted Cone**: Ideal for grinding and finishing in recessed areas and for creating grooves.
Each shape is chosen based on the specific requirements of the task, such as the material being worked on, the desired finish, and the accessibility of the area.
How do you properly attach a mounted point to a rotary tool?
To properly attach a mounted point to a rotary tool, follow these steps:
1. **Safety First**: Ensure the rotary tool is unplugged or the battery is removed to prevent accidental activation. Wear safety goggles and gloves to protect against debris and sharp edges.
2. **Select the Right Collet**: Identify the correct collet size for the shank of the mounted point. Collets are typically available in various sizes (e.g., 1/8 inch, 3/32 inch). The shank of the mounted point should match the collet size for a secure fit.
3. **Loosen the Collet Nut**: Use the provided wrench or tool to loosen the collet nut on the rotary tool. This nut holds the collet in place and must be loosened to insert the mounted point.
4. **Insert the Mounted Point**: Slide the shank of the mounted point into the collet. Ensure it is inserted fully and straight to prevent wobbling during operation.
5. **Tighten the Collet Nut**: Once the mounted point is in place, use the wrench to tighten the collet nut securely. Ensure the mounted point is firmly held and does not move when you apply pressure.
6. **Check Alignment and Balance**: Spin the mounted point manually to check for any wobbling or misalignment. If it wobbles, loosen the collet nut, adjust the mounted point, and retighten.
7. **Test the Setup**: Plug in the rotary tool or reattach the battery. Turn it on at a low speed to test the mounted point's stability. Gradually increase the speed to the desired level, ensuring smooth operation.
8. **Begin Work**: Once satisfied with the setup, proceed with your task, maintaining a steady hand and appropriate pressure to avoid damaging the mounted point or workpiece.
What safety precautions should be taken when using mounted points?
When using mounted points, several safety precautions should be observed to ensure safe operation:
1. **Personal Protective Equipment (PPE):** Always wear appropriate PPE, including safety goggles or a face shield to protect against flying debris, gloves to protect hands, and hearing protection if noise levels are high.
2. **Tool Inspection:** Before use, inspect the mounted point and the tool for any signs of damage, wear, or defects. Ensure that the mounted point is securely attached to the tool.
3. **Speed Compliance:** Verify that the mounted point is rated for the speed of the tool. Never exceed the maximum operating speed specified by the manufacturer.
4. **Secure Workpiece:** Ensure that the workpiece is securely clamped or held in place to prevent movement during operation.
5. **Proper Mounting:** Use the correct size and type of mandrel for the mounted point. Ensure that it is properly mounted and balanced to prevent vibration and potential breakage.
6. **Work Area Safety:** Keep the work area clean and free of clutter. Ensure adequate lighting and ventilation. Keep bystanders at a safe distance.
7. **Safe Operation:** Start the tool at a low speed and gradually increase to the desired speed. Avoid applying excessive pressure, which can cause the mounted point to shatter.
8. **Avoiding Jams:** Do not force the mounted point into the workpiece. Allow the tool to do the work to prevent jamming and potential kickback.
9. **Regular Maintenance:** Regularly maintain and service the tool according to the manufacturer's instructions to ensure it remains in safe working condition.
10. **Training:** Ensure that all operators are properly trained in the use of mounted points and understand the associated risks and safety measures.
By adhering to these precautions, the risk of accidents and injuries can be significantly reduced.
How do you maintain and clean mounted points for longevity?
To maintain and clean mounted points for longevity, follow these steps:
1. **Regular Inspection**: Frequently check mounted points for wear, damage, or imbalance. Look for signs of uneven wear or cracks that could affect performance.
2. **Proper Storage**: Store mounted points in a dry, clean environment. Use original packaging or a dedicated storage system to prevent contamination and physical damage.
3. **Correct Usage**: Use mounted points at the recommended speed and pressure. Avoid excessive force, which can cause overheating and premature wear.
4. **Cleaning**: After use, clean mounted points with a soft brush or compressed air to remove debris and dust. Avoid using water or solvents that could degrade the bonding material.
5. **Dressing**: Regularly dress mounted points with a dressing tool to maintain their shape and surface texture. This ensures efficient cutting and prevents loading.
6. **Balancing**: Ensure mounted points are properly balanced before use. Imbalance can lead to vibration, reducing tool life and affecting workpiece quality.
7. **Avoid Contamination**: Keep mounted points free from oil, grease, and other contaminants that can affect performance and longevity.
8. **Tool Maintenance**: Maintain the equipment used with mounted points. Ensure spindles and collets are clean and in good condition to prevent misalignment and vibration.
9. **Replacement**: Replace mounted points when they become too worn or damaged. Using worn tools can lead to poor performance and potential safety hazards.
10. **Training**: Ensure operators are trained in the correct handling and usage of mounted points to prevent misuse and extend their lifespan.
By following these practices, you can maximize the efficiency and lifespan of mounted points, ensuring consistent performance and safety.
What are the differences between mounted points for metal, plastic, and composite materials?
Mounted points for metal, plastic, and composite materials differ primarily in terms of abrasive material, bonding agent, hardness, and shape to suit the specific requirements of each material type.
1. **Abrasive Material**:
- **Metal**: Typically uses aluminum oxide or silicon carbide abrasives. These materials are hard and durable, suitable for grinding and finishing metals.
- **Plastic**: Often uses softer abrasives like silicon carbide or even softer materials to prevent melting or excessive wear on the plastic surface.
- **Composite**: May use a combination of abrasives, including diamond or cubic boron nitride, to handle the varied hardness and composition of composite materials.
2. **Bonding Agent**:
- **Metal**: Uses strong bonding agents like vitrified or resin bonds to withstand the high pressure and heat generated during metal grinding.
- **Plastic**: Utilizes softer resin bonds to reduce heat buildup and prevent damage to the plastic.
- **Composite**: Requires specialized bonds that can handle the diverse material properties without causing delamination or damage.
3. **Hardness**:
- **Metal**: Mounted points are generally harder to effectively cut through tough metal surfaces.
- **Plastic**: Softer to avoid excessive heat and deformation.
- **Composite**: Varies depending on the specific composite material, balancing between hardness and flexibility.
4. **Shape and Size**:
- **Metal**: Available in a wide range of shapes and sizes to accommodate different metalworking tasks.
- **Plastic**: Often designed with shapes that minimize heat buildup and provide smooth finishes.
- **Composite**: Tailored shapes to address the specific contours and properties of composite materials.
These differences ensure that each mounted point is optimized for its intended material, providing efficient and effective grinding, shaping, or finishing.

