Call +(254) 703 030 000 / 751 483 999 / 721 704 777
- Home
- Abrasives
- Abrasive Brushes
- Cup Brushes
.....Read More
Frequently Asked Questions
How do I install a cup brush on an angle grinder?
1. **Safety First**: Ensure the angle grinder is unplugged or the battery is removed to prevent accidental start-up.
2. **Remove Existing Wheel**: If there is a wheel or disc already installed, use the grinder’s wrench to loosen the nut holding it in place. Turn the nut counterclockwise to remove it.
3. **Inspect the Cup Brush**: Check the cup brush for any damage or defects. Ensure it is compatible with your angle grinder’s specifications, particularly the arbor size.
4. **Install the Cup Brush**: Place the cup brush onto the grinder’s spindle. Ensure the brush is seated properly on the spindle.
5. **Secure the Cup Brush**: Use the grinder’s wrench to tighten the nut over the cup brush. Turn the nut clockwise to secure it. Make sure it is tight enough to hold the brush firmly in place but avoid over-tightening.
6. **Check Alignment**: Spin the cup brush by hand to ensure it is aligned correctly and does not wobble. If it wobbles, adjust and retighten as necessary.
7. **Reattach Power**: Plug the angle grinder back in or reattach the battery.
8. **Test the Installation**: Before using the grinder on a workpiece, turn it on and let it run for a few seconds to ensure the cup brush is installed correctly and operates smoothly.
9. **Use Proper Safety Gear**: Always wear appropriate safety gear, including gloves, goggles, and a dust mask, when operating the angle grinder with a cup brush.
10. **Follow Manufacturer’s Instructions**: Refer to the angle grinder and cup brush manuals for any specific installation instructions or safety warnings.
What safety precautions should I take when using a cup brush on power tools?
When using a cup brush on power tools, prioritize safety by following these precautions:
1. **Personal Protective Equipment (PPE):** Wear safety goggles or a face shield to protect your eyes from flying debris. Use hearing protection to guard against noise. Wear gloves to protect your hands, but ensure they are tight-fitting to avoid entanglement. Use a dust mask or respirator if working with materials that produce dust.
2. **Tool Inspection:** Before use, inspect the power tool and cup brush for any damage or wear. Ensure the brush is securely attached and that there are no loose wires or bristles.
3. **Correct Brush Selection:** Use the appropriate cup brush for the material and task. Ensure the brush's maximum RPM rating exceeds the tool's operating speed to prevent disintegration.
4. **Secure Work Area:** Ensure the workpiece is securely clamped or held in place to prevent movement during operation. Keep the work area clean and free of obstructions.
5. **Proper Handling:** Hold the power tool firmly with both hands to maintain control. Avoid applying excessive pressure; let the brush do the work. Maintain a stable stance to prevent loss of balance.
6. **Avoid Entanglement:** Keep loose clothing, hair, and jewelry away from the brush to prevent entanglement. Ensure the work area is clear of any materials that could catch on the brush.
7. **Tool Operation:** Start the tool at a low speed to check for balance and stability. Gradually increase to the desired speed. Do not start the tool with the brush in contact with the workpiece.
8. **Post-Use Care:** After use, allow the brush to come to a complete stop before setting the tool down. Inspect the brush for wear and replace it if necessary. Store the tool and brush properly.
By adhering to these precautions, you can minimize the risk of accidents and ensure a safer working environment.
Can I use a cup brush on a drill for rust removal?
Yes, you can use a cup brush on a drill for rust removal. Cup brushes are designed to be attached to power tools like drills and are effective for removing rust, paint, and other surface contaminants from metal surfaces. When using a cup brush on a drill, ensure that the brush is securely attached to the drill's chuck. Use a drill with variable speed settings to control the speed of the brush, as high speeds can cause the brush to wear out quickly or damage the surface being cleaned. Always wear appropriate safety gear, such as goggles and gloves, to protect against flying debris and metal particles. Additionally, work in a well-ventilated area to avoid inhaling dust and rust particles.
What is the best cup brush for cleaning paint off metal surfaces?
The best cup brush for cleaning paint off metal surfaces is typically a wire cup brush made of carbon steel or stainless steel, depending on the specific requirements of the task. A carbon steel wire cup brush is ideal for general-purpose cleaning and paint removal on ferrous metals, while a stainless steel wire cup brush is better suited for non-ferrous metals to prevent contamination and rust.
When selecting a cup brush, consider the following features:
1. **Wire Type and Gauge**: Choose between crimped or twisted wire. Crimped wire brushes are more flexible and suitable for light to medium-duty tasks, while twisted wire brushes are more aggressive and ideal for heavy-duty paint removal. The wire gauge also matters; thicker wires are more aggressive, while thinner wires provide a finer finish.
2. **Diameter and Arbor Size**: The diameter of the cup brush should match the size of the area you need to clean. Larger diameters cover more surface area quickly, while smaller ones offer more precision. Ensure the arbor size is compatible with your power tool, typically an angle grinder.
3. **RPM Rating**: Ensure the cup brush's maximum RPM rating is compatible with your power tool to prevent accidents and ensure efficient operation.
4. **Brand and Quality**: Opt for reputable brands known for durability and performance, such as DEWALT, Makita, or Weiler. High-quality brushes last longer and provide consistent results.
5. **Safety Features**: Look for brushes with safety features like knotted wires that reduce the risk of wire breakage and fly-off.
By considering these factors, you can select a cup brush that efficiently removes paint from metal surfaces while ensuring safety and durability.
How do I choose the right cup brush for my power tool?
To choose the right cup brush for your power tool, consider the following factors:
1. **Material Compatibility**: Match the brush material to the workpiece. Steel wire brushes are suitable for heavy-duty cleaning on steel surfaces, while stainless steel brushes are ideal for non-ferrous metals and stainless steel to prevent contamination. Brass brushes are softer and suitable for delicate surfaces.
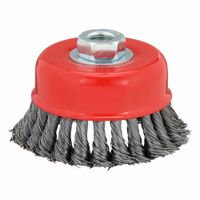
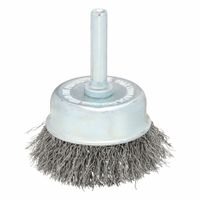
2. **Wire Type**: Decide between crimped or knotted wire. Crimped wire brushes are less aggressive and suitable for light to medium-duty applications, such as removing rust or paint. Knotted wire brushes are more aggressive and ideal for heavy-duty tasks like weld cleaning or scale removal.
3. **Wire Gauge**: Choose the wire thickness based on the task. Thicker wires are more durable and aggressive, suitable for heavy-duty cleaning, while thinner wires are better for finer, more detailed work.
4. **Brush Diameter**: Select a brush size that fits your power tool and the area you need to cover. Larger brushes cover more area quickly, while smaller brushes offer more precision.
5. **Arbor Size**: Ensure the brush’s arbor hole matches your power tool’s spindle size for proper fit and safety.
6. **RPM Rating**: Check the brush’s maximum RPM rating and ensure it matches or exceeds your power tool’s speed to prevent damage or accidents.
7. **Application**: Consider the specific task. For example, a cup brush with a protective guard may be necessary for safety when working in confined spaces.
8. **Brand and Quality**: Opt for reputable brands known for durability and performance to ensure safety and efficiency.
By evaluating these factors, you can select the appropriate cup brush that meets your specific needs and ensures optimal performance and safety.
Are cup brushes compatible with die grinders?
Yes, cup brushes can be compatible with die grinders, but there are important considerations to ensure safe and effective use. Cup brushes are typically used for surface preparation, rust removal, and deburring, and they come in various sizes and materials, such as steel or brass. Die grinders, on the other hand, are versatile rotary tools that can accommodate various attachments, including cup brushes.
To ensure compatibility, the following factors should be considered:
1. **Shank Size**: Die grinders usually have a collet that holds attachments, and the shank size of the cup brush must match the collet size of the die grinder. Common shank sizes are 1/4 inch or 1/8 inch.
2. **Speed Rating**: Cup brushes have a maximum RPM rating, which should not be exceeded to prevent damage or accidents. Die grinders can operate at high speeds, so it is crucial to ensure that the grinder's speed does not exceed the brush's maximum RPM.
3. **Power and Torque**: Die grinders are generally less powerful than angle grinders, which are more commonly used with cup brushes. Ensure that the die grinder has sufficient power and torque to handle the cup brush without stalling.
4. **Size and Weight**: The size and weight of the cup brush should be appropriate for the die grinder. A large or heavy brush may be difficult to control and could strain the tool.
5. **Safety**: Always wear appropriate personal protective equipment, such as safety glasses and gloves, when using cup brushes with die grinders. Ensure that the brush is securely attached and that the workpiece is stable.
In summary, while cup brushes can be used with die grinders, it is essential to ensure compatibility in terms of shank size, speed rating, power, and safety to achieve optimal results.
How do I maintain and store cup brushes after use?
To maintain and store cup brushes after use, follow these steps:
1. **Cleaning**: Immediately after use, remove any debris or residue from the cup brush. Use a wire brush or a stiff bristle brush to dislodge particles. For stubborn materials, consider using a solvent or detergent solution to soak the brush briefly, then rinse thoroughly with water.
2. **Drying**: Ensure the brush is completely dry before storage to prevent rust and corrosion. Shake off excess water and allow the brush to air dry in a well-ventilated area. Avoid using heat sources for drying, as they can damage the bristles.
3. **Inspection**: Regularly inspect the brush for wear and tear. Check for bent, broken, or excessively worn bristles. Replace the brush if it shows significant damage or reduced effectiveness to ensure safety and performance.
4. **Lubrication**: If the brush has a metal core, apply a light coat of machine oil to prevent rust. Avoid getting oil on the bristles, as it can affect the brush's performance.
5. **Storage**: Store the cup brush in a dry, cool place away from direct sunlight and moisture. Use a pegboard, tool rack, or dedicated storage box to keep the brush organized and prevent bristle deformation. Ensure the brush is not in contact with other tools that could damage the bristles.
6. **Labeling**: If you use different brushes for various materials, label them accordingly to avoid cross-contamination and ensure the right brush is used for the right task.
By following these steps, you can extend the life of your cup brushes and maintain their effectiveness for future use.

