Sandpaper Grit
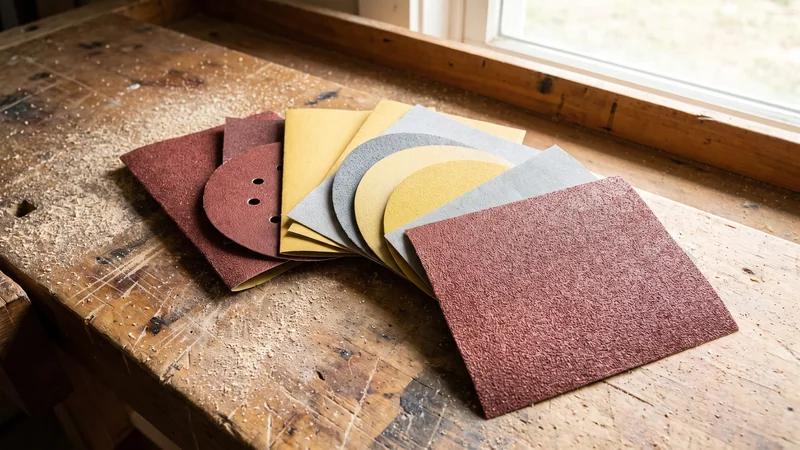
Sandpaper Grit Guide: How to Choose the Right Grit for Any Job
Picking the wrong sandpaper grit ruins more projects than any other sanding mistake. Too coarse leaves deep scratches you can't hide. Too fine wastes hours removing almost nothing.
This sandpaper grit guide explains what the numbers mean, which grit fits which job, and the sequence rules professionals follow. Ten minutes here saves hours at the bench.
What Do Sandpaper Grit Numbers Mean?
The grit number rates the size of the abrasive particles bonded to the paper. The rule is simple to remember.
Lower numbers are coarser. Big particles bite deep and remove material fast — and leave visible scratches.
Higher numbers are finer. Small particles remove less but leave a smoother surface. That's why every sanding job moves from low numbers to high.
CAMI vs FEPA: why some grits have a "P"
Two grading standards share the market:
- CAMI — the American system; plain numbers like 80 or 220.
- FEPA — the European system; a "P" before the number, like P80 or P220.
The two scales line up closely in the middle ranges. At the extremes they drift apart — CAMI runs coarser than P grades at the coarse end and finer at the fine end. When a spec sheet matters, match the exact standard rather than the bare number.
Sandpaper Grit Chart: Coarse to Ultra Fine
Use this sandpaper grit chart to translate the numbers into real jobs:
| Grade | CAMI grit | FEPA grit | Best for |
|---|---|---|---|
| Coarse | 40–60 | P40–P50 | Fast material removal; stripping old paint or varnish |
| Medium | 80 | P60–P80 | Shaping bare wood; first pass on rough boards |
| Fine | 100–120 | P100–P120 | Preparing wood for finishing; removing water stains |
| Very fine | 150–220 | P150–P220 | Final pass on bare wood before stain or paint |
| Extra–super fine | 320–600 | P400–P1200 | Light scuffing between finish coats |
| Ultra fine | 800–1000 | P1500–P2500 | Polishing thick finishes; wet sanding |
Keep this page bookmarked. The chart answers most day-to-day grit questions at a glance.

Which Sandpaper Grit for Which Job?
Match the starting sandpaper grit to the surface in front of you.
Bare wood
Pick the starting sandpaper grit by how the boards feel:
- Rough or saw-marked boards: start at 80.
- Already smooth boards: start at 120.
- Final pass before stain or paint: 180–220.
Sand with the grain, never across it. Cross-grain scratches only show up after the stain goes on.
Stripping paint or varnish
Coarse sandpaper grit does the heavy lifting here:
- Cut through the coating at 40–60.
- Step up through 80 and 120 once you reach bare material.
- Finish with the normal bare-surface sequence.
The coarse particles bite through the coating instead of sliding over it. Expect to change sheets often — old finish clogs paper fast.
Metal and rust
Metal rewards a steady sandpaper grit progression:
- Rust and mill scale: 80–120.
- Satin finish: 220 and beyond.
- Polishing: wet sanding at 400 and above.
Water carries away the dust during wet sanding and stops the paper clogging. It also leaves a finer, more even scratch pattern.
Between coats of finish
Scuff gently with 320–400 sandpaper grit. You're not removing the coat — just knocking down dust bumps so the next layer bonds.
Drywall joints
Sand filler with 120–150 grit, then feather the edges with 220. Coarser paper tears the paper face.
Sandpaper Materials: What the Abrasive Is Made Of
Sandpaper grit size is half the choice. The abrasive material is the other half:
| Material | Character | Use it on |
|---|---|---|
| Aluminum oxide | Tough all-rounder, long life | Wood, metal, general work |
| Silicon carbide | Harder, sharper, friable | Wet sanding, metal, plastics, finishes |
| Ceramic | Very aggressive, self-sharpening | Fast stock removal on belts and discs |
| Garnet | Natural, gentle, wears fast | Fine hand-finishing on wood |
| Zirconia alumina | Durable under heat and pressure | Grinding metal, rough wood shaping |
Two practical picks cover most workshops:
- Aluminum oxide for nearly everything dry.
- Silicon carbide for anything wet or glossy.
Browse both across EYBY's sanding abrasives range. Stock two or three grits of each and most jobs are covered.
Sheets, Discs or Belts: Matching Grit to the Tool
The same sandpaper grit behaves differently depending on what drives it:
- Hand sanding — most control; best for final passes, edges, and profiles a machine can't follow.
- Random orbital sanders — take discs and suit most flat work.
- The machine works faster, so one grit step finer than hand sanding gives a similar scratch pattern.
- Belt sanders — aggressive removal; save them for coarse and medium grits.
- Fine paper on a belt sander burns wood quickly.
Buffing wheels and compounds take over where sandpaper stops. For mirror finishes, move from ultra-fine grits into buffing and polishing supplies.
The Grit Sequence Rules Professionals Follow
Good sanding is a sequence, not a single sheet. Four rules keep it efficient:
- Never skip more than one grade — jumping from 80 to 220 leaves 80-grit scratches the fine paper can't erase.
- A typical wood sequence: 80 → 120 → 180 → 220.
- Let the paper cut — pressing harder clogs grit and burns surfaces; add a fresh sheet instead.
- Clean between grits — dust from the last grade scratches the next pass.
- Stop when the job says stop — wood before paint rarely needs more than 220; finishes reward going finer.

The sequence matters more than the brand. Cheap paper used in the right order beats premium paper used wrong.
Safety note: fine sanding dust is a respiratory hazard whatever the material. Use extraction or a mask, especially with power sanders.
FAQ: Sandpaper Grit Questions Answered
What does the grit number on sandpaper mean?
It rates the size of the abrasive particles. Lower numbers mean coarser particles that cut fast; higher numbers mean finer particles that leave a smoother finish.
What grit sandpaper should I use on bare wood before painting?
Start at 80–120 grit depending on roughness, then work up to 180–220. Finishing coarser than 180 shows scratches through paint; going far beyond 220 can burnish wood so finish struggles to grip.
Can I skip grit levels when sanding?
Skip no more than one grade at a time. Each sandpaper grit exists to erase the scratches of the one before it — a big jump leaves deep scratches behind.
What is the difference between CAMI and P (FEPA) grits?
Both rate particle size, but on different scales. CAMI numbers stand alone (220); FEPA numbers carry a "P" (P220). They roughly match in mid ranges and drift apart at the extremes, so match the standard on critical work.
Conclusion
Choosing sandpaper grit comes down to a few dependable moves:
- Read the number.
- Low = coarse and fast; high = fine and smooth.
- Match the starting grit to the surface.
- Rough wood 80, smooth wood 120, stripping 40–60, between coats 320+.
- Respect the sequence.
- Step through the grades; never skip more than one.
- Pick the right abrasive material.
- Aluminum oxide dry, silicon carbide wet.
Master the sandpaper grit chart once, and every sanding job — wood, metal or finish — becomes a predictable sequence instead of guesswork. Explore the full abrasives range to stock the grades your work calls for.
Related Posts
Silicone Sealant Guide: Types, Cure Times, and Uses