Call +(254) 703 030 000 / 751 483 999 / 721 704 777
- Home
- Tools
- Power Tools
- Power Planers Jointers Joiners
.....Read More
Frequently Asked Questions
What is the difference between a planer and a jointer?
A planer and a jointer are both woodworking tools used to create flat surfaces on wood, but they serve different purposes and operate differently.
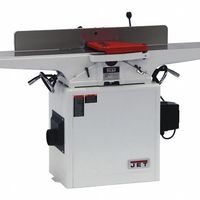
A jointer is primarily used to flatten one face of a board and square up one edge. It consists of a flat, adjustable infeed and outfeed table with a set of rotating blades in between. The wood is passed over the blades, which shave off material to create a flat surface. The jointer is essential for preparing one face and one edge of a board, ensuring they are flat and at a right angle to each other. This is crucial for creating a reference surface before further processing.
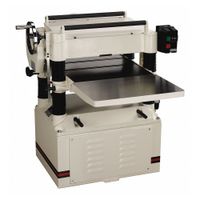
A planer, also known as a thickness planer, is used to make the opposite face of a board parallel to the one flattened by the jointer and to achieve a specific thickness. It has a set of rotating blades above a flat table. The board is fed through the planer, and the blades remove material from the top surface, ensuring it is parallel to the bottom face. The planer is essential for achieving uniform thickness across the entire board.
In summary, the jointer is used first to flatten one face and square one edge, while the planer is used afterward to make the opposite face parallel and achieve the desired thickness. Both tools are complementary in the woodworking process, ensuring boards are flat, square, and of consistent thickness.
How do I choose the right planer for my woodworking needs?
To choose the right planer for your woodworking needs, consider the following factors:
1. **Type of Planer**: Decide between a benchtop planer, which is portable and suitable for small to medium projects, or a stationary planer, which is larger and ideal for heavy-duty tasks.
2. **Width Capacity**: Determine the maximum width of wood you will be planing. Choose a planer with a width capacity that accommodates your typical project sizes.
3. **Depth Capacity**: Consider the maximum depth of cut the planer can handle. A deeper cut capacity allows for more material removal in a single pass, increasing efficiency.
4. **Motor Power**: Look for a planer with sufficient motor power (measured in amps or horsepower) to handle the type of wood you work with. Hardwoods require more power than softwoods.
5. **Cutterhead Type**: Choose between straight knife cutterheads, which are more affordable, or helical/spiral cutterheads, which offer smoother finishes and quieter operation.
6. **Feed Rate**: Check the feed rate, which indicates how fast the wood moves through the planer. Adjustable feed rates provide more control over the finish quality.
7. **Dust Collection**: Ensure the planer has an effective dust collection system or port to maintain a clean workspace and prolong the machine's life.
8. **Build Quality**: Opt for a planer with a sturdy construction, preferably with a cast iron or steel base, to reduce vibrations and enhance durability.
9. **Budget**: Balance your needs with your budget. Higher-end models offer more features and better performance but come at a higher cost.
10. **Brand and Reviews**: Research reputable brands and read user reviews to gauge reliability and performance.
By evaluating these factors, you can select a planer that aligns with your woodworking requirements and enhances your project outcomes.
What safety precautions should I take when using a jointer?
1. **Read the Manual**: Familiarize yourself with the jointer's manual to understand its specific features and safety guidelines.
2. **Wear Safety Gear**: Use safety glasses or goggles to protect your eyes from flying debris. Wear hearing protection to guard against noise. Avoid loose clothing, jewelry, and tie back long hair.
3. **Inspect the Jointer**: Before use, check the jointer for any damage or loose parts. Ensure the blades are sharp and properly aligned.
4. **Proper Setup**: Adjust the infeed and outfeed tables to the correct height. Ensure the fence is square and secure.
5. **Use Push Blocks**: Always use push blocks or push sticks to keep your hands away from the blades, especially when jointing narrow or thin stock.
6. **Maintain a Safe Stance**: Stand to the side of the jointer, not directly behind the stock, to avoid kickback.
7. **Check the Stock**: Inspect the wood for nails, knots, or other foreign objects that could damage the blades or cause kickback.
8. **Feed the Stock Correctly**: Feed the wood against the rotation of the blades with steady, even pressure. Do not force the wood through the jointer.
9. **Avoid Distractions**: Stay focused and avoid distractions while operating the jointer. Never leave the machine running unattended.
10. **Turn Off and Unplug**: After use, turn off the jointer and unplug it before making any adjustments or cleaning.
11. **Regular Maintenance**: Keep the jointer clean and well-maintained. Regularly check and replace blades as needed.
12. **Emergency Procedures**: Be aware of the location of emergency stops and know how to quickly shut down the machine if necessary.
Can a planer be used to flatten a board?
Yes, a planer can be used to flatten a board, but with some limitations. A planer is designed to make the top surface of a board parallel to the bottom surface. If the board is already relatively flat and just needs thickness adjustment, a planer is ideal. However, if the board is warped, twisted, or cupped, a planer alone may not effectively flatten it.
To flatten a board with a planer, you typically need to start by creating a flat reference surface. This can be done using a jointer or a sled. A jointer can flatten one face of the board, which can then be run through the planer to make the opposite face parallel. If a jointer is not available, a planer sled can be used. The sled supports the board and compensates for any warping or twisting, allowing the planer to remove material from the high spots until the board is flat.
In summary, while a planer can be used to flatten a board, it often requires additional tools or techniques to address significant warping or twisting.
How do I maintain and sharpen planer and jointer blades?
To maintain and sharpen planer and jointer blades, follow these steps:
1. **Safety First**: Disconnect the power supply to the machine to prevent accidental starts. Wear safety gloves and goggles.
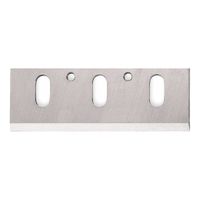
2. **Remove the Blades**: Consult the machine's manual for specific instructions. Typically, you'll need to loosen the gib screws or clamps holding the blades in place. Carefully remove the blades, noting their orientation.
3. **Clean the Blades**: Use a soft brush or cloth to remove any resin or debris. For stubborn buildup, use a solvent like mineral spirits.
4. **Inspect the Blades**: Check for nicks, chips, or excessive wear. If the damage is severe, consider replacing the blades.
5. **Sharpening**:
- **Manual Sharpening**: Use a honing guide to maintain the correct angle. Start with a coarse diamond stone or wet stone, progressing to finer grits. Maintain consistent pressure and angle.
- **Machine Sharpening**: Use a dedicated blade sharpening machine if available. Follow the manufacturer's instructions for angle and pressure settings.
6. **Honing**: After sharpening, use a honing stone or fine-grit sandpaper to polish the edge. This step removes burrs and refines the sharpness.
7. **Reinstall the Blades**: Carefully place the blades back into the machine, ensuring they are aligned and seated properly. Tighten the gib screws or clamps securely.
8. **Alignment and Calibration**: Check the blade alignment with a straight edge or dial indicator. Adjust as necessary to ensure even cutting.
9. **Regular Maintenance**: Clean the blades after each use and inspect them regularly. Sharpen as needed, typically after 20-30 hours of use, depending on the material being cut.
10. **Storage**: Store blades in a dry, safe place to prevent rust and damage.
By following these steps, you can maintain sharp, efficient planer and jointer blades, ensuring optimal performance and longevity.
What is a biscuit joiner and how is it used?
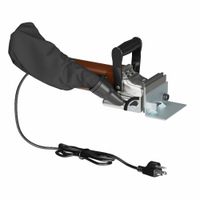
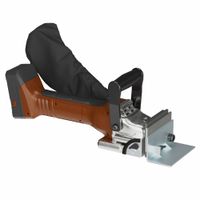
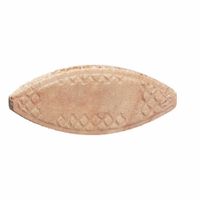
A biscuit joiner, also known as a plate joiner, is a woodworking tool used to join two pieces of wood together. It operates by cutting a crescent-shaped hole (or slot) in the opposite edges of two pieces of wood. A thin, oval-shaped piece of compressed wood, known as a biscuit, is then inserted into these slots. When glue is applied, the biscuit swells, creating a tight and strong joint.
To use a biscuit joiner, follow these steps:
1. **Mark the Wood**: Align the pieces of wood you want to join and mark where the biscuits will be placed. Typically, biscuits are spaced 6 to 12 inches apart.
2. **Set the Depth**: Adjust the biscuit joiner to the correct depth setting based on the size of the biscuit you are using (common sizes are #0, #10, and #20).
3. **Cut the Slots**: Position the joiner on the marked lines and turn it on. Push the tool forward to cut the slot. Repeat this for all marked locations on both pieces of wood.
4. **Insert the Biscuits**: Apply wood glue to the slots and the biscuits. Insert the biscuits into the slots on one piece of wood.
5. **Join the Pieces**: Align the slots of the second piece of wood with the exposed biscuits and press the pieces together. Clamp the joint to ensure a tight fit and allow the glue to dry.
Biscuit joiners are favored for their ability to create strong, precise joints quickly and are commonly used in cabinetry, furniture making, and other woodworking projects.
How do I set up and adjust a jointer for accurate cuts?
1. **Safety First**: Ensure the jointer is unplugged before making any adjustments.
2. **Inspect the Knives**: Check that the knives are sharp and properly installed. They should be parallel to the cutter head and extend equally from it.
3. **Set the Infeed Table**: Lower the infeed table to the desired depth of cut, typically between 1/16 to 1/8 inch. Use the depth adjustment lever or wheel.
4. **Align the Outfeed Table**: The outfeed table should be level with the highest point of the knife arc. Use a straightedge across both tables and adjust the outfeed table height until it is perfectly aligned with the knife edges.
5. **Check Fence Alignment**: Ensure the fence is square to the tables. Use a combination square to check for 90 degrees. Adjust the fence angle if necessary.
6. **Test the Setup**: Run a test piece of wood through the jointer. Check for evenness and squareness of the cut. If the cut is not square, adjust the fence. If the cut is uneven, recheck the table alignment.
7. **Fine-Tune the Knives**: If the cut is still not accurate, adjust the knife height. Use a knife-setting jig or a dial indicator to ensure the knives are set to the correct height relative to the outfeed table.
8. **Secure All Adjustments**: Once satisfied with the setup, tighten all adjustment knobs and screws to prevent any movement during operation.
9. **Regular Maintenance**: Periodically check and maintain the jointer’s settings, knife sharpness, and cleanliness to ensure consistent performance.
10. **Safety Check**: Before operation, ensure all guards are in place and the work area is clear of obstructions.
