Call +(254) 703 030 000 / 751 483 999 / 721 704 777
.....Read More
Frequently Asked Questions
What is the best mud mixer for concrete?
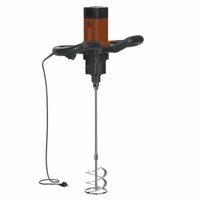
The best mud mixer for concrete is the Collomix Xo 55 Heavy Duty Dual Paddle Mixer. This mixer is renowned for its robust construction and powerful performance, making it ideal for heavy-duty mixing tasks. It features a dual paddle design that ensures thorough and consistent mixing of concrete, reducing the time and effort required compared to single paddle mixers. The Xo 55 is equipped with a high-torque motor that can handle large volumes of material, making it suitable for both professional and DIY projects.
The ergonomic design of the Collomix Xo 55 includes a comfortable grip and adjustable speed settings, allowing users to control the mixing process precisely. Its durable construction ensures longevity, even under frequent use in demanding conditions. Additionally, the mixer is designed for easy maintenance, with detachable paddles that can be cleaned or replaced as needed.
Another advantage of the Collomix Xo 55 is its versatility. While it excels at mixing concrete, it can also be used for other materials such as mortar, plaster, and grout, making it a valuable tool for various construction and renovation projects. The mixer’s stability and balance reduce user fatigue, and its efficient design minimizes splashing and mess.
Overall, the Collomix Xo 55 Heavy Duty Dual Paddle Mixer stands out for its combination of power, durability, and user-friendly features, making it the best choice for those seeking a reliable and efficient mud mixer for concrete.
How do you choose the right paddle for a mud mixer?
To choose the right paddle for a mud mixer, consider the following factors:
1. **Material Compatibility**: Ensure the paddle is suitable for the material you are mixing, such as drywall mud, cement, or paint. Different materials require different paddle designs for optimal mixing.
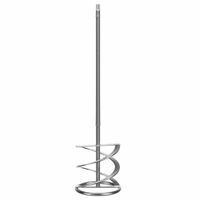
2. **Paddle Design**: Select a paddle design that matches the viscosity of the material. Helical or spiral paddles are ideal for thick materials like cement, while flat or cage paddles work well for thinner substances like paint.
3. **Size and Diameter**: Choose a paddle size that fits your mixing container and the volume of material. Larger paddles are suitable for bigger batches, while smaller paddles are better for smaller quantities.
4. **Shaft Length**: Ensure the shaft length is appropriate for the depth of your mixing container to avoid splashing and ensure thorough mixing.
5. **Material and Durability**: Opt for paddles made from durable materials like stainless steel or coated metals to withstand the abrasive nature of mixing and ensure longevity.
6. **Mixer Compatibility**: Verify that the paddle is compatible with your mixer’s chuck size and power capacity. A mismatch can lead to inefficient mixing or damage to the mixer.
7. **Ease of Cleaning**: Consider paddles with smooth surfaces or non-stick coatings for easier cleaning, especially if you frequently switch between different materials.
8. **Cost and Brand**: While cost is a factor, prioritize quality and brand reputation to ensure reliability and performance.
By evaluating these factors, you can select a paddle that enhances efficiency, ensures proper mixing, and extends the lifespan of both the paddle and the mixer.
Can a regular drill be used as a mud mixer?
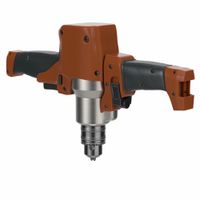
Yes, a regular drill can be used as a mud mixer, but there are several considerations to keep in mind. First, ensure that the drill has sufficient power and torque to handle the viscosity of the mud or compound you are mixing. Corded drills are generally more powerful than cordless ones and are better suited for this task.
Second, you will need a mixing paddle attachment that fits the drill's chuck. These paddles are specifically designed for mixing and can be purchased at most hardware stores. Make sure the attachment is securely fastened to prevent it from coming loose during operation.
Third, consider the drill's speed settings. Mixing mud requires a slower speed to prevent splattering and to ensure a thorough mix. Many drills have variable speed settings, which can be adjusted to suit the task.
Fourth, be aware of the drill's duty cycle. Regular drills are not designed for continuous heavy-duty use, so allow the drill to rest periodically to prevent overheating.
Finally, ensure safety by wearing appropriate protective gear, such as goggles and gloves, and work in a well-ventilated area to avoid inhaling dust or fumes.
While a regular drill can be used for mixing mud, for frequent or large-scale mixing tasks, a dedicated mud mixer or a heavy-duty drill designed for mixing is recommended for better performance and durability.
What is the difference between corded and cordless mud mixers?
Corded mud mixers are powered by electricity through a direct connection to a power outlet. They provide consistent power output, making them suitable for heavy-duty mixing tasks and prolonged use without the need for recharging. Corded mixers are generally more powerful, offering higher torque and speed, which is beneficial for mixing thick or dense materials like concrete or mortar. However, their mobility is limited by the length of the power cord, and they require access to an electrical outlet, which can be a constraint on job sites without easy access to power.
Cordless mud mixers, on the other hand, are battery-operated, offering greater mobility and convenience as they are not tethered to a power source. This makes them ideal for use in remote locations or areas without readily available electricity. They are typically lighter and easier to maneuver, which can reduce user fatigue. However, cordless mixers may have less power and torque compared to their corded counterparts, potentially making them less effective for very thick or heavy materials. The battery life is a critical factor, as it limits the duration of use before needing a recharge, and replacement batteries can be costly.
In summary, the choice between corded and cordless mud mixers depends on the specific needs of the user. Corded mixers are better for continuous, heavy-duty tasks with access to power, while cordless mixers offer flexibility and ease of use in locations where mobility is a priority.
How do you maintain a mud mixer?
To maintain a mud mixer, follow these steps:
1. **Regular Cleaning**: After each use, thoroughly clean the mixer to prevent mud buildup. Use a hose to wash off excess mud and a brush to scrub off any stubborn residue. Ensure all parts, including paddles and the drum, are free from debris.
2. **Lubrication**: Regularly lubricate moving parts such as bearings, shafts, and gears to ensure smooth operation. Use appropriate grease or oil as recommended by the manufacturer.
3. **Inspection**: Conduct routine inspections for wear and tear. Check for cracks, rust, or damage in the drum, paddles, and frame. Ensure all bolts and nuts are tight and secure.
4. **Motor Maintenance**: If the mixer is motorized, inspect the motor regularly. Check for overheating, unusual noises, or vibrations. Ensure electrical connections are secure and free from corrosion.
5. **Belt and Chain Check**: For mixers with belts or chains, inspect for wear and tension. Replace worn belts or chains and adjust tension as needed to prevent slippage.
6. **Storage**: Store the mixer in a dry, sheltered area to protect it from weather elements. Cover it with a tarp if stored outside to prevent rust and corrosion.
7. **Safety Checks**: Ensure all safety guards and covers are in place and functioning. Replace any missing or damaged safety components immediately.
8. **Manual Reference**: Always refer to the manufacturer's manual for specific maintenance guidelines and recommended service intervals.
9. **Professional Servicing**: Schedule regular professional servicing to address any complex issues and ensure the mixer operates efficiently.
By following these maintenance steps, you can extend the lifespan of your mud mixer and ensure it operates effectively.
What safety precautions should be taken when using a mud mixer?
1. **Personal Protective Equipment (PPE):** Wear safety goggles to protect your eyes from splashes, a dust mask to avoid inhaling dust, gloves to protect your hands, and steel-toed boots to prevent foot injuries.
2. **Proper Clothing:** Wear long sleeves and pants to protect your skin from splashes and debris.
3. **Work Area:** Ensure the work area is well-ventilated to avoid inhaling fumes or dust. Keep the area clean and free of obstacles to prevent tripping.
4. **Equipment Inspection:** Check the mud mixer for any damage or wear before use. Ensure all parts are securely attached and functioning properly.
5. **Electrical Safety:** If using an electric mixer, ensure the power cord is in good condition and keep it away from water to prevent electrical shock. Use a Ground Fault Circuit Interrupter (GFCI) outlet.
6. **Secure Mixing Container:** Use a stable and appropriate container for mixing to prevent tipping or spilling.
7. **Correct Mixing Technique:** Follow the manufacturer’s instructions for mixing. Start the mixer at a low speed to prevent splashing and gradually increase speed as needed.
8. **Avoid Overloading:** Do not exceed the mixer’s capacity to prevent motor strain or equipment failure.
9. **Safe Handling:** Use both hands to operate the mixer for better control and stability.
10. **Emergency Preparedness:** Have a first aid kit nearby and know the location of emergency exits and fire extinguishers.
11. **Training:** Ensure all operators are trained in the safe use of the mud mixer and understand the risks involved.
12. **Supervision:** Supervise inexperienced users and provide guidance as needed.
13. **Storage:** After use, clean the mixer thoroughly and store it in a dry, safe place to prevent damage and ensure longevity.
How do you clean a mud mixer after use?
1. **Safety First**: Unplug the mixer or remove the battery to ensure it is not accidentally turned on during cleaning.
2. **Initial Rinse**: Immediately after use, rinse the mixer with a hose or under running water to remove excess mud. This prevents the mud from hardening.
3. **Disassemble**: If possible, detach the mixing paddle from the drill or motor unit. This makes cleaning easier and more thorough.
4. **Soak**: Fill a bucket with warm, soapy water and soak the paddle. This helps loosen any remaining mud.
5. **Scrub**: Use a stiff brush or a wire brush to scrub the paddle, focusing on areas where mud tends to stick, such as joints and crevices.
6. **Rinse Again**: Rinse the paddle thoroughly with clean water to remove soap and loosened mud.
7. **Dry**: Wipe the paddle with a clean cloth or towel to prevent rust. Allow it to air dry completely before reassembling or storing.
8. **Clean the Motor Unit**: Wipe down the motor unit with a damp cloth. Avoid getting water into any electrical components.
9. **Inspect**: Check for any damage or wear on the paddle and motor unit. Address any issues before the next use.
10. **Lubricate**: If necessary, apply a light coat of oil to metal parts to prevent rust.
11. **Store Properly**: Store the mixer in a dry place to avoid moisture buildup and potential rusting.