Call +(254) 703 030 000 / 751 483 999 / 721 704 777
.....Read More


Frequently Asked Questions
What is the difference between an angle grinder and a cut-off tool?
An angle grinder and a cut-off tool are both handheld power tools used for cutting, grinding, and polishing, but they differ in design, functionality, and applications.
An angle grinder is a versatile tool equipped with a powerful motor and a right-angle gear head. It typically uses abrasive discs or blades that can be swapped out for different tasks. Angle grinders are available in various sizes, with disc diameters ranging from 4.5 inches to 9 inches or more. They are used for a wide range of applications, including grinding metal, cutting tile, polishing surfaces, and removing rust or paint. The larger size and power of angle grinders make them suitable for heavy-duty tasks and materials.
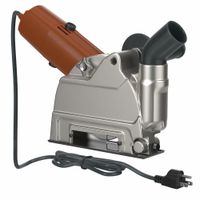
A cut-off tool, on the other hand, is more compact and specifically designed for cutting tasks. It usually features a smaller disc, often around 3 to 4 inches in diameter, and is primarily used for cutting metal, plastic, or other materials. Cut-off tools are generally lighter and easier to handle, making them ideal for precision cutting in tight spaces. They are often used in automotive work, plumbing, and other applications where precise cuts are necessary.
In summary, the main differences between an angle grinder and a cut-off tool are their size, power, and intended use. Angle grinders are larger, more powerful, and versatile, suitable for a variety of tasks beyond cutting. Cut-off tools are smaller, more precise, and specifically designed for cutting applications.
How do I choose the right grinding tool for my project?
To choose the right grinding tool for your project, consider the following factors:
1. **Material Type**: Identify the material you are working with (e.g., metal, wood, stone). Different materials require different abrasives. For instance, aluminum oxide is suitable for ferrous metals, while silicon carbide is better for non-ferrous metals and stone.
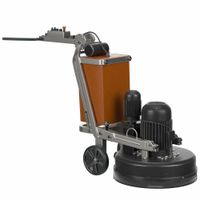
2. **Tool Type**: Determine the type of grinding tool you need. Common types include angle grinders, bench grinders, and die grinders. Each is suited for specific tasks; angle grinders are versatile for cutting and grinding, bench grinders are ideal for sharpening, and die grinders are perfect for precision work.
3. **Grit Size**: Choose the appropriate grit size based on the finish you desire. Coarse grits (16-24) are for rapid material removal, medium grits (36-60) for smoothing surfaces, and fine grits (80-120) for finishing touches.
4. **Bond Type**: Select the bond type that matches your project needs. Vitrified bonds are strong and heat-resistant, ideal for precision grinding, while resin bonds are more flexible and suited for high-speed operations.
5. **Wheel Shape**: Pick the wheel shape that fits your task. Straight wheels are common for surface grinding, while cup wheels are used for edge grinding.
6. **Speed and Power**: Ensure the tool’s speed and power match the requirements of your project. Higher speeds are suitable for harder materials, but ensure the tool can handle the load without overheating.
7. **Safety and Ergonomics**: Consider tools with safety features like guards and ergonomic designs to reduce fatigue and enhance control.
8. **Budget and Quality**: Balance cost with quality. Investing in a reputable brand may offer better performance and durability.
By evaluating these factors, you can select a grinding tool that meets the specific demands of your project efficiently and safely.
What safety precautions should I take when using grinding tools?
When using grinding tools, prioritize safety by adhering to the following precautions:
1. **Personal Protective Equipment (PPE):** Wear safety goggles or a face shield to protect against flying debris. Use hearing protection to guard against noise. Wear gloves to protect your hands, and ensure you have appropriate footwear and clothing to prevent injuries.
2. **Tool Inspection:** Before use, inspect the grinding tool for any damage or wear. Check the wheel for cracks or chips and ensure it is properly mounted and balanced. Verify that the tool's guards are in place and functioning.
3. **Work Area:** Keep the work area clean and free of clutter. Ensure adequate lighting and ventilation to prevent dust accumulation. Remove any flammable materials from the vicinity.
4. **Proper Handling:** Use the correct type and size of grinding wheel for the task. Follow the manufacturer's instructions for installation and operation. Ensure the tool is switched off before plugging it in or making adjustments.
5. **Secure Workpiece:** Firmly secure the workpiece to prevent movement during grinding. Use clamps or a vise if necessary.
6. **Correct Posture and Grip:** Maintain a stable stance and a firm grip on the tool. Keep your hands away from the grinding wheel and avoid overreaching.
7. **Operation:** Start the tool and let it reach full speed before applying it to the workpiece. Apply consistent pressure and avoid forcing the tool. Be aware of the tool's kickback and maintain control at all times.
8. **Maintenance:** Regularly maintain and clean the tool according to the manufacturer's guidelines. Replace worn or damaged parts promptly.
9. **Emergency Preparedness:** Be familiar with emergency procedures and have a first aid kit readily available. Know how to quickly shut off the tool in case of an emergency.
How do I maintain and clean my grinding tools?
To maintain and clean your grinding tools, follow these steps:
1. **Unplug and Disassemble**: Always unplug the tool before cleaning. Disassemble removable parts like guards and wheels.
2. **Inspect for Wear**: Check for wear and tear on the grinding wheel, brushes, and other components. Replace any worn-out parts.
3. **Clean the Exterior**: Use a damp cloth to wipe the exterior. Avoid using excessive water to prevent electrical damage.
4. **Remove Dust and Debris**: Use compressed air or a soft brush to remove dust and debris from vents, motor housing, and other crevices.
5. **Clean the Grinding Wheel**: Use a wheel dresser to clean and true the grinding wheel. This removes embedded particles and maintains its shape.
6. **Lubricate Moving Parts**: Apply a light machine oil to moving parts like bearings and spindles to ensure smooth operation.
7. **Check Electrical Components**: Inspect the power cord for damage. Ensure all connections are secure and replace any frayed wires.
8. **Reassemble and Test**: Reassemble the tool, ensuring all parts are securely in place. Plug it in and test to ensure it operates smoothly.
9. **Storage**: Store in a dry, dust-free environment. Use protective covers to prevent dust accumulation.
10. **Regular Maintenance Schedule**: Establish a regular maintenance schedule based on usage frequency. Regular checks can prevent major issues.
By following these steps, you can extend the life of your grinding tools and ensure they operate efficiently.
What are the best brands for grinding and cut-off tools?
Some of the best brands for grinding and cut-off tools include:
1. **DeWalt**: Known for durability and performance, DeWalt offers a wide range of grinding and cut-off tools suitable for both professional and DIY use.
2. **Makita**: Renowned for their innovative technology and high-quality construction, Makita tools are favored for their reliability and efficiency.
3. **Bosch**: Bosch provides a comprehensive selection of grinding and cut-off tools that are well-regarded for their precision and longevity.
4. **Milwaukee**: With a focus on heavy-duty performance, Milwaukee tools are designed for demanding applications and are popular among professionals.
5. **Metabo**: Specializing in industrial-grade tools, Metabo is known for its robust and powerful grinding and cut-off tools.
6. **Hitachi (now HiKOKI)**: Offers a range of high-performance tools that are appreciated for their ergonomic design and advanced features.
7. **3M**: While primarily known for abrasives, 3M also provides high-quality grinding and cut-off tools that are efficient and effective.
8. **Norton**: A leader in abrasive technology, Norton offers a variety of grinding and cut-off tools that deliver precision and durability.
9. **Ridgid**: Known for their rugged construction, Ridgid tools are designed to withstand tough conditions and provide reliable performance.
10. **Black & Decker**: Offers affordable and reliable tools suitable for home use and light professional work.
These brands are recognized for their commitment to quality, innovation, and customer satisfaction, making them top choices for grinding and cut-off tools.
Can grinding tools be used on all materials?
No, grinding tools cannot be used on all materials. Grinding tools are designed for specific applications and materials, and using them on inappropriate materials can lead to suboptimal results or damage.
1. **Metals**: Grinding tools are commonly used on metals like steel, aluminum, and cast iron. However, the type of abrasive material in the grinding tool must be suitable for the specific metal to avoid excessive wear or damage.
2. **Ceramics and Glass**: Special grinding tools with diamond abrasives are required for ceramics and glass due to their hardness and brittleness. Using inappropriate tools can cause cracking or shattering.
3. **Wood**: Grinding tools can be used on wood, but they must be designed for woodworking to prevent burning or gouging the material.
4. **Plastics**: Grinding plastics requires careful selection of tools to avoid melting or deforming the material due to heat generated during the process.
5. **Composites**: These materials often require specialized grinding tools to handle their unique properties without causing delamination or other damage.
6. **Stone and Concrete**: Diamond grinding tools are typically used for stone and concrete due to their hardness. Using non-diamond tools can lead to rapid wear and ineffective grinding.
In summary, the effectiveness and safety of grinding tools depend on matching the tool to the material. Using the wrong tool can result in poor performance, damage to the material, or even safety hazards. Always consult manufacturer guidelines and material specifications when selecting grinding tools for a specific application.
How do I change the wheel or attachment on my grinder?
1. **Safety First**: Ensure the grinder is unplugged from the power source to prevent accidental start-up. Wear safety gloves and goggles to protect against sharp edges and debris.
2. **Secure the Grinder**: Place the grinder on a stable surface. If possible, use a vise or clamp to hold it steady.
3. **Locate the Lock Button**: Most grinders have a spindle lock button. Press and hold this button to prevent the wheel from spinning.
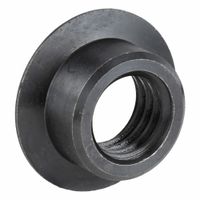
4. **Remove the Current Wheel**: Use a wrench or the tool provided with your grinder to loosen the nut or flange holding the wheel in place. Turn it counterclockwise to unscrew. If the wheel is stuck, gently tap the wrench with a mallet to loosen it.
5. **Remove the Wheel**: Once the nut is loose, remove it along with any washers. Carefully take off the old wheel or attachment.
6. **Inspect the New Wheel**: Check the new wheel or attachment for any damage or defects. Ensure it is the correct size and type for your grinder.
7. **Install the New Wheel**: Place the new wheel onto the spindle. Ensure it sits flat and is properly aligned. Replace any washers and the nut or flange.
8. **Tighten the Nut**: Hold the spindle lock button and use the wrench to tighten the nut clockwise. Ensure it is snug but avoid overtightening, which can damage the wheel.
9. **Check Alignment**: Spin the wheel by hand to ensure it is properly aligned and not wobbling.
10. **Test the Grinder**: Plug the grinder back in and turn it on briefly to ensure the wheel is securely attached and functioning correctly.
11. **Final Safety Check**: Before use, double-check that all components are secure and that you are wearing appropriate safety gear.