Call +(254) 703 030 000 / 751 483 999 / 721 704 777
- Home
- Tools
- Power Tools
- Electrician S Power Tools
.....Read More
Frequently Asked Questions
What are the essential power tools for electricians?
Essential power tools for electricians include:
1. **Cordless Drill**: A versatile tool for drilling holes and driving screws, essential for installing fixtures and panels.
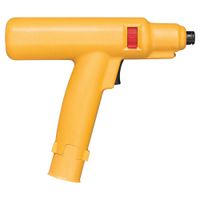
2. **Impact Driver**: Provides high torque for driving screws and bolts, especially useful for heavy-duty tasks.
3. **Reciprocating Saw**: Ideal for cutting through various materials like wood, metal, and plastic, often used in demolition or remodeling.
4. **Rotary Hammer Drill**: Used for drilling into concrete and masonry, crucial for installing anchors and fasteners.
5. **Oscillating Multi-Tool**: Offers precision cutting, sanding, and scraping, useful for tight spaces and detailed work.
6. **Angle Grinder**: Used for cutting, grinding, and polishing metal and other materials, essential for conduit work.
7. **Power Fish Tape**: Assists in pulling wires through conduits, especially in complex or long runs.
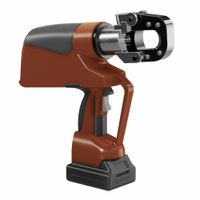
8. **Cable Cutter**: Electricians use powered cable cutters for cleanly cutting through thick cables and wires.
9. **Heat Gun**: Used for heat-shrinking tubing and stripping paint, essential for insulation and repair tasks.
10. **Power Tester**: A non-contact voltage tester or multimeter is crucial for safely checking electrical circuits and diagnosing issues.
11. **Laser Level**: Ensures precise alignment and installation of electrical components and fixtures.
12. **Cordless Screwdriver**: Offers convenience for assembling and disassembling electrical components quickly.
These tools enhance efficiency, safety, and precision in electrical work, making them indispensable for professional electricians.
How do cable pullers and fishing systems work?
Cable pullers and fishing systems are essential tools in the installation and maintenance of electrical wiring and telecommunications cables.
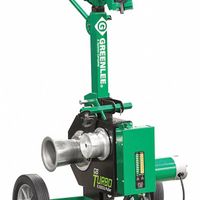
Cable pullers are mechanical devices used to pull cables through conduits, ducts, or other pathways. They typically consist of a winch or motorized system that provides the necessary force to move the cable over long distances or through complex routes. The cable is attached to a pulling rope or wire, which is then fed through the conduit. The puller applies tension to the rope, drawing the cable along the desired path. Some cable pullers are portable and manually operated, while others are larger, powered units designed for heavy-duty applications.
Fishing systems, on the other hand, are used to guide cables through existing conduits or walls where direct access is limited. These systems often include fish tapes, rods, or lines. Fish tapes are long, flexible strips of metal or fiberglass that can be pushed or pulled through a conduit. Once the tape reaches the other end, the cable is attached and pulled back through. Fish rods are similar but are typically more rigid, allowing for better control in tight or angled spaces. Fish lines are lightweight, often used in conjunction with a vacuum or blower to propel the line through the conduit.
Both systems are crucial for efficient cable installation, reducing the need for extensive construction or demolition. They help ensure that cables are installed quickly, safely, and with minimal disruption to existing structures.
What is the best method for cutting and stripping cables?
The best method for cutting and stripping cables involves using the right tools and techniques to ensure precision and safety. For cutting cables, use a high-quality cable cutter designed for the specific type and size of cable you are working with. This ensures a clean cut without damaging the internal wires. For larger cables, ratcheting cable cutters provide better leverage and control.
When stripping cables, use a dedicated wire stripper that matches the gauge of the wire. Adjustable wire strippers are versatile and can accommodate various wire sizes. Begin by measuring the length of insulation to be removed, typically around 1/2 to 3/4 inch, depending on the application. Place the wire in the appropriate notch of the stripper, squeeze the handles, and gently pull off the insulation. This method prevents nicking or damaging the conductor.
For coaxial cables, use a coaxial cable stripper, which is specifically designed to strip the outer jacket, shield, and dielectric without harming the core conductor. Adjust the stripper to the correct depth settings for the cable type.
In all cases, ensure the tools are sharp and well-maintained to avoid slippage and ensure clean cuts. Always follow safety protocols, such as wearing protective eyewear and gloves, especially when working with live wires or in industrial settings. Properly dispose of stripped insulation to maintain a clean and safe workspace.
By using the appropriate tools and techniques, you can achieve precise and efficient cable cutting and stripping, minimizing the risk of damage to the cables and ensuring optimal performance in electrical installations.
How do you properly crimp cables for secure connections?
To properly crimp cables for secure connections, follow these steps:
1. **Select the Right Tools and Materials**: Use a high-quality crimping tool suitable for the type of connector and cable you are working with. Ensure you have the correct size and type of connector for the cable.
2. **Prepare the Cable**: Strip the cable to expose the conductor. The length of the exposed conductor should match the connector's specifications. Avoid nicking or damaging the conductor during stripping.
3. **Insert the Cable into the Connector**: Slide the stripped end of the cable into the connector until the conductor is fully seated. Ensure that the insulation is also inside the connector to provide strain relief.
4. **Position the Connector in the Crimping Tool**: Place the connector into the appropriate slot of the crimping tool. Ensure it is aligned correctly to avoid uneven crimping.
5. **Crimp the Connector**: Squeeze the crimping tool handles firmly until the tool completes the crimp. Some tools have a ratcheting mechanism that ensures a complete crimp before releasing.
6. **Inspect the Crimp**: Check the crimped connection for security and integrity. The conductor should be tightly secured, and the insulation should be intact. There should be no visible gaps or loose wires.
7. **Test the Connection**: Use a continuity tester or multimeter to verify the electrical connection. Ensure there is no short circuit or open circuit.
8. **Apply Strain Relief**: If applicable, use heat shrink tubing or other strain relief methods to protect the connection from mechanical stress.
9. **Repeat as Necessary**: For multi-conductor cables, repeat the process for each conductor.
By following these steps, you ensure a secure and reliable crimped connection.
What are the steps to use a wire wrapping tool?
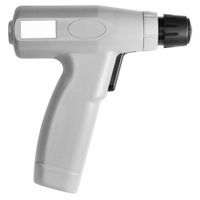
1. **Select the Wire and Tool**: Choose the appropriate wire gauge and corresponding wire wrapping tool. Ensure the tool is compatible with the wire size.
2. **Prepare the Wire**: Cut the wire to the desired length using wire cutters. Strip a small section of insulation from the end of the wire if necessary, exposing the bare wire.
3. **Insert the Wire**: Place the stripped end of the wire into the wire wrapping tool's slot or hole designed for holding the wire. Ensure it is securely positioned.
4. **Position the Tool**: Align the tool with the terminal post or pin you intend to wrap. The post should fit into the tool's central hole or guide.
5. **Wrap the Wire**: Hold the tool firmly and rotate it around the post. The tool will automatically wrap the wire tightly around the post, creating a secure connection. Ensure the wire wraps neatly without overlapping.
6. **Check the Connection**: Inspect the wrapped wire to ensure it is tight and secure. The wire should be evenly wrapped around the post with no loose ends.
7. **Trim Excess Wire**: If there is any excess wire, use wire cutters to trim it off, ensuring a clean finish.
8. **Test the Connection**: Optionally, test the electrical connection for continuity using a multimeter to ensure it is functioning correctly.
9. **Repeat as Necessary**: Repeat the process for additional connections, ensuring consistency and reliability in each wrap.
10. **Store the Tool**: After use, clean and store the wire wrapping tool properly to maintain its condition for future use.
How do punchdown tools function in telecom and data installations?
Punchdown tools are essential in telecom and data installations for terminating wires into insulation-displacement connectors (IDCs), such as those found in patch panels, keystone jacks, and punchdown blocks. These tools function by pushing a wire into a slot on the IDC, which cuts through the wire's insulation and establishes a secure electrical connection.
The tool typically consists of a handle, a blade, and a spring mechanism. The handle provides grip and leverage, while the blade is designed to fit specific types of connectors, such as 66, 110, or Krone blocks. The spring mechanism ensures consistent pressure is applied during the punchdown process.
To use a punchdown tool, the technician first strips the outer jacket of the cable to expose the individual wires. Each wire is then positioned over the appropriate slot on the IDC. The punchdown tool is placed over the wire and slot, and pressure is applied to the handle. The blade pushes the wire into the slot, cutting through the insulation and securing the wire in place. The excess wire is trimmed off by the blade's cutting edge, leaving a clean and precise termination.
Punchdown tools may have interchangeable blades to accommodate different types of connectors. Some models feature adjustable impact settings to control the force applied, reducing the risk of damaging delicate components. Additionally, ergonomic designs and cushioned grips enhance user comfort during repetitive tasks.
Overall, punchdown tools are crucial for ensuring reliable and efficient connections in telecom and data networks, facilitating the organization and management of complex wiring systems.
What safety precautions should be taken when using electrician's power tools?
When using electrician's power tools, several safety precautions are essential to prevent accidents and ensure a safe working environment:
1. **Personal Protective Equipment (PPE):** Always wear appropriate PPE, including safety glasses, gloves, and non-conductive footwear, to protect against electrical shocks and flying debris.
2. **Tool Inspection:** Before use, inspect tools for any damage, such as frayed cords, cracked casings, or loose parts. Ensure all safety guards are in place and functioning.
3. **Proper Training:** Only use tools you are trained and authorized to operate. Understand the tool's operation manual and safety features.
4. **Environment Check:** Ensure the work area is dry and well-lit. Avoid using power tools in wet or damp conditions to reduce the risk of electric shock.
5. **Electrical Safety:** Use tools with double insulation or ensure they are properly grounded. Avoid overloading circuits and use Ground Fault Circuit Interrupters (GFCIs) when working in potentially wet areas.
6. **Secure Work Area:** Keep the work area free of clutter and ensure all cords are positioned to prevent tripping hazards. Secure any loose clothing or hair that could get caught in moving parts.
7. **Correct Tool Usage:** Use the right tool for the job and do not force tools beyond their capacity. Ensure all attachments are correctly fitted and secure.
8. **Power Off:** Always disconnect tools from the power source before making adjustments, changing accessories, or performing maintenance.
9. **Emergency Preparedness:** Be aware of the location of emergency shut-off switches and first aid kits. Know the procedures for electrical emergencies.
10. **Regular Maintenance:** Perform regular maintenance on tools to ensure they remain in safe working condition. Replace any worn or damaged parts immediately.
By adhering to these precautions, the risk of injury or accidents can be significantly minimized when using electrician's power tools.


