.....Read More

Frequently Asked Questions

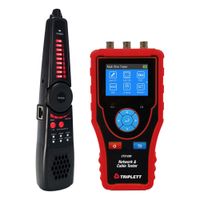
What are the best tools for testing copper and fiber optic cables?

The best tools for testing copper and fiber optic cables include: 1. **Cable Certifiers**: These are essential for certifying copper cables to industry standards like TIA/EIA and ISO/IEC. Popular models include the Fluke Networks DSX CableAnalyzer series, which provides comprehensive testing for Cat 5e, 6, 6A, and 8 cables. 2. **Cable Testers**: For basic continuity and wiring verification, tools like the Klein Tools VDV Scout Pro 3 or the Fluke Networks MicroScanner2 are effective. They test for open, short, and crossed wires in copper cables. 3. **Time Domain Reflectometers (TDRs)**: TDRs, such as the Megger TDR2000/3, are used for locating faults in copper cables by sending a signal down the cable and measuring reflections caused by impedance changes. 4. **Optical Time Domain Reflectometers (OTDRs)**: For fiber optics, OTDRs like the EXFO MaxTester series are crucial. They help in identifying faults, splices, and bends by analyzing the backscattered light from the fiber. 5. **Visual Fault Locators (VFLs)**: These are used for identifying breaks and bends in fiber optic cables. Tools like the Fluke Networks VisiFault emit a red laser light that helps in visually locating faults. 6. **Optical Power Meters and Light Sources**: These are used to measure the power loss in fiber optic cables. The Fluke Networks SimpliFiber Pro is a popular choice for testing insertion loss and verifying continuity. 7. **Network Cable Analyzers**: Tools like the NetAlly LinkRunner G2 provide comprehensive testing for both copper and fiber networks, including PoE testing, link speed, and network connectivity. 8. **Fusion Splicers**: For fiber optic cable repair and installation, fusion splicers like the Fujikura 70S+ are used to join fibers with minimal loss. These tools ensure accurate testing, troubleshooting, and certification of both copper and fiber optic cables, essential for maintaining network performance and reliability.

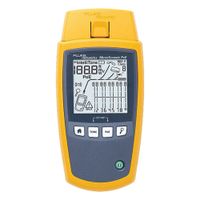
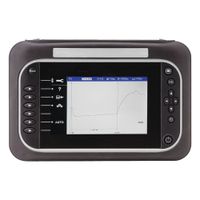
How do you use a time domain reflectometer (TDR) for cable testing?

To use a Time Domain Reflectometer (TDR) for cable testing, follow these steps: 1. **Preparation**: Ensure the TDR is calibrated and the correct settings are selected for the type of cable being tested. This includes setting the velocity of propagation (VoP) specific to the cable material. 2. **Connection**: Connect the TDR to one end of the cable using the appropriate connector. Ensure the other end of the cable is open or terminated, depending on the test requirements. 3. **Initiate Test**: Power on the TDR and initiate the test. The TDR sends a fast-rise-time pulse down the cable. 4. **Signal Reflection**: As the pulse travels down the cable, it reflects back to the TDR from any impedance discontinuities, such as faults, breaks, or connectors. 5. **Data Interpretation**: The TDR measures the time it takes for the reflections to return. This time is used to calculate the distance to the fault or discontinuity, based on the speed of the signal in the cable (VoP). 6. **Analyze Waveform**: Examine the TDR's display, which shows a waveform representing the cable's impedance profile. Peaks or dips in the waveform indicate changes in impedance, which correspond to faults or features in the cable. 7. **Identify Faults**: Use the waveform to identify and locate issues such as open circuits, short circuits, or impedance mismatches. The distance to each fault is typically displayed on the TDR. 8. **Documentation**: Record the findings, including the type and location of any faults, for maintenance or repair purposes. 9. **Verification**: After repairs, retest the cable to ensure all issues have been resolved. By following these steps, a TDR can effectively diagnose and locate faults in cables, aiding in maintenance and repair efforts.

What is the difference between copper and fiber optic cable testing?

Copper and fiber optic cable testing differ primarily in the medium, tools, and parameters assessed. Copper cable testing involves checking electrical signals transmitted through metal wires. Key tests include continuity, resistance, attenuation, crosstalk, and return loss. Tools like multimeters, time-domain reflectometers (TDR), and network cable testers are used. These tests ensure the cable can handle the required bandwidth and detect issues like shorts, opens, or miswiring. Fiber optic cable testing, on the other hand, focuses on light signal transmission through glass or plastic fibers. Key tests include insertion loss, return loss, and optical time-domain reflectometry (OTDR). Specialized tools like optical power meters, light sources, and OTDRs are used. These tests assess the cable's ability to transmit light efficiently and identify issues like splices, bends, or breaks. In summary, copper testing evaluates electrical properties, while fiber optic testing assesses optical properties, each requiring distinct tools and techniques.

How can I test the signal strength of a telephone line?

To test the signal strength of a telephone line, follow these steps: 1. **Visual Inspection**: Check the telephone line for any visible damage, such as frays or cuts, which could affect signal strength. 2. **Use a Multimeter**: - Set the multimeter to measure voltage (V). - Connect the multimeter probes to the telephone line wires. Typically, the red probe goes to the red wire and the black probe to the green wire. - A healthy telephone line should show a DC voltage between 48V and 52V when on-hook (not in use) and around 6V to 12V when off-hook (in use). 3. **Line Tester Device**: - Use a dedicated telephone line tester, which can be plugged into the phone jack. - The tester will indicate if the line is active and may provide additional information about the line quality. 4. **Check for Noise**: - Connect a telephone to the line and listen for any static, humming, or other noise, which can indicate interference or poor line quality. 5. **DSL Filter Check**: - If using DSL internet, ensure that DSL filters are correctly installed on all telephone jacks to prevent interference. 6. **Contact Service Provider**: - If issues persist, contact your telephone service provider. They can perform a line test remotely and send a technician if necessary. 7. **Use a Line Quality Test Tool**: - Some online tools and apps can test line quality if you have internet access through the line. 8. **Check Internal Wiring**: - Inspect internal wiring for any loose connections or corrosion, which can degrade signal quality. These steps will help determine the signal strength and quality of a telephone line.

What are the common faults identified by network testing instruments?

Network testing instruments are essential for diagnosing and troubleshooting issues within a network. Common faults identified by these tools include: 1. **Latency Issues**: High latency can cause delays in data transmission, affecting the performance of applications. Network testing tools measure round-trip time to identify latency problems. 2. **Packet Loss**: This occurs when data packets fail to reach their destination, leading to incomplete data transfer. Testing tools can detect packet loss rates and help pinpoint the source of the problem. 3. **Bandwidth Bottlenecks**: Insufficient bandwidth can lead to network congestion. Testing instruments measure throughput to identify bottlenecks and ensure optimal data flow. 4. **Jitter**: Variability in packet arrival times can disrupt real-time communications like VoIP. Network tools measure jitter to ensure consistent data delivery. 5. **Network Congestion**: Overloaded network segments can slow down data transmission. Testing tools help identify congestion points and suggest load balancing solutions. 6. **Signal Interference**: In wireless networks, interference from other devices can degrade performance. Testing instruments detect interference sources and suggest mitigation strategies. 7. **Configuration Errors**: Misconfigured devices or settings can lead to connectivity issues. Network testing tools can identify incorrect configurations and recommend corrections. 8. **Security Vulnerabilities**: Testing tools can detect unauthorized access points, rogue devices, and potential security breaches, helping to secure the network. 9. **Cable Faults**: Physical layer issues like broken or improperly connected cables can disrupt network connectivity. Testing instruments can identify and locate these faults. 10. **Protocol Errors**: Miscommunication between network devices due to protocol mismatches can cause disruptions. Testing tools help identify and resolve protocol-related issues. By identifying these common faults, network testing instruments play a crucial role in maintaining network performance and reliability.

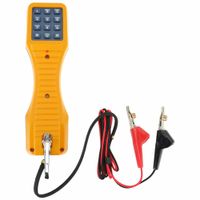
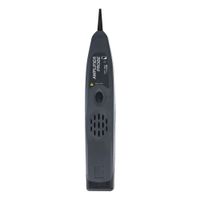
How do tone generators and speaker probes work for cable identification?

Tone generators and speaker probes are tools used for cable identification and tracing in network and telecommunication installations. A tone generator is connected to one end of a cable, and it sends a specific signal or tone through the wire. This device typically has two leads: one connects to the cable's conductor, and the other to the ground or shield. The tone generator can produce different types of signals, such as continuous or warbling tones, to help distinguish between multiple cables. The speaker probe, also known as an inductive amplifier or tone probe, is used to detect the signal emitted by the tone generator. The probe does not need to make direct contact with the wire; it can detect the tone through the cable insulation. When the probe is brought near the cable carrying the tone, it amplifies the signal, allowing the user to hear it through a built-in speaker or headphone jack. The loudness of the tone helps the user identify the correct cable among a bundle. Together, these tools are effective for identifying and tracing cables without needing to disconnect them from their network or power source. They are particularly useful in complex wiring environments, such as data centers or telephone closets, where numerous cables are bundled together. By following the tone along the cable's path, technicians can accurately identify and label cables, troubleshoot connectivity issues, and ensure proper cable management.

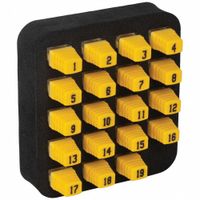
What accessories are essential for enhancing cable testing capabilities?

Essential accessories for enhancing cable testing capabilities include: 1. **Cable Testers**: Fundamental for identifying faults, verifying connections, and ensuring signal integrity. Advanced models can test for continuity, shorts, and wire mapping. 2. **Adapters and Connectors**: Necessary for interfacing with various cable types and ensuring compatibility with different testing equipment. 3. **Patch Panels**: Facilitate organized testing and management of multiple cables, allowing for easy access and reconfiguration. 4. **Cable Identifiers and Toners**: Help in tracing and identifying cables in complex installations, reducing the time spent on locating specific lines. 5. **Network Analyzers**: Provide detailed analysis of network performance, including bandwidth, latency, and packet loss, crucial for diagnosing network issues. 6. **Fiber Optic Testers**: Essential for testing fiber optic cables, measuring parameters like optical loss and verifying the integrity of fiber connections. 7. **TDR (Time Domain Reflectometer)**: Used for pinpointing faults in cables by measuring the time it takes for a signal to reflect back, indicating breaks or shorts. 8. **Cable Certifiers**: Validate that cables meet industry standards and specifications, crucial for ensuring compliance and performance. 9. **Crimping Tools and Strippers**: Necessary for preparing cables for testing by ensuring proper termination and connection. 10. **Labeling Tools**: Aid in organizing and identifying cables, reducing confusion and errors during testing and maintenance. 11. **Environmental Test Chambers**: Simulate various environmental conditions to test cable performance under different stress factors. 12. **Power Meters and Light Sources**: Used in fiber optic testing to measure the power of optical signals and ensure proper light transmission. 13. **Documentation Software**: Helps in recording test results, generating reports, and maintaining a history of cable performance and issues. These accessories collectively enhance the efficiency, accuracy, and scope of cable testing, ensuring reliable network performance and maintenance.

How do you determine if a cable is compatible with specific networking speeds?

To determine if a cable is compatible with specific networking speeds, consider the following factors: 1. **Cable Category**: Check the category rating of the cable, which indicates its performance capabilities. Common categories include Cat5, Cat5e, Cat6, Cat6a, Cat7, and Cat8. Each category supports different maximum speeds and frequencies: - Cat5: Up to 100 Mbps - Cat5e: Up to 1 Gbps - Cat6: Up to 1 Gbps (10 Gbps for short distances) - Cat6a: Up to 10 Gbps - Cat7: Up to 10 Gbps - Cat8: Up to 25-40 Gbps 2. **Cable Length**: The length of the cable can affect performance. Longer cables may experience signal degradation, reducing speed. For example, Cat6 cables can support 10 Gbps up to 55 meters, while Cat6a can maintain 10 Gbps up to 100 meters. 3. **Shielding**: Shielded cables (e.g., STP, FTP) are better at reducing electromagnetic interference, which can affect speed, especially in environments with high interference. 4. **Connector Type**: Ensure the connectors (e.g., RJ45) are compatible with the devices and support the desired speeds. High-speed cables often require high-quality connectors to maintain performance. 5. **Cable Quality**: The build quality, including the materials used (e.g., copper vs. copper-clad aluminum), can impact performance. High-quality cables are more likely to support higher speeds reliably. 6. **Standards Compliance**: Verify that the cable complies with relevant industry standards (e.g., TIA/EIA, ISO/IEC) for the desired speed. 7. **Testing and Certification**: Look for cables that have been tested and certified for specific speeds by reputable organizations. By considering these factors, you can determine if a cable is suitable for the networking speeds you require.

What are the steps to diagnose open, shorts, and continuity in copper cables?

1. **Visual Inspection**: Begin with a thorough visual inspection of the cable for any obvious signs of damage, such as cuts, abrasions, or kinks. Check connectors and terminations for corrosion or loose connections. 2. **Use a Multimeter**: - **Continuity Test**: Set the multimeter to the continuity setting. Connect the probes to each end of the cable. A continuous beep indicates a good connection, while no sound suggests a break. - **Resistance Measurement**: Measure the resistance of the cable. A high resistance reading may indicate a poor connection or a partial break. 3. **Cable Tester**: Use a dedicated cable tester to check for open circuits, shorts, and continuity. Connect the tester to both ends of the cable. The tester will indicate if there are any faults. 4. **Time Domain Reflectometer (TDR)**: For more precise diagnostics, use a TDR. It sends a signal down the cable and measures reflections caused by faults. This can pinpoint the location of opens or shorts. 5. **Insulation Resistance Test**: Use an insulation resistance tester to check for shorts. This test applies a high voltage to the cable and measures the resistance between conductors. Low resistance indicates a short. 6. **Loopback Test**: For network cables, perform a loopback test. Connect a loopback plug to one end and use a network tester to send signals through the cable. This checks for continuity and proper wiring. 7. **Check for Interference**: Use an oscilloscope or network analyzer to detect electromagnetic interference, which can cause intermittent shorts or opens. 8. **Documentation and Analysis**: Record all findings and compare them against standard values for the specific cable type. Analyze the data to determine the exact nature and location of the fault. 9. **Repair or Replace**: Based on the diagnosis, decide whether to repair the cable or replace it entirely.

How do fiber optic cable testing instruments ensure optic signals are at full strength?

Fiber optic cable testing instruments ensure optic signals are at full strength by performing several key functions: 1. **Optical Power Measurement**: Optical power meters measure the power level of the light signal being transmitted through the fiber. By comparing the measured power to the expected power levels, technicians can determine if the signal is at full strength or if there are losses. 2. **Optical Time-Domain Reflectometer (OTDR)**: OTDRs send a series of light pulses down the fiber and measure the light that is scattered or reflected back. This helps identify the location and extent of losses, breaks, or faults in the fiber, ensuring the signal remains strong throughout its path. 3. **Insertion Loss Testing**: This test measures the amount of signal loss as light travels through the fiber and its connectors. By ensuring that insertion loss is within acceptable limits, technicians can confirm that the signal strength is maintained. 4. **Return Loss Testing**: This measures the amount of light reflected back towards the source. High return loss indicates good signal strength, as less light is being reflected back, which can interfere with the transmitted signal. 5. **Visual Fault Locators (VFL)**: VFLs use visible light to identify breaks or bends in the fiber that could weaken the signal. By visually inspecting the fiber, technicians can ensure that the path is clear and the signal remains strong. 6. **End-Face Inspection**: Ensuring that the fiber end-faces are clean and free from defects is crucial. Contaminants or damage can cause significant signal loss, so inspection tools help maintain optimal signal strength. By employing these testing methods, fiber optic cable testing instruments help maintain the integrity and strength of optical signals, ensuring efficient and reliable data transmission.