Call +(254) 703 030 000 / 751 483 999 / 721 704 777
.....Read More
Frequently Asked Questions
How do I install a built-in locker lock on a locker door?
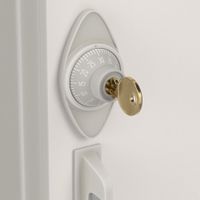
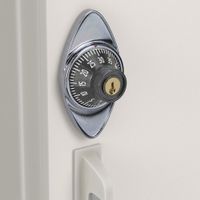
1. **Choose the Right Lock**: Select a built-in locker lock compatible with your locker door. Common types include combination locks and key locks.
2. **Gather Tools**: You may need a screwdriver, drill, measuring tape, and pencil.
3. **Prepare the Locker Door**: Ensure the locker door is clean and free of obstructions. If replacing an old lock, remove it first.
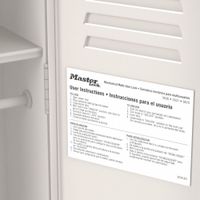
4. **Mark the Position**: Use the template provided with the lock to mark the position on the locker door. Ensure it aligns with the latch mechanism inside the locker.
5. **Drill Holes**: If necessary, drill holes at the marked positions. Use the correct drill bit size as specified in the lock’s instructions.
6. **Install the Lock**: Insert the lock into the pre-drilled hole. Ensure the lock’s face is flush with the locker door surface.
7. **Secure the Lock**: Use screws to secure the lock in place. Tighten them with a screwdriver, ensuring the lock is stable and doesn’t wobble.
8. **Attach the Latch**: Inside the locker, attach the latch mechanism to the lock. This may involve sliding or snapping it into place, depending on the lock design.
9. **Test the Lock**: Close the locker door and test the lock to ensure it functions correctly. For combination locks, set the combination as per the instructions. For key locks, ensure the key turns smoothly.
10. **Adjust if Necessary**: If the lock doesn’t operate smoothly, adjust the alignment or tighten the screws.
11. **Secure the Locker**: Once satisfied with the installation, ensure all components are securely fastened.
12. **Final Check**: Perform a final test to confirm the lock secures the locker door properly.
What are the benefits of using built-in locker locks in schools and gyms?
Built-in locker locks in schools and gyms offer several benefits that enhance security, convenience, and efficiency. Firstly, they provide a higher level of security compared to traditional padlocks. Built-in locks are often more robust and tamper-resistant, reducing the risk of theft or unauthorized access. This is crucial in environments where personal belongings are stored, such as schools and gyms.
Secondly, built-in locks eliminate the need for students or gym members to bring their own locks, which can be easily lost or forgotten. This convenience reduces the hassle for users and ensures that lockers are always secure. It also minimizes the administrative burden on staff who would otherwise need to manage lost keys or forgotten combinations.
Additionally, built-in locks streamline locker management. Schools and gyms can easily reassign lockers without the need to change locks or distribute new keys. Many built-in systems allow for easy reprogramming of combinations or access codes, facilitating quick turnover and efficient use of locker space.
Moreover, built-in locks often come with master key or override capabilities, allowing staff to access lockers in emergencies or for maintenance purposes without damaging the lock. This feature is particularly beneficial in ensuring safety and resolving issues promptly.
Finally, built-in locker locks contribute to a cleaner and more organized appearance. Without external padlocks, lockers maintain a uniform look, enhancing the overall aesthetic of the facility. This can positively impact the perception of the institution, reflecting a commitment to security and modernity.
In summary, built-in locker locks offer enhanced security, convenience, and efficiency, making them an ideal choice for schools and gyms looking to improve locker management and user experience.
How do I reset the combination on a built-in locker lock?
To reset the combination on a built-in locker lock, follow these general steps, but note that specific instructions may vary depending on the lock brand and model:
1. **Open the Locker**: Ensure the locker is open. You cannot reset the combination if the locker is locked.
2. **Locate the Reset Mechanism**: Most built-in locker locks have a reset lever or button inside the locker door. This is often found on the back of the lock or near the locking mechanism.
3. **Engage the Reset Mode**:
- If there is a reset lever, move it to the reset position. This might involve pushing it up or down.
- If there is a reset button, press and hold it. Some models require a tool, like a pen, to press the button.
4. **Set the New Combination**:
- Turn the dials to your desired combination while holding the reset lever or button in place.
- Ensure the numbers are aligned correctly and are easy to remember.
5. **Finalize the Reset**:
- Release the reset lever or button to lock in the new combination.
- If there was a lever, return it to its original position.
6. **Test the New Combination**:
- Close the locker and lock it using the new combination.
- Reopen the locker to ensure the new combination works correctly.
7. **Record the New Combination**: Write down the new combination and store it in a secure place to avoid being locked out in the future.
If these steps do not apply to your lock, consult the lock’s manual or contact the manufacturer for specific instructions.
What should I do if I forget the combination to my built-in locker lock?
If you forget the combination to your built-in locker lock, follow these steps:
1. **Check for Default Combinations**: Some locks have a default combination set by the manufacturer. Check the lock's manual or the manufacturer's website for this information.
2. **Contact the Manufacturer**: Reach out to the lock manufacturer for assistance. They may require proof of purchase or ownership and might provide the combination or a way to reset it.
3. **Consult the School or Facility**: If the locker is in a school or gym, contact the administration or facility management. They often have a master key or combination list.
4. **Try Common Combinations**: If you set the combination yourself, try common or previously used combinations you might have chosen.
5. **Use a Locksmith**: If other methods fail, hire a professional locksmith. They can open the lock without damaging it and may be able to reset the combination.
6. **Non-Destructive Entry**: If you have the skills, you can attempt to pick the lock or use a shim to open it. This should be a last resort and done carefully to avoid damage.
7. **Replace the Lock**: If the lock cannot be opened or reset, consider replacing it. Ensure the new lock is secure and that you keep a record of the new combination.
8. **Prevent Future Issues**: Once resolved, store the combination in a secure place, such as a password manager or a secure note, to prevent future lockouts.
How do control keys work with built-in locker locks?
Control keys for built-in locker locks are designed to provide a master access mechanism, allowing authorized personnel to open multiple locks without needing individual keys for each one. These keys work by interacting with a special component within the lock mechanism that is distinct from the user key.
In a typical built-in locker lock system, each lock has a unique user key that operates the lock by aligning the internal pins or tumblers to allow the lock to open. However, the control key is designed to bypass this standard pin alignment. It does so by engaging a separate set of pins or a control mechanism that overrides the user key's function.
When the control key is inserted into the lock, it aligns with a different set of pins or a control shear line, which is not accessible by the user key. This alignment allows the lock to turn and open, regardless of the position of the user key pins. The control key essentially shifts the internal components of the lock to a position that permits unlocking, providing a quick and efficient way to access multiple lockers.
This system is particularly useful in environments like schools, gyms, or workplaces, where maintenance staff or security personnel need to access lockers without having to carry a large number of keys. The control key system ensures that while individual users have secure access to their lockers, authorized personnel can manage and maintain the lockers efficiently.
Are built-in locker locks secure enough for valuable items?
Built-in locker locks, commonly found in gyms, schools, and workplaces, offer a basic level of security but may not be sufficient for safeguarding highly valuable items. These locks are typically designed for convenience and ease of use rather than high security. They often use simple mechanical or electronic mechanisms that can be vulnerable to picking, shimming, or brute force attacks.
Mechanical built-in locks, such as combination dials or key locks, can be susceptible to manipulation techniques. Experienced individuals may bypass these locks using tools or methods that exploit their mechanical weaknesses. Electronic locks, while offering more advanced features like keypads or RFID access, can also be compromised through hacking or electronic interference.
The security of built-in locker locks also depends on the quality and maintenance of the lock. Over time, wear and tear can degrade the lock's effectiveness, making it easier to breach. Additionally, if the lock is part of a mass-produced batch, there may be common vulnerabilities that are widely known.
For storing valuable items, it is advisable to use additional security measures. Portable high-security locks, such as padlocks with hardened shackles and advanced locking mechanisms, can provide an extra layer of protection. Alternatively, storing valuables in a safe or secure area with controlled access can offer better security.
In summary, while built-in locker locks provide a basic level of security suitable for low-value items, they may not be adequate for protecting high-value possessions. For enhanced security, consider supplementary locking mechanisms or alternative storage solutions.
How do I maintain and troubleshoot a built-in locker lock?
To maintain and troubleshoot a built-in locker lock, follow these steps:
1. **Regular Cleaning**: Use a soft cloth to wipe the lock and surrounding area to remove dust and debris. For deeper cleaning, use a mild soap solution and a soft brush, ensuring no moisture enters the lock mechanism.
2. **Lubrication**: Apply a graphite-based lubricant to the keyhole and moving parts of the lock. Avoid oil-based lubricants as they can attract dust and grime, leading to jamming.
3. **Inspect for Wear and Tear**: Regularly check for signs of rust, corrosion, or physical damage. If any parts appear worn or damaged, consider replacing them to prevent lock failure.
4. **Check Alignment**: Ensure the locker door and lock are properly aligned. Misalignment can cause the lock to jam. Adjust the hinges or lock position if necessary.
5. **Test the Lock**: Periodically test the lock with the key or combination to ensure smooth operation. If the lock is stiff or difficult to operate, it may need cleaning or lubrication.
6. **Troubleshooting Common Issues**:
- **Key Won't Turn**: Ensure the key is the correct one and fully inserted. If it still won't turn, apply a small amount of graphite lubricant.
- **Combination Lock Issues**: Double-check the combination and ensure the dial is turned correctly. If the combination is forgotten, consult the locker’s manual or contact the manufacturer for reset instructions.
- **Lock Jamming**: Clean and lubricate the lock. If the problem persists, disassemble the lock (if possible) to check for internal obstructions or damage.
7. **Professional Help**: If troubleshooting does not resolve the issue, contact a professional locksmith for repair or replacement to avoid further damage.


