Call +(254) 703 030 000 / 751 483 999 / 721 704 777
.....Read More
Frequently Asked Questions
What are the best hydration products for staying hydrated during exercise?
The best hydration products for staying hydrated during exercise include:
1. **Water**: The most basic and essential hydration option. It's calorie-free and effective for short-duration exercises.
2. **Electrolyte Drinks**: Products like Gatorade, Powerade, and Nuun tablets replenish electrolytes lost through sweat, such as sodium, potassium, and magnesium, which are crucial for muscle function and preventing cramps.
3. **Coconut Water**: A natural alternative to sports drinks, coconut water contains electrolytes like potassium and magnesium, making it a good option for light to moderate exercise.
4. **Hydration Powders**: Brands like Liquid I.V. and DripDrop offer powders that can be mixed with water to provide a concentrated dose of electrolytes and sometimes vitamins.
5. **Electrolyte Tablets**: Products like SaltStick and Hammer Endurolytes are convenient for long-duration activities, providing a quick and easy way to replenish electrolytes without added sugars.
6. **Isotonic Drinks**: These drinks, such as Lucozade Sport, have a similar concentration of salt and sugar as the human body, allowing for quick absorption and energy replenishment.
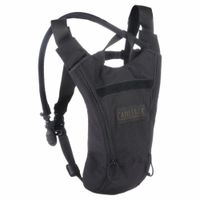
7. **Hydration Packs**: For endurance activities, hydration packs like CamelBak allow for hands-free drinking and can be filled with water or electrolyte solutions.
8. **Infused Water**: Adding fruits like lemon, lime, or berries to water can enhance flavor and encourage more frequent drinking.
9. **Protein and Electrolyte Blends**: Products like Skratch Labs Recovery Mix combine protein with electrolytes, ideal for post-exercise recovery.
10. **Alkaline Water**: Some athletes prefer alkaline water for its potential to neutralize acid in the body, though scientific support is limited.
Choosing the right product depends on the intensity and duration of the exercise, personal preference, and specific hydration needs.
How do sports drinks compare to water for hydration?
Sports drinks and water both serve to hydrate the body, but they do so in different ways and are suited for different situations.
Water is the most basic and essential form of hydration. It is calorie-free, easily accessible, and sufficient for maintaining hydration in most everyday activities and light exercises. It effectively replenishes fluids lost through sweat and helps regulate body temperature.
Sports drinks, on the other hand, are designed to replace not only fluids but also electrolytes and carbohydrates lost during intense physical activities. They contain sodium, potassium, and other electrolytes that help maintain the body's electrolyte balance, which is crucial during prolonged or high-intensity exercise. The carbohydrates in sports drinks provide a quick source of energy, which can be beneficial during endurance events or prolonged physical exertion.
For moderate activities or short-duration exercises, water is generally adequate for hydration. However, during prolonged, intense activities lasting more than an hour, especially in hot and humid conditions, sports drinks can be more effective. They help prevent dehydration, maintain energy levels, and reduce the risk of electrolyte imbalances.
In summary, while water is sufficient for everyday hydration and light exercise, sports drinks are beneficial for athletes or individuals engaged in prolonged, high-intensity activities. They provide additional electrolytes and energy, which can enhance performance and recovery. However, for those not engaged in intense physical activities, the extra calories and sugars in sports drinks may be unnecessary and could contribute to weight gain if consumed excessively.
What are the benefits of using a hydration pack?
A hydration pack offers several benefits, particularly for outdoor enthusiasts and athletes. Firstly, it provides hands-free hydration, allowing users to drink water without stopping their activity. This is especially advantageous for runners, cyclists, and hikers who need to maintain their pace and focus. The convenience of a hydration pack means that users can sip water through a tube connected to a water reservoir, which is typically stored in a backpack.
Secondly, hydration packs often have a larger capacity than traditional water bottles, enabling users to carry more water. This is crucial for long-duration activities where access to water sources may be limited. The packs are designed to distribute weight evenly across the back, reducing strain and improving comfort during extended use.
Additionally, many hydration packs come with extra storage compartments, allowing users to carry essential items such as snacks, maps, and first-aid kits. This multifunctionality makes them ideal for outdoor adventures where carrying additional gear is necessary.
Hydration packs also promote better hydration habits. The ease of access to water encourages more frequent sipping, which can help maintain optimal hydration levels and improve performance and endurance. This is particularly important in hot weather or high-intensity activities where dehydration risks are higher.
Moreover, the design of hydration packs often includes features like insulation to keep water cool, adjustable straps for a customized fit, and durable materials that withstand rugged conditions. These features enhance the overall user experience, making hydration packs a reliable and practical choice for staying hydrated during physical activities.
How do I choose the right size cooler for my needs?
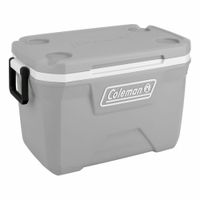
To choose the right size cooler, consider the following factors:
1. **Purpose and Duration**: Determine the primary use of the cooler. For day trips, a small cooler (20-30 quarts) is sufficient. For weekend camping, opt for a medium cooler (30-50 quarts). For extended trips or large gatherings, a large cooler (50+ quarts) is necessary.
2. **Number of People**: Estimate the number of people using the cooler. More people require more storage space. A small cooler suits 1-2 people, a medium cooler is ideal for 3-4 people, and a large cooler accommodates 5 or more.
3. **Type of Contents**: Consider what you’ll store. If you need to pack a lot of food and drinks, choose a larger cooler. For just drinks, a smaller cooler might suffice.
4. **Ice Retention Needs**: Longer trips require better ice retention. High-end coolers with thick insulation offer longer ice retention but are bulkier. Choose based on how long you need to keep items cold.
5. **Portability**: Consider how you’ll transport the cooler. Smaller coolers are easier to carry, while larger ones may need wheels or multiple people to move.
6. **Storage Space**: Ensure you have space to store the cooler when not in use. Larger coolers take up more storage space.
7. **Budget**: Larger and high-performance coolers are more expensive. Balance your needs with your budget.
8. **Additional Features**: Look for features like wheels, handles, and drainage spouts that enhance usability.
By evaluating these factors, you can select a cooler that fits your specific needs, ensuring efficiency and convenience for your activities.
What are the advantages of using reusable ice packs?
Reusable ice packs offer several advantages:
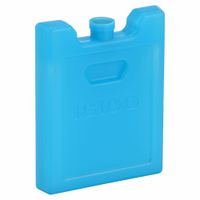
1. **Cost-Effective**: Over time, reusable ice packs are more economical than single-use options. Once purchased, they can be used repeatedly, reducing the need for constant repurchasing.
2. **Environmentally Friendly**: By reducing the need for disposable ice packs, reusable options help decrease waste and the environmental impact associated with single-use plastics.
3. **Convenience**: Reusable ice packs are easy to store and can be quickly refrozen for future use. They are available in various sizes and shapes, making them versatile for different applications.
4. **Durability**: Made from robust materials, reusable ice packs are designed to withstand multiple freeze-thaw cycles without leaking or breaking, ensuring long-term use.
5. **Consistent Cooling**: They provide reliable and consistent cooling, maintaining their temperature for extended periods, which is ideal for keeping food and beverages cold during transport or for therapeutic uses.
6. **Versatility**: Reusable ice packs can be used for a variety of purposes, including in coolers for picnics, lunch boxes, medical applications like reducing swelling or pain, and even in shipping perishable goods.
7. **Safety**: Many reusable ice packs are made with non-toxic materials, making them safe for use around food and children.
8. **Space-Saving**: When not in use, they can be stored compactly in the freezer, taking up less space than bags of ice.
9. **Temperature Control**: Some reusable ice packs are designed to maintain specific temperatures, which can be beneficial for medical or scientific applications requiring precise temperature control.
10. **Reduced Mess**: Unlike melting ice, reusable ice packs do not create water messes, keeping items dry and preventing potential water damage.
How do I clean and maintain my hydration pack?
To clean and maintain your hydration pack, follow these steps:
1. **Disassemble**: Remove the bladder from the pack. Detach the tube and bite valve.
2. **Rinse**: Rinse the bladder, tube, and bite valve with warm water to remove any residual liquid.
3. **Clean the Bladder**:
- **Mild Soap Solution**: Fill the bladder with warm water and a few drops of mild dish soap. Close and shake it vigorously.
- **Scrub**: Use a soft brush or a specialized cleaning kit brush to scrub the interior.
- **Rinse Thoroughly**: Rinse several times with clean water to remove soap residue.
4. **Clean the Tube and Bite Valve**:
- **Tube**: Use a long brush from a cleaning kit to scrub the inside of the tube.
- **Bite Valve**: Soak in warm soapy water, then rinse. Use a small brush if necessary.
5. **Sanitize**:
- **Baking Soda or Lemon Juice**: Mix a tablespoon with water, fill the bladder, and let it sit for 15 minutes.
- **Vinegar Solution**: Alternatively, use a mixture of water and white vinegar (1:1 ratio) for sanitizing. Rinse thoroughly afterward.
6. **Dry Completely**:
- **Bladder**: Prop open with a drying rack or hang it upside down to air dry.
- **Tube**: Hang vertically to ensure all water drains out.
- **Bite Valve**: Squeeze out excess water and let it air dry.
7. **Storage**: Once completely dry, store the bladder in a cool, dry place. To prevent mold, some prefer storing it in the freezer.
8. **Regular Maintenance**: Clean after each use, especially if using sugary drinks. Inspect for leaks or damage regularly.
By following these steps, you can ensure your hydration pack remains clean, functional, and free from mold or bacteria.
What is the best way to store water for emergencies?
The best way to store water for emergencies involves several key steps to ensure safety and longevity:
1. **Choose the Right Containers**: Use food-grade water storage containers made of glass, plastic, or stainless steel. Avoid containers that previously held chemicals or non-food substances. Opt for BPA-free plastic containers or those specifically designed for water storage.
2. **Clean and Sanitize Containers**: Before filling, clean containers with soap and water, then sanitize with a solution of 1 teaspoon of unscented liquid household chlorine bleach per quart of water. Rinse thoroughly.
3. **Use Proper Water Sources**: Use tap water from a safe municipal source. If using well water or other sources, treat it with unscented liquid household chlorine bleach (8 drops per gallon) or boil it for one minute to ensure safety.
4. **Seal and Label Containers**: Seal containers tightly to prevent contamination. Label them with the date of storage and the source of the water.
5. **Store in a Cool, Dark Place**: Keep water containers in a cool, dark area away from direct sunlight and chemicals. This helps prevent algae growth and degradation of plastic containers.
6. **Rotate Water Supplies**: Replace stored water every six months to ensure freshness. Use the old water for non-drinking purposes like watering plants or cleaning.
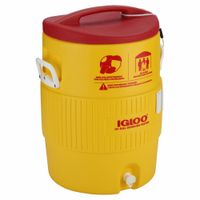
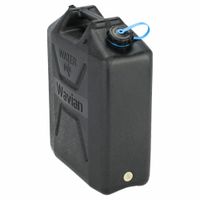
7. **Consider Larger Storage Options**: For long-term storage, consider larger tanks or barrels, ensuring they are food-grade and have a spigot for easy access.
8. **Emergency Water Treatment**: Keep water purification tablets or a portable water filter on hand for additional treatment if needed.
By following these steps, you can ensure a reliable and safe water supply during emergencies.
How do I keep my drinks cold in a soft-sided cooler?
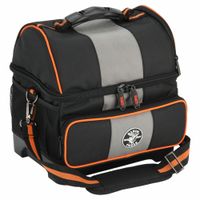
To keep drinks cold in a soft-sided cooler, start by pre-chilling the cooler and drinks. Place the cooler in a cold environment or fill it with ice for a few hours before use. Pre-chill the drinks in a refrigerator or freezer. Use a combination of ice packs and ice cubes for optimal cooling. Ice packs maintain a consistent temperature, while ice cubes fill gaps and provide direct contact with the drinks.
Layer the cooler strategically. Place a layer of ice packs at the bottom, followed by a layer of drinks. Add another layer of ice cubes and repeat the process, ensuring drinks are surrounded by ice. Use frozen water bottles as an alternative to ice packs; they keep drinks cold and provide extra water as they melt.
Minimize air space by packing the cooler tightly. Air pockets can cause ice to melt faster. Use towels or crumpled newspaper to fill any remaining gaps. Keep the cooler closed as much as possible to maintain the internal temperature. Open it only when necessary and close it quickly.
Store the cooler in a shaded area, away from direct sunlight. Cover it with a reflective blanket or towel to reduce heat absorption. If possible, elevate the cooler off hot surfaces like asphalt or concrete.
Consider using salt to lower the freezing point of ice, making it colder and more effective. Mix salt with ice cubes before adding them to the cooler. Finally, choose a high-quality soft-sided cooler with good insulation properties to enhance cooling efficiency.
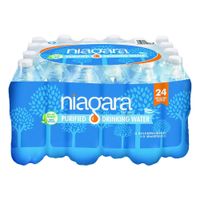
What are the environmental impacts of single-use bottled water?
Single-use bottled water has significant environmental impacts across its lifecycle, from production to disposal.
1. **Resource Depletion**: The production of plastic bottles primarily uses polyethylene terephthalate (PET), derived from non-renewable fossil fuels like oil and natural gas. This extraction process contributes to resource depletion and environmental degradation.
2. **Energy Consumption**: Manufacturing and transporting bottled water require substantial energy. The production process involves extracting raw materials, processing them into plastic, and bottling the water, all of which consume energy and contribute to greenhouse gas emissions.
3. **Water Usage**: Producing bottled water is water-intensive. It is estimated that it takes about three liters of water to produce one liter of bottled water, considering the water used in production and packaging processes.
4. **Pollution**: The production and transportation of bottled water contribute to air and water pollution. Factories emit pollutants, and transportation vehicles release carbon emissions, exacerbating climate change.
5. **Waste Generation**: Single-use bottles contribute significantly to plastic waste. Many bottles end up in landfills or as litter in natural environments, taking hundreds of years to decompose. This plastic waste can leach harmful chemicals into the soil and waterways.
6. **Marine Impact**: A large portion of plastic waste ends up in oceans, posing a threat to marine life. Animals can ingest or become entangled in plastic debris, leading to injury or death.
7. **Recycling Challenges**: Although PET bottles are recyclable, the recycling rate is low. Many bottles are not recycled due to inadequate recycling facilities or consumer behavior, leading to increased environmental burden.
Overall, the environmental impacts of single-use bottled water are profound, affecting ecosystems, wildlife, and contributing to climate change.
How do I choose the right water bottle for my lifestyle?
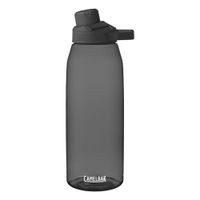
To choose the right water bottle for your lifestyle, consider the following factors:
1. **Material**:
- **Plastic**: Lightweight and affordable, but may retain flavors and odors.
- **Stainless Steel**: Durable, retains temperature, but heavier.
- **Glass**: Pure taste, easy to clean, but fragile and heavier.
- **Aluminum**: Lightweight and durable, but may dent easily.
2. **Size and Capacity**:
- Choose based on your daily water intake needs and portability. Common sizes range from 12 oz to 32 oz.
3. **Insulation**:
- **Single-Wall**: Lightweight, suitable for short-term use.
- **Double-Wall Vacuum Insulated**: Keeps drinks hot or cold for hours, ideal for outdoor activities or long commutes.
4. **Design and Features**:
- **Spout Type**: Wide mouth for easy cleaning and filling, narrow for easy sipping.
- **Lid Type**: Screw-on for leak-proof security, flip-top for convenience.
- **Handles/Straps**: For easy carrying.
5. **Purpose and Activity**:
- **Sports**: Look for bottles with easy-to-use spouts or straws.
- **Travel**: Consider collapsible or lightweight options.
- **Office**: Sleek designs that fit in cup holders or bags.
6. **Environmental Impact**:
- Opt for reusable bottles to reduce waste. Consider brands with sustainable practices.
7. **Budget**:
- Prices vary widely. Balance cost with features and durability.
8. **Aesthetic Preferences**:
- Choose colors and designs that match your style.
By evaluating these factors, you can select a water bottle that complements your lifestyle, ensuring convenience, functionality, and satisfaction.
