Call +(254) 703 030 000 / 751 483 999 / 721 704 777
.....Read More
Frequently Asked Questions
What are the differences between thermal transfer and direct thermal labels?
Thermal transfer and direct thermal labels are two distinct types of printing technologies used for creating labels, each with unique characteristics and applications.
Thermal Transfer Labels:
1. **Printing Process**: Utilizes a ribbon coated with wax, resin, or a combination. The printer's heated printhead melts the ribbon's coating onto the label surface, creating durable images.
2. **Durability**: Produces labels that are resistant to heat, moisture, chemicals, and abrasion, making them suitable for long-term use.
3. **Material Variety**: Compatible with a wide range of materials, including paper, polyester, polypropylene, and vinyl, allowing for versatile applications.
4. **Applications**: Ideal for labeling products that require longevity, such as asset tracking, inventory management, and outdoor labeling.
5. **Cost**: Generally higher initial cost due to the need for ribbons, but cost-effective for long-term use due to durability.
Direct Thermal Labels:
1. **Printing Process**: Involves a heat-sensitive label material that darkens when passed under the printer's heated printhead, eliminating the need for ribbons.
2. **Durability**: Less durable than thermal transfer labels; susceptible to fading and damage from heat, light, and abrasion.
3. **Material Variety**: Limited to heat-sensitive materials, typically paper-based, which restricts their use in harsh environments.
4. **Applications**: Suitable for short-term applications like shipping labels, receipts, and event tickets where longevity is not a priority.
5. **Cost**: Lower initial cost due to the absence of ribbons, but may incur higher costs over time if frequent reprinting is necessary due to label degradation.
In summary, thermal transfer labels offer durability and versatility for long-term applications, while direct thermal labels provide a cost-effective solution for short-term needs.
How do I choose the right barcode label printer for my needs?
To choose the right barcode label printer, consider the following factors:
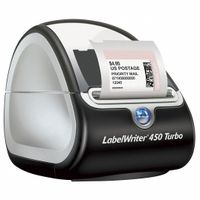
1. **Printing Volume**: Determine the number of labels you need to print daily. For high-volume printing, consider an industrial printer. For moderate use, a desktop printer may suffice.
2. **Print Technology**: Decide between direct thermal and thermal transfer printing. Direct thermal is suitable for short-term use, while thermal transfer is ideal for durable, long-lasting labels.
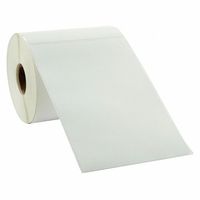
3. **Label Size and Type**: Ensure the printer supports the label sizes and materials you require, such as paper, polyester, or polypropylene.
4. **Print Resolution**: Choose a printer with the appropriate DPI (dots per inch) for your needs. Higher DPI is necessary for small or detailed labels.
5. **Connectivity Options**: Consider how you will connect the printer to your system. Options include USB, Ethernet, Wi-Fi, and Bluetooth.
6. **Software Compatibility**: Ensure the printer is compatible with your existing software and systems for seamless integration.
7. **Environment**: Consider the environment where the printer will be used. Industrial settings may require rugged printers, while office environments may not.
8. **Budget**: Balance your needs with your budget. Consider not only the initial cost but also the cost of consumables like labels and ribbons.
9. **Brand and Support**: Choose a reputable brand known for reliability and good customer support.
10. **Future Needs**: Consider potential future requirements to avoid frequent upgrades.
By evaluating these factors, you can select a barcode label printer that meets your specific needs efficiently and cost-effectively.
What types of adhesive are available for shipping labels?
There are several types of adhesives used for shipping labels, each designed to meet specific requirements based on the application and environmental conditions:
1. **Permanent Adhesive**: This is the most common type used for shipping labels. It creates a strong bond with the surface, ensuring the label remains attached throughout the shipping process. Once applied, it is difficult to remove without damaging the label or the surface.
2. **Removable Adhesive**: This type allows the label to be removed without leaving residue or damaging the surface. It is ideal for temporary labeling needs where the label might need to be repositioned or removed after a short period.
3. **Repositionable Adhesive**: Similar to removable adhesives, these allow for the label to be repositioned shortly after application. However, they eventually become permanent over time, providing flexibility during initial application.
4. **Freezer Adhesive**: Designed for cold environments, freezer adhesives maintain their bonding strength at low temperatures. They are suitable for labels on products stored or transported in cold storage.
5. **High-Tack Adhesive**: This adhesive is used for surfaces that are difficult to adhere to, such as rough, textured, or low-energy surfaces. It provides a stronger initial bond compared to standard permanent adhesives.
6. **Acrylic Adhesive**: Known for its durability and resistance to environmental factors like UV light and moisture, acrylic adhesives are suitable for long-term applications and outdoor use.
7. **Hot Melt Adhesive**: This type offers a strong initial tack and is often used for applications requiring quick adhesion. It is less resistant to heat and UV exposure compared to acrylic adhesives.
8. **Water-Activated Adhesive**: Used primarily for eco-friendly applications, these adhesives require moisture to activate the bonding process, often used in paper-based labels.
Each adhesive type is selected based on the specific needs of the shipping process, including the material of the package, environmental conditions, and the duration of the label's application.
How can I create custom barcode labels for my business?
To create custom barcode labels for your business, follow these steps:
1. **Determine Barcode Type**: Choose the appropriate barcode type (e.g., UPC, EAN, Code 39, QR) based on your needs and industry standards.
2. **Obtain Barcode Numbers**: For retail products, purchase barcode numbers from GS1, the global standards organization. For internal use, you can generate your own numbers.
3. **Select Barcode Software**: Use software like Adobe Illustrator, BarTender, or online tools like OnlineLabels.com to design and generate barcodes.
4. **Design the Label**: Incorporate your barcode into a label design. Include necessary information such as product name, price, and company logo. Ensure the barcode is scannable by maintaining proper size and contrast.
5. **Choose Label Material**: Select a suitable label material (e.g., paper, polyester) and adhesive based on the product's environment and surface.
6. **Print the Labels**: Use a high-quality printer, such as a thermal transfer or laser printer, to print your labels. Ensure the printer supports the label material and size.
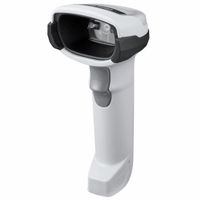
7. **Test the Barcodes**: Before mass production, test the printed barcodes with a scanner to ensure they are readable and accurate.
8. **Apply the Labels**: Affix the labels to your products, ensuring they are placed on a flat, clean surface for optimal scanning.
9. **Maintain Records**: Keep a record of the barcode numbers and corresponding products for inventory management and future reference.
10. **Compliance and Updates**: Ensure your barcodes comply with industry standards and update them as needed for new products or changes in packaging.
By following these steps, you can efficiently create custom barcode labels tailored to your business needs.
What are the best practices for printing and applying barcode labels?
1. **Choose the Right Material**: Select label materials and adhesives suitable for the environment (e.g., temperature, moisture) where the barcode will be used.
2. **Select Appropriate Printer**: Use a thermal transfer or direct thermal printer for high-quality, durable barcodes. Ensure the printer is compatible with the label material.
3. **Resolution and Size**: Print at a resolution of at least 300 dpi for clear, scannable barcodes. Ensure the barcode size is appropriate for the scanning distance and equipment.
4. **Barcode Symbology**: Choose the correct barcode symbology (e.g., UPC, Code 128) based on industry standards and application needs.
5. **Data Accuracy**: Verify the data encoded in the barcode is accurate and up-to-date to prevent scanning errors.
6. **Print Quality**: Regularly maintain and clean the printer to avoid print defects. Use high-quality ribbons and labels to ensure crisp printing.
7. **Test Scannability**: Use a barcode verifier to test the scannability and quality of printed barcodes before mass production.
8. **Label Placement**: Apply labels on flat, smooth surfaces to avoid wrinkles or bubbles. Ensure the barcode is easily accessible and visible for scanning.
9. **Orientation**: Position the barcode for optimal scanning, typically horizontally (picket fence) rather than vertically (ladder).
10. **Environmental Considerations**: Protect labels from exposure to harsh conditions by using laminates or protective coatings if necessary.
11. **Compliance**: Adhere to industry-specific regulations and standards for barcode labeling.
12. **Training**: Train staff on proper label application techniques and the importance of barcode quality.
13. **Inventory Management**: Implement a system to track label inventory and reorder supplies before they run out.
14. **Continuous Improvement**: Regularly review and update barcode printing and application processes to incorporate new technologies and practices.
How do I troubleshoot common issues with barcode label printers?
1. **Check Connections**: Ensure all cables (power, USB, Ethernet) are securely connected. Verify the printer is powered on and connected to the network or computer.
2. **Driver and Software**: Confirm the correct printer driver is installed and up-to-date. Check the software settings to ensure they match the printer's specifications.
3. **Media and Ribbon**: Verify that the correct type and size of labels and ribbons are loaded. Ensure they are properly aligned and not wrinkled or torn.
4. **Printer Settings**: Check the printer settings for label size, print speed, and darkness. Adjust these settings in the printer’s control panel or software as needed.
5. **Calibration**: Perform a calibration to ensure the printer correctly detects the label size and gap. This can usually be done through the printer’s menu or software.
6. **Print Quality**: If print quality is poor, clean the printhead with isopropyl alcohol and a lint-free cloth. Check for any debris or adhesive buildup.
7. **Error Messages**: Refer to the printer’s manual for specific error codes. Common issues include paper jams, out-of-paper errors, or ribbon errors.
8. **Firmware Updates**: Check for and install any available firmware updates from the manufacturer’s website to fix known issues.
9. **Test Print**: Run a test print to check if the issue persists. This can help isolate whether the problem is with the printer or the software.
10. **Consult Documentation**: Refer to the printer’s user manual or the manufacturer’s support website for troubleshooting guides specific to your model.
11. **Contact Support**: If issues persist, contact the manufacturer’s technical support for further assistance.
What software is recommended for designing and printing barcode labels?
For designing and printing barcode labels, several software options are recommended, each catering to different needs and levels of expertise:
1. **BarTender**: Known for its versatility, BarTender is a leading software for barcode label design and printing. It supports a wide range of barcode types and integrates with various databases, making it suitable for businesses of all sizes. Its user-friendly interface and robust features allow for the creation of complex labels with ease.
2. **NiceLabel**: NiceLabel offers a comprehensive suite of tools for barcode label design and printing. It is particularly favored for its ease of use and ability to streamline label printing processes. The software supports cloud-based solutions, enabling collaboration and access from multiple locations.
3. **ZebraDesigner**: Specifically designed for Zebra printers, ZebraDesigner provides a straightforward interface for creating barcode labels. It supports a variety of barcode symbologies and is ideal for users who need a simple, efficient solution for Zebra hardware.
4. **TBarCode Office**: This software integrates with Microsoft Office, allowing users to create barcodes directly within Word and Excel. It is suitable for those who require basic barcode functionality without the need for standalone software.
5. **Labeljoy**: Labeljoy is a user-friendly software that offers a WYSIWYG interface for designing and printing labels. It supports a wide range of barcode types and is ideal for small to medium-sized businesses looking for an affordable solution.
6. **Adobe Illustrator with Barcode Plugins**: For those familiar with graphic design, Adobe Illustrator can be used with barcode plugins to create highly customized labels. This option is best for users who need advanced design capabilities.
Each of these software options provides unique features and benefits, making them suitable for different business needs and technical expertise levels.