Call +(254) 703 030 000 / 751 483 999 / 721 704 777
.....Read More
Frequently Asked Questions
How does a drip irrigation system work?
A drip irrigation system works by delivering water directly to the root zone of plants through a network of valves, pipes, tubing, and emitters. This method is designed to conserve water and nutrients by allowing water to drip slowly to the roots of plants, either from above the soil surface or buried below the surface.
The system typically begins with a water source, which could be a municipal water supply, a well, or a rainwater collection system. The water is then filtered to remove any debris that could clog the emitters. A pressure regulator is often used to ensure the water pressure is suitable for the system, as high pressure can damage the components.
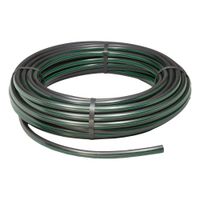
The mainline tubing, usually made of polyethylene, carries the water from the source to the planting area. From the mainline, smaller tubes branch out to deliver water to individual plants or rows of plants. Emitters, which are small devices attached to the tubing, control the flow of water, releasing it at a slow, steady rate. These emitters can be adjusted to provide different flow rates depending on the water needs of specific plants.
Drip irrigation systems can be automated with timers and sensors to optimize watering schedules based on weather conditions, soil moisture levels, and plant requirements. This automation helps in reducing water waste and ensuring plants receive consistent moisture.
Overall, drip irrigation is an efficient and effective method for watering plants, particularly in arid regions or areas with water scarcity, as it minimizes evaporation and runoff, promoting healthier plant growth and conserving water resources.
What are the benefits of using drip irrigation over traditional sprinklers?
Drip irrigation offers several advantages over traditional sprinklers:
1. **Water Efficiency**: Drip irrigation delivers water directly to the plant roots, minimizing evaporation and runoff. This targeted approach can reduce water usage by 30-50% compared to sprinklers.
2. **Reduced Evaporation**: By applying water directly to the soil, drip systems significantly decrease water loss due to evaporation, which is a common issue with overhead sprinklers.
3. **Minimized Weed Growth**: Since water is delivered only to the plants, the surrounding soil remains dry, reducing the likelihood of weed germination and growth.
4. **Improved Plant Health**: Consistent moisture levels at the root zone promote healthier plant growth and reduce stress, leading to higher yields and better quality produce.
5. **Soil Erosion Prevention**: Drip irrigation applies water slowly and steadily, preventing soil erosion and nutrient runoff that can occur with the high-pressure spray of sprinklers.
6. **Flexibility and Precision**: Drip systems can be easily adjusted to meet the specific needs of different plants, allowing for precise control over water delivery and nutrient application.
7. **Reduced Disease Risk**: By keeping foliage dry, drip irrigation lowers the risk of fungal diseases and other pathogens that thrive in moist environments.
8. **Energy Efficiency**: Drip systems often require lower water pressure and less energy to operate than sprinkler systems, leading to cost savings on energy bills.
9. **Scalability**: Drip irrigation can be easily expanded or modified to accommodate changes in planting layouts or crop types.
10. **Environmental Benefits**: By conserving water and reducing chemical runoff, drip irrigation supports sustainable agricultural practices and helps protect local ecosystems.
How do I install a drip irrigation system?
1. **Plan the Layout**: Determine the areas to be irrigated and measure the garden. Sketch a layout, marking plant locations and water sources.
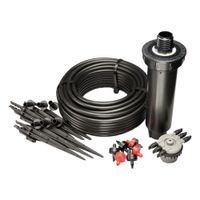
2. **Gather Materials**: Purchase a drip irrigation kit or individual components: mainline tubing, drip emitters, connectors, stakes, a filter, pressure regulator, and a timer.
3. **Install the Water Source Connection**: Attach a backflow preventer to the outdoor faucet to prevent contamination. Connect a pressure regulator and filter to ensure consistent water flow and clean water.
4. **Lay the Mainline Tubing**: Unroll the mainline tubing from the water source to the garden areas. Use stakes to secure it in place. Cut the tubing with scissors as needed.
5. **Install Emitters**: Punch holes in the mainline tubing using a hole punch tool. Insert drip emitters or micro-sprayers near the base of each plant. Use connectors to attach smaller tubing if needed.
6. **Add Connectors and End Caps**: Use T-connectors or elbow connectors to navigate corners or split the line. Seal the end of the tubing with end caps to prevent water loss.
7. **Test the System**: Turn on the water to check for leaks and ensure emitters are working. Adjust the pressure regulator if necessary.
8. **Set the Timer**: Attach a timer to automate watering schedules. Program it based on plant needs and local climate conditions.
9. **Cover and Secure**: Bury or cover the tubing with mulch to protect it from sun damage and to maintain garden aesthetics.
10. **Regular Maintenance**: Check for clogs, leaks, and proper emitter function regularly. Clean the filter periodically to ensure efficient operation.
What components are needed for a drip irrigation system?
A drip irrigation system requires several key components to function effectively:
1. **Water Source**: This is the origin of the water supply, which can be a municipal water line, well, or rainwater collection system.
2. **Pump**: If the water source lacks sufficient pressure, a pump is necessary to ensure adequate flow through the system.
3. **Backflow Preventer**: This device prevents contaminated water from flowing back into the clean water supply, ensuring the safety of the water source.
4. **Pressure Regulator**: Drip systems operate at low pressure, typically between 10-30 psi. A pressure regulator ensures the water pressure is reduced to the optimal level for the system.
5. **Filter**: A filter removes debris and particles from the water, preventing clogs in the drip emitters.
6. **Mainline Tubing**: This is the primary conduit for water distribution, usually made of polyethylene or PVC, running from the water source to the irrigation area.
7. **Valves**: These control the flow of water into different zones of the system, allowing for precise irrigation management.
8. **Emitters**: Emitters are devices that release water directly to the plant roots at a slow, controlled rate. They can be pressure-compensating or non-pressure-compensating.
9. **Drip Tubing**: This tubing, often with built-in emitters, distributes water along the plant rows.
10. **Fittings and Connectors**: These components, including tees, elbows, and couplings, are used to connect and direct the tubing throughout the system.
11. **End Caps**: These seal the ends of the tubing to prevent water from escaping.
12. **Stakes and Hold-Downs**: These secure the tubing in place, ensuring it remains in the desired position.
13. **Timer/Controller**: An automated timer or controller schedules irrigation cycles, optimizing water usage and ensuring consistent watering.
These components work together to deliver water efficiently and directly to the plant roots, minimizing waste and promoting healthy plant growth.
How do I maintain and troubleshoot a drip irrigation system?
To maintain and troubleshoot a drip irrigation system, follow these steps:
1. **Regular Inspection**: Check the system weekly for leaks, clogs, and wear. Look for wet spots indicating leaks or dry areas suggesting clogs.
2. **Filter Cleaning**: Clean filters every few weeks to prevent clogs. Remove and rinse them under running water, using a brush if necessary.
3. **Flush the System**: Flush the entire system at least once a month. Open the end caps and let water run through to clear debris.
4. **Emitter Check**: Inspect emitters for clogs. Clean them by soaking in vinegar or replacing them if necessary.
5. **Pressure Check**: Ensure the water pressure is within the recommended range (usually 15-30 psi). Use a pressure regulator if needed.
6. **Line Inspection**: Examine tubing for cracks or damage. Replace any damaged sections to prevent leaks.
7. **Connection Tightening**: Ensure all connections are secure. Tighten loose fittings to prevent leaks.
8. **Seasonal Adjustments**: Adjust the system for seasonal changes. Increase watering in hot months and reduce in cooler months.
9. **Valve and Timer Check**: Test valves and timers regularly to ensure they function correctly. Replace batteries in timers as needed.
10. **Root Intrusion Prevention**: Check for root intrusion in emitters and lines, especially near trees and shrubs. Use root barriers if necessary.
11. **Winterization**: In cold climates, drain the system before winter to prevent freezing damage. Store removable parts indoors.
12. **Documentation**: Keep a maintenance log to track inspections, repairs, and replacements.
By following these steps, you can ensure your drip irrigation system operates efficiently and effectively, minimizing water waste and promoting healthy plant growth.
Can drip irrigation be used for lawns as well as gardens?
Yes, drip irrigation can be used for both lawns and gardens. Drip irrigation is a highly efficient watering system that delivers water directly to the roots of plants through a network of tubes, emitters, and valves. This method minimizes water wastage and evaporation, making it suitable for various types of landscapes, including lawns and gardens.
For lawns, drip irrigation can be installed beneath the surface or just below the grass level. Subsurface drip irrigation systems are particularly effective for lawns as they provide consistent moisture directly to the root zone, promoting healthy grass growth while reducing water usage. This method also helps prevent weed growth and reduces the risk of fungal diseases by keeping the grass blades dry.
In gardens, drip irrigation is ideal for watering flower beds, vegetable patches, and shrubs. It allows for precise water delivery to individual plants, ensuring that each plant receives the appropriate amount of water. This is especially beneficial for gardens with diverse plant species that have varying water requirements. Drip systems can be easily customized and expanded to accommodate changes in garden layout or plant types.
Overall, drip irrigation offers several advantages for both lawns and gardens, including water conservation, reduced labor, and improved plant health. It is a versatile and sustainable solution for maintaining lush, green lawns and thriving gardens.
How do I choose the right drip emitters for my plants?
To choose the right drip emitters for your plants, consider the following factors:
1. **Plant Water Requirements**: Determine the water needs of your plants. Some plants require more water, while others need less. Choose emitters with appropriate flow rates, typically measured in gallons per hour (GPH). Common flow rates are 0.5, 1, and 2 GPH.
2. **Soil Type**: Soil type affects water absorption. Sandy soils drain quickly, requiring emitters with higher flow rates. Clay soils retain water longer, so lower flow rates are preferable to prevent waterlogging.
3. **Emitter Type**:
- **Pressure Compensating Emitters**: Deliver consistent flow regardless of pressure changes, ideal for uneven terrain or long runs.
- **Non-Pressure Compensating Emitters**: Flow varies with pressure, suitable for flat, short runs.
- **Adjustable Emitters**: Allow flow rate adjustments, offering flexibility for different plant needs.
4. **Emitter Placement**: Consider plant spacing and root zone coverage. Use multiple emitters for larger plants or trees to ensure even water distribution.
5. **System Pressure**: Check your water supply pressure. Most emitters operate optimally between 15-30 psi. Use a pressure regulator if necessary to maintain consistent pressure.
6. **Clogging Potential**: Choose emitters with built-in filters or self-flushing mechanisms to reduce clogging, especially in areas with hard water or debris.
7. **Durability and UV Resistance**: Select emitters made from durable, UV-resistant materials to withstand outdoor conditions and ensure longevity.
8. **Cost and Availability**: Consider your budget and the availability of emitters. Balance cost with quality and performance.
By evaluating these factors, you can select drip emitters that efficiently meet the watering needs of your plants, ensuring healthy growth and optimal water use.