Call +(254) 703 030 000 / 751 483 999 / 721 704 777
.....Read More
Frequently Asked Questions
What are the best materials for temporary outdoor structures?
The best materials for temporary outdoor structures are those that offer a balance of durability, ease of assembly, portability, and weather resistance. Key materials include:
1. **Aluminum**: Lightweight and resistant to rust, aluminum is ideal for frames of temporary structures like tents and gazebos. Its strength-to-weight ratio makes it easy to transport and assemble.
2. **Steel**: Galvanized steel provides robust support and is often used for larger structures. It is heavier than aluminum but offers superior strength and stability, especially in windy conditions.
3. **Polyethylene (PE) and Polyvinyl Chloride (PVC)**: These plastics are commonly used for canopy covers and tarps. They are waterproof, UV-resistant, and provide excellent protection against the elements. PVC is slightly more durable than PE.
4. **Canvas**: A traditional material for tents, canvas is breathable and provides good insulation. Modern treated canvas is water-resistant and more durable, making it suitable for longer-term use.
5. **Polyester**: Often used for tent fabrics, polyester is lightweight, quick-drying, and resistant to UV rays. It is less breathable than canvas but offers good weather protection.
6. **Acrylic Coated Fabrics**: These are used for awnings and canopies, offering excellent UV protection and water resistance. They are durable and maintain their color over time.
7. **Bamboo**: An eco-friendly option, bamboo is strong and flexible, suitable for lightweight structures. It is biodegradable and sustainable, making it a popular choice for environmentally conscious projects.
8. **Composite Materials**: Combining materials like fiberglass and resin, composites offer high strength and weather resistance. They are used in modular structures and can withstand harsh conditions.
These materials, chosen based on specific needs such as portability, climate, and duration of use, ensure the effectiveness and longevity of temporary outdoor structures.
How do I secure a canopy tent in windy conditions?
To secure a canopy tent in windy conditions, follow these steps:
1. **Choose the Right Location**: Set up your tent in a sheltered area, away from direct wind paths. Use natural windbreaks like trees or buildings.
2. **Use Heavy-Duty Stakes**: Invest in long, heavy-duty stakes or pegs. Drive them into the ground at a 45-degree angle away from the tent for maximum hold.
3. **Anchor with Weights**: Use canopy weights or sandbags on each leg. Fill bags with sand, rocks, or water to add substantial weight. Aim for at least 20-40 pounds per leg.
4. **Guy Lines and Ropes**: Attach guy lines to the top corners of the canopy. Secure them to the ground with stakes, ensuring they are taut. Use strong, durable rope or bungee cords.
5. **Lower the Canopy**: If the wind picks up, lower the canopy to reduce its profile against the wind. Some models allow you to adjust the height easily.
6. **Reinforce the Frame**: Use additional support poles or cross-bracing if available. Ensure all joints and connections are secure.
7. **Close Sidewalls**: If your canopy has sidewalls, close them to reduce wind flow through the tent. This can help stabilize the structure.
8. **Regular Checks**: Periodically check all anchors, weights, and connections. Tighten or adjust as necessary to maintain stability.
9. **Dismantle if Necessary**: If winds become too strong, it may be safer to dismantle the tent to prevent damage or injury.
10. **Use Quality Equipment**: Invest in a high-quality canopy designed for outdoor use, with reinforced frames and durable materials.
By following these steps, you can significantly enhance the stability of your canopy tent in windy conditions.
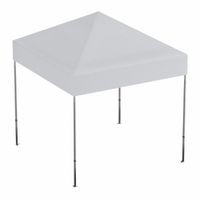
What size canopy tent do I need for my event?
To determine the appropriate size of a canopy tent for your event, consider the following factors:
1. **Number of Guests**: Estimate the number of attendees. A general guideline is to allocate 10-12 square feet per person for a seated dinner, 8 square feet per person for a buffet-style meal, and 5-6 square feet per person for standing or cocktail-style events.
2. **Event Type**: Different events require different setups. For example, a wedding with a dance floor and dining area will need more space than a simple gathering.
3. **Seating Arrangement**: Decide on the seating style. Round tables require more space than rectangular ones. For round tables, allocate about 100 square feet per table (seating 8-10 people), and for rectangular tables, about 80 square feet per table.
4. **Additional Space**: Consider space for other elements like a stage, dance floor, buffet tables, bar, or DJ booth. A dance floor typically requires 2-4 square feet per person dancing.
5. **Weather Considerations**: If weather is a concern, ensure the tent is large enough to accommodate all guests comfortably inside.
6. **Venue Restrictions**: Check the venue for any size restrictions or specific requirements.
7. **Tent Size Examples**:
- For 20-40 guests: 20x20 feet (400 sq ft)
- For 50-60 guests: 20x30 feet (600 sq ft)
- For 80-100 guests: 30x30 feet (900 sq ft)
- For 150 guests: 30x50 feet (1500 sq ft)
By considering these factors, you can select a tent size that ensures comfort and functionality for your event.
How do I clean and maintain outdoor furniture?
To clean and maintain outdoor furniture, follow these steps:
1. **Materials Needed**: Gather mild soap, water, a soft brush or cloth, a hose, and protective covers.
2. **General Cleaning**:
- **Plastic and Resin**: Mix mild soap with water. Use a soft brush or cloth to scrub the surface. Rinse with a hose and let it air dry.
- **Wood**: Use a soft brush with soapy water. Rinse thoroughly and let it dry. Apply a wood sealant or oil annually to protect against moisture.
- **Metal**: Use soapy water and a soft cloth. Rinse and dry completely to prevent rust. Apply a rust-resistant finish if needed.
- **Wicker**: Use a vacuum to remove dust. Clean with a soft brush and soapy water. Rinse lightly and let it dry in the sun.
3. **Cushions and Fabrics**:
- Remove covers if possible and wash according to the label. For non-removable covers, use a fabric cleaner or mild soap solution. Rinse and air dry completely.
4. **Stain Removal**:
- For tough stains, use a mixture of vinegar and water or a specialized cleaner. Test on a small area first.
5. **Maintenance**:
- Regularly inspect for damage or wear. Tighten screws and bolts.
- Store furniture indoors or use protective covers during harsh weather.
- Reapply protective finishes or sealants annually to prolong life.
6. **Seasonal Care**:
- In winter, store furniture indoors if possible. If not, use weatherproof covers.
- In summer, provide shade to prevent sun damage.
By following these steps, you can keep your outdoor furniture looking great and extend its lifespan.
What are the most durable temporary shelters for camping?
The most durable temporary shelters for camping are those that offer a balance of strength, weather resistance, and ease of setup. Here are some top options:
1. **Four-Season Tents**: Designed to withstand harsh weather conditions, these tents are made with robust materials and reinforced poles. They are ideal for winter camping or high-altitude environments, providing excellent protection against snow, wind, and rain.
2. **Geodesic Dome Tents**: Known for their stability, these tents have multiple intersecting poles that create a dome shape, distributing stress evenly across the structure. This design makes them highly resistant to strong winds and heavy snow loads.
3. **Canvas Tents**: Made from heavy-duty cotton canvas, these tents are extremely durable and offer excellent insulation. They are breathable, reducing condensation, and can last for many years with proper care. However, they are heavier and take longer to set up.
4. **Teepees**: Modern teepees use durable synthetic materials and are supported by a central pole, making them stable in windy conditions. They offer ample space and good ventilation, though they may require more effort to pitch.
5. **Hammock Tents**: Constructed from high-strength nylon or polyester, these are suspended between trees, keeping campers off the ground. They are durable, lightweight, and ideal for uneven or wet terrain, though they require suitable trees for setup.
6. **Bivy Sacks**: These are compact, waterproof shelters made from durable materials like Gore-Tex. They are designed for solo campers and provide excellent protection against the elements, though they offer limited space.
Each of these options has its own advantages and is suited to different camping conditions. The choice depends on factors like climate, terrain, and personal preference.
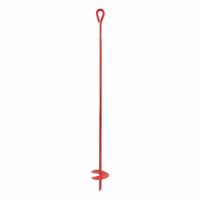
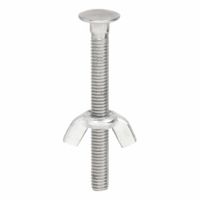
How do I choose the right anchors and weights for my canopy?
To choose the right anchors and weights for your canopy, consider the following factors:
1. **Canopy Size and Material**: Larger canopies or those made from heavier materials require more substantial anchoring. Check the manufacturer's recommendations for specific weight requirements.
2. **Location and Surface**: Determine if the canopy will be set up on grass, sand, concrete, or another surface. For grass, stakes or auger anchors are effective. On sand, use sandbags or specialized sand anchors. For hard surfaces like concrete, weighted bags or water barrels are suitable.
3. **Weather Conditions**: In areas prone to high winds, use heavier weights or additional anchoring points. Consider using guy lines for extra stability.
4. **Type of Event**: For temporary events, portable and easy-to-install weights like water barrels or sandbags are ideal. For permanent installations, consider more robust solutions like concrete blocks.
5. **Ease of Setup and Portability**: If frequent setup and takedown are required, choose anchors and weights that are easy to transport and install, such as collapsible water weights or stackable sandbags.
6. **Budget**: Weights and anchors vary in cost. Determine your budget and balance it with the need for durability and effectiveness.
7. **Safety Regulations**: Ensure compliance with local safety regulations, especially for public events, which may dictate specific anchoring requirements.
8. **Aesthetic Considerations**: For events where appearance matters, choose anchors and weights that blend with the environment or can be concealed.
By evaluating these factors, you can select the appropriate anchors and weights to ensure your canopy remains secure and stable in various conditions.
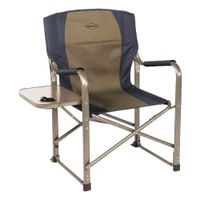
What are the best portable tables and chairs for outdoor events?
The best portable tables and chairs for outdoor events combine durability, ease of transport, and comfort. For tables, consider the Lifetime 4428 Adjustable Folding Table. It's lightweight, made from high-density polyethylene, and features adjustable height settings, making it versatile for various uses. The table is also UV-protected and weather-resistant, ensuring longevity.
Another excellent option is the Coleman Pack-Away 4-in-1 Table. This model offers versatility with its modular design, allowing it to be configured as a square table, buffet table, bi-level table, or two separate tables. It's compact when folded, making it easy to transport and store.
For chairs, the Helinox Chair One is a top choice. Known for its lightweight and compact design, it offers excellent comfort and support. The chair is made from durable materials and can support up to 320 pounds, making it suitable for most users.
The GCI Outdoor Freestyle Rocker is another great option, especially for those who value comfort. It features a spring-action rocking technology, a sturdy frame, and a convenient carry handle, making it easy to transport.
For a more budget-friendly option, the Coleman Portable Camping Quad Chair with 4-Can Cooler is a popular choice. It offers a built-in cooler, a comfortable seat, and a sturdy steel frame, providing excellent value for money.
When selecting portable tables and chairs for outdoor events, prioritize features like weight capacity, ease of setup, and weather resistance to ensure they meet your specific needs.
How do I repair a damaged canopy tent?
To repair a damaged canopy tent, first assess the damage. For small tears or holes in the fabric, use a tent repair kit or fabric repair tape. Clean the area around the tear, apply the tape on both sides, and press firmly. For larger tears, sew the fabric using a needle and strong thread, then seal with seam sealer for waterproofing.
If the frame is bent or broken, identify the damaged section. For bent poles, gently straighten them using your hands or a rubber mallet. For broken poles, use a pole repair sleeve or a splint. Slide the sleeve over the break, ensuring it covers both sides, and secure it with duct tape or hose clamps.
For damaged connectors or joints, replace them with new parts from the manufacturer or a compatible third-party supplier. Disassemble the affected section, remove the broken part, and install the new connector.
If the canopy's zippers are stuck or broken, lubricate them with a zipper lubricant or graphite pencil. For broken zippers, replace them by removing the old zipper with a seam ripper and sewing in a new one.
Finally, check all guy lines and stakes. Replace any frayed lines and bent stakes. Ensure all connections are secure and the tent is properly tensioned to prevent future damage. Regular maintenance and proper storage can extend the life of your canopy tent.
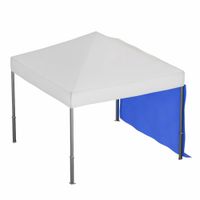
What are the benefits of using sidewalls with canopy tents?
Sidewalls enhance canopy tents by providing several key benefits. Firstly, they offer protection from the elements, such as wind, rain, and sun, ensuring a more comfortable environment for occupants. This is particularly important for outdoor events where weather conditions can be unpredictable.
Secondly, sidewalls provide privacy and security. They create a defined space that can be used for various purposes, such as trade shows, weddings, or private gatherings, where controlling access and visibility is important. This can help in managing crowds and ensuring that only invited guests or participants are present.
Thirdly, sidewalls can improve the aesthetic appeal of a canopy tent. They come in various colors, designs, and materials, allowing for customization to match the theme or branding of an event. This can enhance the overall visual impact and create a more cohesive look.
Additionally, sidewalls can help with temperature control. By enclosing the space, they can retain heat during cooler weather or provide shade and reduce heat during warmer conditions. This can be further enhanced by using sidewalls with windows or ventilation options to allow for airflow while maintaining protection.
Moreover, sidewalls can serve as a branding opportunity. They can be printed with logos, messages, or graphics, turning the tent into a marketing tool that can attract attention and promote a brand or cause.
Finally, sidewalls add structural stability to the tent. They can help anchor the tent in place, reducing the risk of it being lifted or moved by strong winds. This contributes to the safety and durability of the setup, ensuring that the event can proceed without disruptions.
How do I store and transport temporary outdoor structures efficiently?
To store and transport temporary outdoor structures efficiently, follow these steps:
1. **Disassembly and Labeling**: Break down the structure into its components. Label each part clearly to facilitate easy reassembly. Use color-coded tags or numbered labels for quick identification.
2. **Compact Packing**: Organize components to minimize space. Use nesting techniques for similar parts and stackable containers for smaller items. Ensure that the heaviest items are at the bottom to prevent damage.
3. **Protective Packaging**: Wrap delicate parts in bubble wrap or foam padding. Use waterproof covers or tarps to protect against moisture. Secure all items with straps or ties to prevent shifting during transport.
4. **Modular Storage Solutions**: Utilize modular storage systems like stackable bins or collapsible crates. These can be easily adjusted to fit different components and maximize space efficiency.
5. **Inventory Management**: Maintain a detailed inventory list of all parts and their storage locations. This helps in tracking and ensures nothing is misplaced during transport.
6. **Transport Vehicles**: Choose vehicles with ample space and appropriate weight capacity. Use trailers or trucks with tie-down points to secure the load. Consider using a vehicle with a lift gate for easier loading and unloading.
7. **Efficient Loading Techniques**: Load heavier items first and distribute weight evenly. Use dollies or hand trucks to move heavy components. Ensure that the load is balanced to prevent tipping during transport.
8. **Climate Control**: If the structure includes materials sensitive to temperature or humidity, consider climate-controlled storage or transport options.
9. **Regular Maintenance**: Inspect and maintain storage containers and transport vehicles regularly to ensure they remain in good condition and provide adequate protection.
10. **Documentation**: Keep assembly instructions and transport guidelines handy for reference during reassembly and future transport.