Call +(254) 703 030 000 / 751 483 999 / 721 704 777
.....Read More
Frequently Asked Questions
What are the essential outdoor hand tools for gardening?
Essential outdoor hand tools for gardening include:
1. **Trowel**: A small hand tool with a pointed, scoop-shaped metal blade, ideal for digging small holes, planting, and transplanting seedlings.
2. **Pruning Shears**: Also known as secateurs, these are used for cutting branches, stems, and deadheading flowers. They are essential for maintaining plant health and shape.
3. **Garden Fork**: A tool with a handle and several sturdy tines, used for loosening, lifting, and turning over soil. It is also useful for aerating lawns and breaking up compacted soil.
4. **Hand Rake**: A small rake used for smoothing soil, removing debris, and spreading mulch. It is perfect for working in tight spaces and around delicate plants.
5. **Weeder**: A tool designed to remove weeds from the garden. It typically has a long handle and a forked end to dig out roots effectively.
6. **Garden Hoe**: Used for shaping soil, removing weeds, and clearing soil of old crops. It is essential for preparing garden beds and maintaining soil health.
7. **Watering Can**: A portable container with a spout, used to water plants. It allows for precise watering, especially in areas where a hose might be too strong.
8. **Garden Gloves**: Protect hands from thorns, splinters, and soil. They provide grip and prevent blisters during prolonged gardening tasks.
9. **Hand Cultivator**: A tool with short tines used for loosening soil, removing weeds, and aerating soil in small areas.
10. **Transplanter**: Similar to a trowel but with a narrower blade, used for transplanting small plants and seedlings.
These tools are fundamental for various gardening tasks, ensuring efficiency and ease in maintaining a healthy and productive garden.
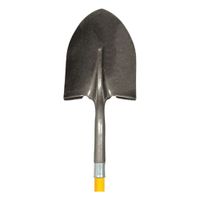
How do I choose the right shovel for my needs?
To choose the right shovel, consider the following factors:
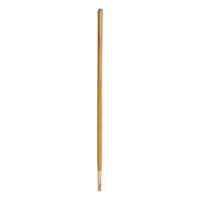
1. **Purpose**: Identify the primary task. For digging, a round-point shovel is ideal. For moving loose materials like gravel or snow, a square-point or scoop shovel works best. For gardening, a trowel or transplanting shovel is suitable.
2. **Material**: Shovel blades are typically made from steel, aluminum, or plastic. Steel is durable and ideal for heavy-duty tasks. Aluminum is lightweight and rust-resistant, suitable for lighter tasks. Plastic is lightweight and best for snow or light materials.
3. **Handle Type**: Choose between wood, fiberglass, or metal handles. Wood offers a traditional feel and shock absorption but can break. Fiberglass is durable and weather-resistant. Metal is strong but can be heavy and cold in winter.
4. **Handle Length**: Longer handles provide more leverage and are better for digging, while shorter handles offer more control and are suitable for confined spaces.
5. **Grip**: Look for ergonomic grips or D-shaped handles for comfort and reduced hand fatigue.
6. **Blade Size and Shape**: Larger blades move more material but require more strength. Smaller blades offer precision. The shape should match the task: pointed for digging, flat for scooping.
7. **Weight**: Ensure the shovel is not too heavy for prolonged use. Balance weight with durability.
8. **Budget**: Higher-quality shovels may cost more but offer better durability and performance.
9. **Storage and Maintenance**: Consider where you’ll store the shovel and how easy it is to maintain. Rust-resistant materials require less upkeep.
By evaluating these factors, you can select a shovel that meets your specific needs and ensures efficient and comfortable use.
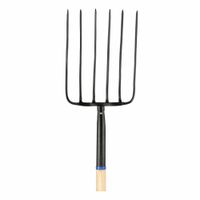
What is the difference between a garden fork and a pitchfork?
A garden fork and a pitchfork are both types of forks used in gardening and farming, but they have distinct differences in design and purpose.
A garden fork, also known as a digging fork or spading fork, is primarily used for gardening tasks such as turning soil, breaking up clumps, aerating, and mixing in compost. It typically has four sturdy, short, and flat tines made of metal, which are designed to penetrate the soil easily. The tines are usually spaced closely together to provide strength and leverage. The handle of a garden fork is often made of wood or fiberglass and is designed to provide a comfortable grip for digging and lifting.
In contrast, a pitchfork is designed for handling lighter, bulkier materials such as hay, straw, or manure. It usually has two to four long, slender, and slightly curved tines that are spaced further apart than those of a garden fork. The tines are often made of metal and are designed to easily penetrate and lift loose materials. The handle of a pitchfork is typically longer than that of a garden fork, allowing for greater reach and leverage when moving large amounts of material.
In summary, the main differences between a garden fork and a pitchfork lie in their design and intended use. A garden fork is built for heavy-duty soil work with short, sturdy tines, while a pitchfork is designed for handling lighter, bulkier materials with long, slender tines.
How do I maintain and sharpen my garden tools?
To maintain and sharpen your garden tools, follow these steps:
1. **Cleaning**: After each use, clean your tools with water to remove dirt and debris. For stubborn grime, use a wire brush or putty knife. Dry them thoroughly to prevent rust.
2. **Rust Removal**: If rust appears, use sandpaper or a wire brush to scrub it off. For severe rust, soak tools in a vinegar solution overnight, then scrub.
3. **Sharpening**: Use a mill file or sharpening stone. Secure the tool in a vice for stability. For shears and pruners, sharpen the beveled edge by moving the file in one direction, maintaining the original angle. For hoes and shovels, file the edge at a 45-degree angle. Use a whetstone for finer sharpening, lubricating it with oil or water.
4. **Lubrication**: Apply a light coat of oil (e.g., linseed or motor oil) to metal parts to prevent rust. For moving parts, use a penetrating oil like WD-40.
5. **Handle Care**: Sand wooden handles to remove splinters, then apply linseed oil to preserve the wood. Check for cracks and replace if necessary.
6. **Storage**: Store tools in a dry place. Hang them or keep them in a toolbox to avoid moisture contact. Consider using a bucket of sand mixed with oil to store smaller tools; it cleans and lubricates them.
7. **Regular Inspection**: Periodically check for damage or wear. Tighten loose screws and replace worn-out parts.
By following these steps, you ensure your garden tools remain effective and have a longer lifespan.
What are the best tools for removing weeds?
The best tools for removing weeds include:
1. **Hand Weeder**: Ideal for small gardens, this tool allows for precise removal of weeds, especially those with deep roots. It typically has a forked end to dig around the weed and pull it out by the root.
2. **Hoe**: A versatile tool, the hoe is excellent for larger areas. It can cut weeds at the surface and is effective for shallow-rooted weeds. Different types include the Dutch hoe, scuffle hoe, and stirrup hoe.
3. **Weed Puller**: This tool is designed to remove weeds with minimal effort. It often has a long handle and a claw-like end to grip and pull out weeds, making it suitable for those with back issues.
4. **Garden Fork**: Useful for loosening soil and uprooting weeds, especially in dense or compacted soil. It can also be used to turn over the soil, which helps in preventing weed growth.
5. **Weed Torch**: A propane-powered tool that uses heat to kill weeds. It is effective for driveways and walkways but should be used with caution to prevent fire hazards.
6. **String Trimmer**: Also known as a weed eater, this tool is effective for cutting down weeds in large areas or along edges and fences. It doesn’t remove roots but is useful for maintenance.
7. **Mulching**: While not a tool, using organic or synthetic mulch can suppress weed growth by blocking sunlight and preventing seed germination.
8. **Chemical Herbicides**: For persistent weeds, selective or non-selective herbicides can be used. They should be applied carefully to avoid harming desired plants.
9. **Weed Barrier Fabric**: Placed over soil, it prevents weed growth by blocking sunlight. It’s ideal for long-term weed control in garden beds.
These tools, when used appropriately, can effectively manage and remove weeds from various garden settings.
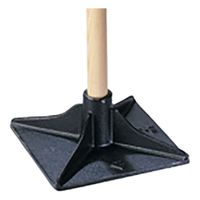
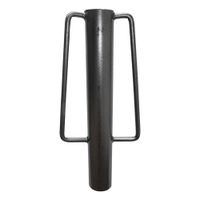
How do I use a post hole digger effectively?
To use a post hole digger effectively, follow these steps:
1. **Select the Right Tool**: Choose between a manual post hole digger or a powered auger based on the size and number of holes you need. Manual diggers are suitable for small projects, while augers are better for larger tasks.
2. **Prepare the Area**: Mark the location of each hole with stakes or spray paint. Ensure the area is clear of debris and obstacles.
3. **Position the Digger**: Stand with your feet shoulder-width apart for stability. Place the digger's blades on the marked spot.
4. **Start Digging**: For manual diggers, thrust the blades into the ground by pulling the handles apart, then push them together to scoop out the soil. For powered augers, position the auger bit on the mark and activate the machine to start drilling.
5. **Remove Soil**: Lift the digger or auger out of the hole and deposit the soil to the side. Repeat the process, ensuring the hole remains straight and the sides are even.
6. **Check Depth and Width**: Use a measuring tape to ensure the hole is the correct depth and width for your post. Typically, holes should be about one-third the height of the post and three times its width.
7. **Clear the Hole**: Remove any remaining loose soil or debris from the bottom of the hole to ensure a stable base for the post.
8. **Safety Precautions**: Wear gloves and safety goggles. Be cautious of underground utilities by calling local services to mark them before digging.
9. **Post Installation**: Once the hole is ready, place the post inside, ensuring it is level and secure before backfilling with soil or concrete.
By following these steps, you can efficiently and safely use a post hole digger for your project.
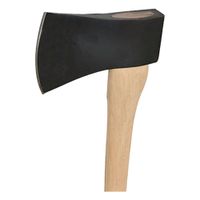
What safety precautions should I take when using axes and machetes?
When using axes and machetes, prioritize safety by following these precautions:
1. **Personal Protective Equipment (PPE):** Wear appropriate PPE, including gloves, safety goggles, long sleeves, and sturdy boots to protect against cuts and flying debris.
2. **Inspect Tools:** Before use, check the axe or machete for damage. Ensure the handle is secure and the blade is sharp and free of rust or cracks.
3. **Clear Work Area:** Ensure the area is free of obstacles and bystanders. Maintain a safe distance from others to prevent accidental injury.
4. **Proper Grip and Stance:** Hold the tool firmly with both hands. Stand with feet shoulder-width apart for balance and control.
5. **Cutting Technique:** Use controlled, deliberate motions. For axes, swing in a downward arc, and for machetes, use a slicing motion. Avoid overreaching or swinging wildly.
6. **Cutting Angle:** Always cut away from your body and keep your non-dominant hand clear of the cutting path.
7. **Secure Workpiece:** Stabilize the material you are cutting to prevent it from moving unexpectedly.
8. **Be Aware of Surroundings:** Continuously monitor your environment for changes, such as people entering your work area.
9. **Tool Maintenance:** Regularly sharpen blades to ensure efficient cutting and reduce the risk of slipping. Keep tools clean and dry to prevent rust.
10. **Storage:** Store axes and machetes in a safe, dry place, out of reach of children. Use blade covers or sheaths to prevent accidental contact.
11. **Training and Experience:** Gain proper training and experience before using these tools. Understand their capabilities and limitations.
12. **Emergency Preparedness:** Have a first aid kit nearby and know basic first aid procedures for cuts and injuries.
By adhering to these precautions, you can minimize the risk of accidents and ensure a safer working environment when using axes and machetes.
How do I properly store outdoor hand tools to prevent rust?
To properly store outdoor hand tools and prevent rust, follow these steps:
1. **Clean Tools After Use**: Remove dirt, sap, and moisture by wiping tools with a cloth. For stubborn grime, use a wire brush or steel wool.
2. **Dry Thoroughly**: Ensure tools are completely dry before storage. Moisture is a primary cause of rust.
3. **Apply Protective Coating**: Use a light coat of oil, such as motor oil or WD-40, on metal parts to create a barrier against moisture. For wooden handles, apply linseed oil to prevent cracking and splintering.
4. **Use Rust Inhibitors**: Consider using rust inhibitors or silica gel packs in storage areas to absorb moisture.
5. **Store in a Dry Location**: Keep tools in a shed, garage, or storage box that is dry and well-ventilated. Avoid leaving tools on the ground where they can collect moisture.
6. **Hang Tools**: Use pegboards, hooks, or wall-mounted racks to hang tools. This keeps them off the ground and allows air circulation.
7. **Toolboxes and Cabinets**: Store smaller tools in a toolbox or cabinet with a tight seal to protect from humidity.
8. **Desiccant Packs**: Place desiccant packs in toolboxes or storage areas to absorb excess moisture.
9. **Regular Maintenance**: Periodically inspect tools for signs of rust or damage. Reapply oil or rust inhibitors as needed.
10. **Seasonal Storage**: For long-term storage, especially in humid climates, consider wrapping tools in a cloth soaked in oil or using a rust-preventive bag.
By following these steps, you can significantly reduce the risk of rust and prolong the life of your outdoor hand tools.
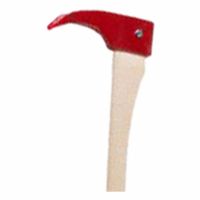
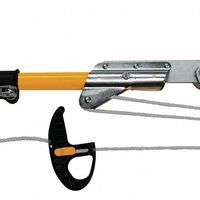
What are the best tools for pruning trees and shrubs?
The best tools for pruning trees and shrubs include:
1. **Hand Pruners (Secateurs):** Ideal for cutting small branches and stems up to ¾ inch in diameter. Bypass pruners, which work like scissors, are preferred for live branches, while anvil pruners are better for dead wood.
2. **Loppers:** These are essentially long-handled pruners that provide more leverage, making them suitable for branches up to 2 inches in diameter. Bypass loppers are recommended for precise cuts on live wood.
3. **Pruning Saws:** Designed for branches thicker than 2 inches, pruning saws come in various shapes and sizes. A curved blade is useful for quick cuts, while a straight blade offers more control.
4. **Pole Pruners:** These extendable tools allow you to reach high branches without a ladder. They often combine a pruning saw and a bypass pruner, making them versatile for different branch sizes.
5. **Hedge Shears:** Specifically designed for shaping and trimming hedges, these shears can handle multiple small branches at once, providing a clean, uniform look.
6. **Chainsaws:** For large branches or tree removal, a chainsaw is necessary. Electric or battery-powered chainsaws are suitable for smaller jobs, while gas-powered models are better for heavy-duty tasks.
7. **Pruning Knives:** Useful for detailed work, such as removing suckers or small shoots, and for grafting tasks.
8. **Pole Saws:** Similar to pole pruners but with a saw blade, these are used for cutting larger branches at height.
9. **Electric or Battery-Powered Trimmers:** Ideal for maintaining hedges and shrubs, these tools offer efficiency and ease of use for repetitive tasks.
10. **Safety Gear:** Always use gloves, safety glasses, and helmets when necessary to protect yourself during pruning tasks.
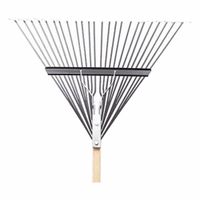
How do I select the right rake for different landscaping tasks?
To select the right rake for different landscaping tasks, consider the following factors:
1. **Task Type**:
- **Leaf Raking**: Use a leaf rake, which has a fan-shaped head with flexible tines, ideal for gathering leaves and light debris without damaging the grass.
- **Soil Preparation**: Opt for a garden or bow rake, featuring short, rigid tines and a sturdy head, perfect for breaking up soil, leveling, and spreading mulch or gravel.
- **Thatch Removal**: A thatch rake, with sharp, curved tines, is designed to remove thatch from lawns, promoting healthy grass growth.
- **Spreading Materials**: For spreading materials like mulch or gravel, a landscape rake with a wide head and long, straight tines is effective.
2. **Material**:
- **Plastic**: Lightweight and suitable for light tasks like leaf raking.
- **Metal**: Durable and ideal for heavy-duty tasks such as soil preparation and spreading gravel.
- **Wood**: Traditional and sturdy, often used for handles, providing a comfortable grip.
3. **Handle Length**:
- Choose a handle length that suits your height to prevent back strain. Longer handles offer greater reach, while shorter handles provide better control.
4. **Head Width**:
- Wider heads cover more ground quickly, suitable for large areas, while narrower heads offer precision in tight spaces.
5. **Ergonomics**:
- Look for rakes with ergonomic handles or cushioned grips to reduce hand fatigue during extended use.
6. **Adjustability**:
- Some rakes have adjustable heads or telescopic handles, offering versatility for different tasks and user preferences.
By considering these factors, you can select the appropriate rake for each specific landscaping task, ensuring efficiency and comfort.