Call +(254) 703 030 000 / 751 483 999 / 721 704 777
.....Read More


Frequently Asked Questions
What are the best pens for note-taking?
The best pens for note-taking combine comfort, reliability, and smooth ink flow. Here are some top choices:
1. **Pilot G2 Gel Pen**: Known for its smooth writing and comfortable grip, the Pilot G2 is a favorite among students and professionals. It offers vibrant ink colors and a variety of tip sizes, making it versatile for different writing styles.
2. **Uni-ball Jetstream**: This pen is praised for its hybrid ink, which combines the smoothness of a gel pen with the quick-drying properties of a ballpoint. It's ideal for left-handed writers and those who need fast-drying ink to prevent smudging.
3. **Sharpie S-Gel**: The Sharpie S-Gel offers bold, vivid lines without the risk of bleeding through pages. Its contoured rubber grip provides comfort during long writing sessions, and the ink dries quickly to minimize smudging.
4. **Muji Gel Ink Pen**: Known for its minimalist design and smooth ink flow, the Muji Gel Ink Pen is a popular choice for those who appreciate a clean aesthetic. It writes consistently and is available in various colors and tip sizes.
5. **Zebra F-301 Ballpoint Pen**: This pen is durable and reliable, with a stainless steel barrel that adds a touch of sophistication. It offers a fine point for precise writing and is a great option for those who prefer ballpoint pens.
6. **Pentel EnerGel**: Combining the best of gel and liquid ink, the Pentel EnerGel provides a smooth writing experience with quick-drying ink. It's available in multiple colors and tip sizes, catering to different preferences.
7. **Lamy Safari Fountain Pen**: For those who prefer fountain pens, the Lamy Safari is a great choice. It offers a comfortable grip and smooth ink flow, making it suitable for extended note-taking sessions.
These pens are highly recommended for their performance, comfort, and reliability in various note-taking scenarios.
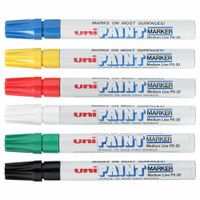
How do I choose the right marker for my project?
To choose the right marker for your project, consider the following factors:
1. **Surface Compatibility**: Identify the surface you will be marking on. Different markers are designed for specific surfaces such as paper, fabric, glass, metal, or whiteboards. For example, permanent markers work well on most surfaces, while dry-erase markers are ideal for whiteboards.
2. **Ink Type**: Decide between water-based or oil-based ink. Water-based markers are less permanent and easier to clean, suitable for temporary projects. Oil-based markers are more durable and resistant to water and fading, ideal for long-lasting projects.
3. **Tip Size and Shape**: Choose the appropriate tip size and shape based on the precision required. Fine tips are suitable for detailed work, while broad tips cover larger areas quickly. Chisel tips offer versatility for both fine and broad strokes.
4. **Color Range**: Consider the color palette needed for your project. Some projects may require a wide range of colors, while others may only need basic colors. Ensure the markers offer vibrant and consistent color output.
5. **Durability and Longevity**: Assess how long the marker needs to last. Permanent markers are designed for durability, while others may fade over time. Check for markers with fade-resistant and waterproof properties if longevity is crucial.
6. **Safety and Environmental Impact**: Look for non-toxic markers, especially if children will be using them. Consider markers that are environmentally friendly, such as those made from recycled materials or with refillable options.
7. **Budget**: Determine your budget and find markers that offer the best value for money. High-quality markers may be more expensive but can provide better performance and longevity.
By evaluating these factors, you can select the most suitable marker for your project, ensuring optimal results and satisfaction.
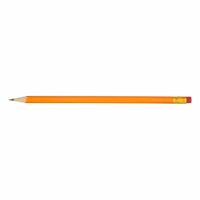
What is the difference between graphite and charcoal pencils?
Graphite and charcoal pencils are both popular tools for drawing, but they differ in composition, texture, and application.
Graphite pencils are made from a mixture of clay and graphite, a form of carbon. The ratio of clay to graphite determines the hardness or softness of the pencil, which is indicated by a grading scale ranging from hard (H) to soft (B). Graphite pencils produce smooth, consistent lines and are ideal for detailed work, shading, and creating gradients. They are less messy than charcoal and easier to erase, making them suitable for precise drawings and technical illustrations.
Charcoal pencils, on the other hand, are made from compressed charcoal, which is also a form of carbon but with a different structure. Charcoal pencils produce rich, dark lines and have a more textured, matte finish. They are excellent for expressive, bold drawings and are often used in figure drawing and sketching. Charcoal is more challenging to control than graphite, as it smudges easily, but this quality can be used creatively for blending and creating depth. Charcoal pencils are harder to erase completely, which can be a drawback for detailed work but adds to the character of the drawing.
In summary, graphite pencils are preferred for precision and control, while charcoal pencils are favored for their deep, dramatic lines and expressive potential. The choice between the two depends on the artist's style, the desired effect, and the specific requirements of the artwork.
How do I properly sharpen a pencil?
To properly sharpen a pencil, follow these steps:
1. **Choose the Right Sharpener**: Select a sharpener that suits your needs. Manual sharpeners are great for control, while electric sharpeners offer speed. Ensure the sharpener is clean and the blade is sharp.
2. **Hold the Pencil Correctly**: Grip the pencil near the middle, ensuring a firm but gentle hold. This prevents excessive pressure that could break the lead.
3. **Insert the Pencil**: Place the pencil into the sharpener's hole. For manual sharpeners, ensure the pencil is straight to avoid uneven sharpening.
4. **Sharpening Technique**:
- **Manual Sharpener**: Rotate the pencil slowly and steadily. Apply consistent pressure and avoid forcing the pencil, which can cause breakage.
- **Electric Sharpener**: Gently insert the pencil and let the sharpener do the work. Hold the pencil steady and avoid pushing too hard.
5. **Check the Point**: Periodically remove the pencil to check the sharpness. A well-sharpened pencil has a smooth, even point without splinters.
6. **Finishing Touches**: If the point is too sharp, gently rub it on a piece of paper to slightly dull it, preventing breakage during use.
7. **Clean Up**: Dispose of shavings properly. If using a manual sharpener, empty the shavings compartment regularly to maintain efficiency.
8. **Maintenance**: Keep the sharpener clean and replace blades when dull to ensure consistent results.
By following these steps, you can achieve a perfectly sharpened pencil, ready for writing or drawing.
What are the best erasers for removing pencil marks?
The best erasers for removing pencil marks are those that effectively lift graphite without damaging the paper. Here are some top choices:
1. **Kneaded Erasers**: These are pliable and can be shaped to erase small details or large areas. They are excellent for artists as they don't leave residue and can be "cleaned" by kneading.
2. **Vinyl Erasers**: Also known as plastic erasers, they are durable and effective for clean erasing. They work well on a variety of paper types and are less likely to tear the paper.
3. **Gum Erasers**: These are softer and crumble as they erase, which helps to avoid paper damage. They are ideal for delicate papers and are often used in art and drafting.
4. **Electric Erasers**: These battery-operated erasers are great for precision work and can remove marks with minimal pressure, reducing the risk of paper damage.
5. **Pencil Erasers**: Attached to the end of pencils, these are convenient for quick corrections. However, quality varies, and they can sometimes smudge or tear paper.
6. **Retractable Erasers**: These are encased in a plastic holder, similar to a mechanical pencil, allowing for precision and cleanliness. They are portable and reduce mess.
7. **Sand Erasers**: Containing fine grit, these are used for stubborn marks or ink. They should be used cautiously as they can abrade the paper.
When choosing an eraser, consider the type of paper and the precision required. For general use, vinyl and kneaded erasers are versatile and reliable. For artists, kneaded and gum erasers offer flexibility and gentleness. Electric erasers are best for detailed work. Always test an eraser on a small area to ensure it meets your needs without damaging your work.
How do I remove ink stains from paper?
To remove ink stains from paper, follow these steps:
1. **Blot the Stain**: Gently blot the ink stain with a clean, dry cloth or paper towel to absorb as much ink as possible. Avoid rubbing, as this can spread the ink.
2. **Use a White Eraser**: Lightly rub a white eraser over the ink stain. This can sometimes lift the ink without damaging the paper.
3. **Apply Rubbing Alcohol**: Dampen a cotton swab with rubbing alcohol and gently dab the ink stain. Test on a small, inconspicuous area first to ensure it doesn't damage the paper. The alcohol can dissolve the ink, making it easier to blot away.
4. **Use Acetone**: If rubbing alcohol doesn't work, try acetone (nail polish remover). Apply it with a cotton swab, but be cautious as it can be harsh on paper.
5. **Try Lemon Juice**: Dab a small amount of lemon juice on the stain using a cotton swab. The acidity can help break down the ink. Blot with a clean cloth.
6. **Use a Bleach Solution**: Mix a very diluted bleach solution (1 part bleach to 10 parts water). Apply sparingly with a cotton swab. This should be a last resort, as bleach can damage paper.
7. **Dry the Paper**: After treatment, allow the paper to air dry completely. Place it between two sheets of clean paper and weigh it down with a book to prevent warping.
8. **Consider Professional Help**: For valuable or irreplaceable documents, consult a professional conservator.
Always test any method on a small, hidden area first to ensure it doesn't cause further damage.
What are the benefits of using oil pastels over crayons?
Oil pastels offer several advantages over crayons, making them a preferred choice for artists seeking vibrant and versatile mediums. Firstly, oil pastels provide richer and more intense colors due to their higher pigment concentration. This results in more vivid and dynamic artwork compared to the often waxy and less saturated appearance of crayons.
Secondly, oil pastels have a creamy, smooth texture that allows for easy blending and layering. Artists can effortlessly create gradients and transitions between colors, enhancing the depth and dimension of their work. In contrast, crayons tend to be harder and less blendable, limiting the range of effects that can be achieved.
Additionally, oil pastels adhere well to a variety of surfaces, including paper, canvas, and wood, offering greater flexibility in artistic expression. Their ability to be used on different textures and materials expands the creative possibilities for artists.
Oil pastels also have a longer lifespan and are more durable than crayons. They resist fading over time, ensuring that artwork retains its original vibrancy. Crayons, on the other hand, can become brittle and lose their color intensity as they age.
Furthermore, oil pastels can be used in combination with other mediums, such as watercolors or acrylics, to create mixed-media pieces. This versatility allows artists to experiment and innovate, pushing the boundaries of traditional art forms.
Lastly, oil pastels are less prone to breaking compared to crayons, which can be fragile and easily snap under pressure. This durability makes oil pastels a more reliable tool for both professional artists and beginners.
In summary, the benefits of using oil pastels over crayons include richer colors, better blending capabilities, versatility across surfaces, durability, and compatibility with other art mediums, making them a superior choice for creating expressive and lasting artwork.
How do I store markers to prevent them from drying out?
To prevent markers from drying out, store them horizontally to ensure the ink is evenly distributed within the barrel, preventing one end from drying out. Keep them capped tightly when not in use to prevent air exposure, which can dry out the ink. Store markers in a cool, dry place away from direct sunlight and heat sources, as excessive heat can cause the ink to evaporate. For markers with dual tips, ensure both caps are securely closed. If possible, store markers in an airtight container or zip-lock bag to minimize air exposure. For water-based markers, occasionally dip the tips in water to maintain moisture. For alcohol-based markers, store them in a cool environment to slow down evaporation. Regularly check and clean the tips to prevent clogging. If a marker starts to dry out, try reviving it by soaking the tip in a small amount of rubbing alcohol or water, depending on the ink type.
What is the best way to organize writing and correction supplies?
To effectively organize writing and correction supplies, start by categorizing items into groups such as pens, pencils, markers, highlighters, erasers, correction fluid, and sticky notes. Use a desk organizer with multiple compartments to keep these categories separate and easily accessible. For pens and pencils, consider using a pen holder or a cup to keep them upright and visible.
Drawer organizers or trays can be used for smaller items like erasers and correction fluid, ensuring they don't get lost among larger supplies. Label each compartment or section to quickly identify where each item belongs, which helps maintain organization over time.
For those with a larger collection of supplies, consider using a tiered desk organizer or a small set of drawers. This allows for vertical storage, saving desk space while keeping items within reach.
If you have a dedicated workspace, a pegboard or wall-mounted organizer can be useful for hanging supplies, especially for items like scissors or tape dispensers. This not only keeps the desk clear but also adds a visual element to the organization.
Regularly declutter and assess your supplies, discarding dried-out pens or empty correction fluid bottles. This ensures that your collection remains functional and organized.
Finally, keep a small, portable pouch or case for essential supplies that you frequently use on the go. This ensures that you have access to necessary items without disrupting the organization of your main workspace.
By implementing these strategies, you can maintain an efficient and tidy workspace, enhancing productivity and creativity.
How do I choose the right correction fluid or tape for my needs?
To choose the right correction fluid or tape, consider the following factors:
1. **Purpose and Usage**: Determine whether you need it for handwritten notes or printed documents. Correction tape is ideal for quick, clean corrections on printed text, while fluid is better for handwritten notes.
2. **Drying Time**: Correction tape offers instant coverage with no drying time, making it suitable for fast-paced environments. Correction fluid requires drying time, which can vary from a few seconds to a minute.
3. **Precision**: For detailed corrections, choose a correction pen or a fine-tipped fluid applicator. Tapes generally offer broader coverage, which is suitable for larger text areas.
4. **Surface Compatibility**: Ensure the product is compatible with the paper type you use. Some fluids may not adhere well to glossy or coated papers.
5. **Color Matching**: Most correction products are white, but if you work with colored paper, look for products that offer color options.
6. **Odor and Safety**: Correction fluids often contain solvents that can emit strong odors. If you are sensitive to smells or work in a shared space, opt for low-odor or solvent-free options.
7. **Environmental Impact**: Consider eco-friendly options, such as refillable correction tapes or fluids with non-toxic ingredients.
8. **Cost and Quantity**: Evaluate how often you need corrections. For frequent use, bulk purchasing or refillable options might be more economical.
9. **Brand and Quality**: Trusted brands often offer better quality and reliability. Read reviews to gauge user satisfaction.
10. **Portability**: If you need to carry it around, choose compact and lightweight options.
By assessing these factors, you can select a correction product that best suits your specific needs and preferences.