Call +(254) 703 030 000 / 751 483 999 / 721 704 777
.....Read More
Frequently Asked Questions
What is the best laminating machine for home use?
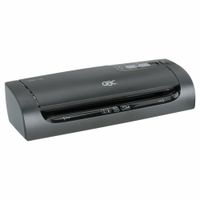
The best laminating machine for home use is the Scotch Thermal Laminator TL901X. This model is highly recommended due to its balance of affordability, ease of use, and reliable performance. It is designed to handle a variety of home projects, from preserving important documents to creating crafts and educational materials.
Key features of the Scotch Thermal Laminator TL901X include:
1. **User-Friendly Design**: The machine is straightforward to operate, making it ideal for users who are new to laminating. It has a simple two-roller system that ensures smooth and even lamination.
2. **Versatility**: It can laminate items up to 9 inches wide, accommodating standard letter-size documents, photos, and smaller items. This versatility makes it suitable for a wide range of home applications.
3. **Heat Settings**: The laminator offers two temperature settings, allowing users to choose the appropriate heat level for different thicknesses of laminating pouches, typically 3 mil and 5 mil.
4. **Quick Warm-Up Time**: The machine heats up in about 5-7 minutes, which is relatively fast for home laminators, allowing users to start their projects without long delays.
5. **Compact and Portable**: Its compact size makes it easy to store and transport, which is ideal for home environments where space might be limited.
6. **Affordability**: The Scotch TL901X is competitively priced, offering excellent value for its features and performance, making it accessible for most home users.
Overall, the Scotch Thermal Laminator TL901X is a reliable and efficient choice for home use, providing the necessary features to handle everyday laminating tasks with ease.
How do I choose the right binding machine for my needs?
To choose the right binding machine, first assess your specific needs. Consider the volume of documents you plan to bind. For low-volume tasks, a manual binding machine may suffice, while high-volume tasks might require an electric or automatic machine for efficiency.
Next, determine the type of binding you prefer. Comb binding is versatile and cost-effective, suitable for reports and presentations. Wire binding offers a professional look, ideal for formal documents. Coil binding is durable and allows pages to lie flat, perfect for manuals and instructional materials. Thermal binding provides a sleek finish, often used for professional reports and proposals.
Consider the document size and capacity. Ensure the machine can handle the maximum number of sheets you need to bind at once. Check the machine's compatibility with different paper sizes, especially if you work with non-standard formats.
Evaluate the ease of use. Look for features like adjustable margin depth, easy-to-load spines, and user-friendly controls. If multiple people will use the machine, simplicity and intuitive operation are crucial.
Budget is another factor. While manual machines are generally cheaper, electric models offer speed and convenience at a higher cost. Balance your budget with the features you need.
Finally, consider the brand and warranty. Opt for reputable brands known for durability and customer support. A good warranty can provide peace of mind and protect your investment.
By assessing these factors—volume, binding type, capacity, ease of use, budget, and brand reputation—you can select a binding machine that meets your specific requirements effectively.
What are the differences between hot and cold laminating?
Hot laminating uses heat-activated adhesive to bond the laminating film to the material. The process involves feeding the document and laminating film through heated rollers, which melt the adhesive, creating a strong, durable bond. This method is ideal for items that require a high level of protection, such as ID cards, menus, and posters. Hot laminating provides a glossy finish and is generally more durable and long-lasting. However, it can be unsuitable for heat-sensitive materials, as the high temperatures may cause damage.
Cold laminating, on the other hand, uses pressure-sensitive adhesive to bond the film to the material. This process does not require heat, making it suitable for heat-sensitive items like photographs, inkjet prints, and certain types of paper. Cold laminating is often used for materials that might be damaged by heat or for quick, temporary applications. It is generally easier and faster to set up, as it does not require warm-up time. The finish can be either glossy or matte, depending on the film used. However, cold laminating may not provide the same level of durability and protection as hot laminating.
In summary, the main differences between hot and cold laminating are the use of heat, the type of adhesive, and the suitability for different materials. Hot laminating offers a more durable finish but is not suitable for heat-sensitive items, while cold laminating is ideal for such items but may not provide the same level of protection.
How do I prevent bubbles when laminating documents?
To prevent bubbles when laminating documents, follow these steps:
1. **Clean the Document**: Ensure the document is free from dust, dirt, or any particles. Use a soft, lint-free cloth to wipe it clean.
2. **Choose the Right Laminating Pouch**: Select a pouch that is slightly larger than the document to ensure complete coverage. Ensure the pouch is of good quality and appropriate thickness for the document.
3. **Preheat the Laminator**: Allow the laminator to fully preheat. Most laminators have an indicator light that signals when they are ready. Using a laminator that is not fully heated can cause uneven adhesion and bubbles.
4. **Align the Document Properly**: Place the document inside the laminating pouch, ensuring it is centered and has equal margins on all sides. Use a flat surface to align the document and pouch.
5. **Use a Carrier Sheet**: If your laminator requires it, use a carrier sheet to protect the laminator and ensure even pressure distribution. This can help prevent bubbles and wrinkles.
6. **Feed the Pouch Correctly**: Insert the sealed edge of the pouch into the laminator first. This helps in guiding the pouch smoothly through the machine and reduces the risk of bubbles.
7. **Apply Even Pressure**: As the document passes through the laminator, ensure it is fed straight and evenly. Avoid pulling or tugging on the pouch.
8. **Cool the Laminated Document**: Once laminated, place the document on a flat surface and allow it to cool under a weight, like a book, to ensure it remains flat and bubble-free.
9. **Check for Bubbles**: If bubbles appear, gently press them out with a soft cloth while the document is still warm.
By following these steps, you can minimize the risk of bubbles and achieve a smooth, professional finish.
What types of binding are available for professional documents?
There are several types of binding available for professional documents, each offering different aesthetics, durability, and functionality:
1. **Saddle Stitching**: This involves folding sheets and stapling them along the spine. It's ideal for booklets, brochures, and small catalogs with a lower page count.
2. **Perfect Binding**: Commonly used for paperback books, this method involves gluing the pages together at the spine with a strong adhesive. It provides a clean, professional look and is suitable for thicker documents.
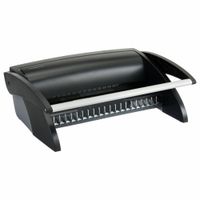
3. **Spiral Binding**: Also known as coil binding, this method uses a plastic or metal coil threaded through holes punched along the edge of the document. It allows the document to lay flat and is often used for notebooks and manuals.
4. **Wire-O Binding**: Similar to spiral binding, but uses a double-loop wire. It offers a more polished appearance and is often used for calendars, reports, and presentations.
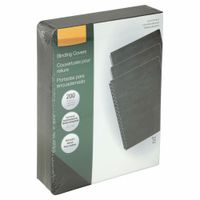
5. **Comb Binding**: This method uses a plastic comb inserted into rectangular holes along the spine. It's cost-effective and allows for easy addition or removal of pages, making it suitable for reports and proposals.
6. **Thermal Binding**: Involves using heat to adhere a glue strip inside a cover to the document's spine. It provides a sleek, book-like finish and is often used for professional reports and presentations.
7. **Velo Binding**: Uses plastic strips and heat to bind documents, creating a secure and tamper-proof finish. It's often used for legal documents and official reports.
8. **Tape Binding**: Involves applying a cloth or paper tape along the spine. It's a simple and quick method, often used for academic papers and reports.
9. **Case Binding**: Also known as hardcover binding, this method involves sewing pages together and attaching them to a rigid cover. It's the most durable option, used for high-quality books and archival documents.
How do I maintain and clean my laminating machine?
To maintain and clean your laminating machine, follow these steps:
1. **Unplug the Machine**: Always ensure the laminator is turned off and unplugged before cleaning to prevent any electrical hazards.
2. **Cool Down**: Allow the machine to cool completely if it has been in use. This prevents burns and ensures safe handling.
3. **Remove Rollers**: If your machine allows, remove the rollers for easier cleaning. Consult the user manual for guidance on how to do this safely.
4. **Clean Rollers**: Use a soft, lint-free cloth slightly dampened with water or a manufacturer-recommended cleaning solution. Gently wipe the rollers to remove adhesive residue and dust. Avoid using sharp objects that could damage the rollers.
5. **Remove Adhesive Residue**: For stubborn adhesive, use a rubber cement eraser or a specialized cleaning card. Run the card through the machine as you would a laminating pouch to pick up residue.
6. **Clean the Exterior**: Wipe the exterior of the machine with a damp cloth to remove dust and fingerprints. Avoid using abrasive cleaners that could damage the surface.
7. **Inspect and Replace Parts**: Regularly check for worn-out parts like belts or gears. Replace them as needed to ensure smooth operation.
8. **Lubricate Moving Parts**: If specified in the manual, apply a small amount of lubricant to moving parts to maintain smooth operation.
9. **Regular Maintenance**: Schedule regular maintenance checks based on usage frequency. This includes checking for any unusual noises or operational issues.
10. **Store Properly**: When not in use, cover the machine to protect it from dust and debris.
By following these steps, you can extend the life of your laminating machine and ensure it operates efficiently.
What thickness of laminating pouches should I use?
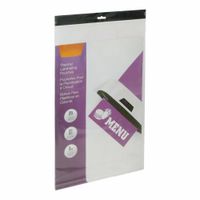
The thickness of laminating pouches is measured in microns or mils, with common options being 3 mil, 5 mil, 7 mil, and 10 mil. The choice depends on the intended use and desired durability:
1. **3 Mil (75 Microns):** Ideal for documents that need basic protection from spills and light handling, such as temporary signs, menus, or certificates. They are flexible and easy to handle but offer minimal rigidity.
2. **5 Mil (125 Microns):** Suitable for items that require moderate protection and are handled more frequently, like ID cards, instructional materials, or frequently used documents. They provide a balance between flexibility and durability.
3. **7 Mil (175 Microns):** Best for documents that need to withstand frequent handling and require more rigidity, such as educational materials, posters, or frequently referenced documents. They offer increased protection against wear and tear.
4. **10 Mil (250 Microns):** Provides the highest level of protection and rigidity, ideal for items that need to be extremely durable, such as luggage tags, outdoor signs, or heavily used reference materials. They are less flexible but offer superior protection.
Consider the following factors when choosing the thickness:
- **Frequency of Use:** Thicker pouches are better for items that are handled often.
- **Environment:** For outdoor or harsh environments, thicker pouches offer better protection.
- **Storage:** If space is a concern, thinner pouches are more compact.
- **Cost:** Thicker pouches are generally more expensive.
Ultimately, the choice of thickness should align with the specific needs of the document and its intended use.
Can I laminate documents with inkjet prints?
Yes, you can laminate documents with inkjet prints, but there are some considerations to ensure the best results. Inkjet prints are susceptible to smudging and running when exposed to moisture or heat, which can occur during the lamination process. To prevent this, follow these steps:
1. **Drying Time**: Allow the inkjet prints to dry completely before laminating. This can take anywhere from a few minutes to a few hours, depending on the type of paper and ink used. Ensuring the ink is fully dry will minimize the risk of smudging.
2. **Paper Type**: Use high-quality paper designed for inkjet printing. This type of paper is more likely to absorb the ink properly, reducing the risk of smudging during lamination.
3. **Lamination Temperature**: Use a laminator with adjustable temperature settings. Lower temperatures are preferable for inkjet prints to prevent the ink from running. If your laminator has a cold setting, consider using cold lamination pouches, which do not require heat and are safer for inkjet prints.
4. **Test First**: Before laminating important documents, test the process with a sample print to ensure that the ink does not smudge or run. This will help you adjust the settings as needed.
5. **Lamination Pouches**: Choose high-quality lamination pouches that are compatible with your laminator. Thicker pouches provide better protection and are less likely to cause issues with inkjet prints.
6. **Handling**: Handle the prints carefully to avoid fingerprints or smudges before lamination. Use clean hands or gloves to maintain the quality of the print.
By following these guidelines, you can successfully laminate inkjet prints without damaging the document, preserving its quality and longevity.
How do I fix a jammed binding machine?
1. **Turn Off and Unplug**: Ensure the binding machine is turned off and unplugged to prevent any electrical hazards.
2. **Identify the Jam**: Open the machine's cover to locate the jam. Check the paper path, punch dies, and binding area for any obstructions.
3. **Remove Obstructions**: Carefully remove any stuck paper or binding materials. Use tweezers or a similar tool if necessary, being cautious not to damage the machine.
4. **Check Punch Dies**: If the punch dies are jammed, gently move them back to their original position. Some machines have a release lever or button to reset the dies.
5. **Inspect the Rollers**: If the rollers are jammed, check for any debris or misaligned materials. Clean the rollers with a soft cloth if needed.
6. **Lubricate Moving Parts**: Apply a small amount of machine oil to the moving parts if they seem stiff or resistant. This can help prevent future jams.
7. **Reassemble and Test**: Once the jam is cleared, reassemble any parts you removed. Plug the machine back in and test it with a single sheet of paper to ensure it operates smoothly.
8. **Consult the Manual**: If the jam persists, refer to the machine’s manual for specific troubleshooting steps or contact the manufacturer for support.
9. **Regular Maintenance**: To prevent future jams, regularly clean and maintain the machine according to the manufacturer’s guidelines.
What are the benefits of using a laminating machine for business cards?
Using a laminating machine for business cards offers several benefits:
1. **Durability**: Laminating business cards protects them from wear and tear, making them more resistant to creases, tears, and other physical damage. This ensures that the cards remain in pristine condition for a longer period.
2. **Water Resistance**: Laminated cards are protected against moisture and spills, which can be particularly beneficial in environments where exposure to liquids is a risk.
3. **Enhanced Appearance**: The lamination process gives business cards a glossy or matte finish, enhancing their visual appeal. This professional look can make a strong impression on clients and partners.
4. **Color Protection**: Lamination helps preserve the vibrancy of the card's colors, preventing them from fading over time due to exposure to sunlight or other environmental factors.
5. **Stain Resistance**: Laminated surfaces are easier to clean and are less likely to absorb stains from dirt, oils, or other substances, maintaining a clean and professional appearance.
6. **Rigidity**: Laminated cards are stiffer, which can make them feel more substantial and high-quality when handed out, potentially leaving a better impression.
7. **Customization**: Laminating machines allow for the addition of special features such as holographic overlays or custom textures, which can make business cards stand out.
8. **Cost-Effective**: While there is an initial investment in a laminating machine, the long-term benefits of protecting and enhancing business cards can outweigh the costs, especially for businesses that frequently distribute cards.
9. **Versatility**: Laminating machines can be used for other business materials, such as menus, signs, and promotional materials, providing additional value beyond just business cards.
10. **Professionalism**: A well-laminated business card reflects attention to detail and professionalism, which can positively influence how a business is perceived.