Call +(254) 703 030 000 / 751 483 999 / 721 704 777
- Home
- Office Supplies
- Boards Easels
- Dry Erase Boards Sheets
.....Read More
Frequently Asked Questions
What are the best cleaning supplies for maintaining dry-erase boards?
The best cleaning supplies for maintaining dry-erase boards include:
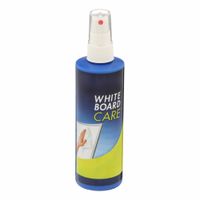
1. **Dry-Erase Board Cleaner**: Specially formulated sprays are designed to remove ink residue and prevent ghosting. Brands like Expo offer effective solutions.
2. **Microfiber Cloths**: These are ideal for wiping down boards without scratching the surface. They effectively pick up ink particles and can be washed and reused.
3. **Whiteboard Erasers**: High-quality erasers are essential for daily use. Felt erasers are common, but some prefer magnetic erasers that attach to the board for convenience.
4. **Isopropyl Alcohol**: A solution of 70% isopropyl alcohol can be used for deep cleaning. It effectively removes stubborn stains and ghosting.
5. **Vinegar and Water Solution**: A natural alternative, a mixture of equal parts vinegar and water can clean the board without harsh chemicals.
6. **Melamine Foam Erasers**: Also known as magic erasers, these can remove tough stains and ghosting. Use them sparingly to avoid wearing down the board surface.
7. **Paper Towels**: Useful for applying cleaning solutions and wiping the board dry. Opt for lint-free options to avoid leaving fibers behind.
8. **Whiteboard Conditioner**: Periodic use of a conditioner can help maintain the board’s surface, reducing ghosting and improving erasability.
9. **Lint-Free Cloths**: For a streak-free finish, use lint-free cloths after cleaning to polish the board.
10. **Regular Maintenance**: Regularly cleaning the board with appropriate supplies prevents buildup and extends the board’s lifespan.
Using these supplies ensures that dry-erase boards remain clean, legible, and in good condition, enhancing their usability and longevity.
How do you install a wall-mounted dry-erase board?
1. **Choose Location**: Select a flat, accessible wall area at a comfortable height for writing and visibility.
2. **Gather Tools and Materials**: You’ll need a drill, level, measuring tape, pencil, screwdriver, wall anchors, screws, and a stud finder.
3. **Mark the Position**: Use the measuring tape to determine the board’s desired height and width. Mark the top edge and corners with a pencil.
4. **Find Studs**: Use the stud finder to locate wall studs within the marked area. Mark their positions. If no studs are available, plan to use wall anchors.
5. **Align the Board**: Hold the board against the wall, aligning it with your pencil marks. Use the level to ensure it’s straight.
6. **Mark Drill Holes**: Through the board’s mounting holes, mark the wall where you’ll drill. Ensure at least two holes align with studs for stability.
7. **Drill Holes**: Drill pilot holes at the marked spots. If using wall anchors, drill holes slightly smaller than the anchors.
8. **Insert Wall Anchors**: If needed, insert wall anchors into the drilled holes, tapping them flush with the wall.
9. **Mount the Board**: Position the board over the holes. Insert screws through the board’s mounting holes into the wall anchors or studs. Use a screwdriver or drill to tighten.
10. **Check Stability**: Ensure the board is securely fastened and doesn’t wobble. Tighten screws if necessary.
11. **Final Adjustments**: Double-check the board’s level and make any necessary adjustments.
12. **Clean Surface**: Wipe the board with a dry cloth to remove any installation dust.
Your dry-erase board is now ready for use.
What are the benefits of using mobile dry-erase boards?
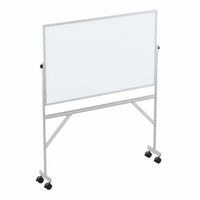
Mobile dry-erase boards offer several benefits that enhance flexibility, collaboration, and efficiency in various settings such as offices, classrooms, and workshops.
1. **Portability**: These boards are equipped with wheels, allowing easy movement from one location to another. This mobility facilitates dynamic work environments where teams can gather around the board in different spaces as needed.
2. **Space Efficiency**: Mobile dry-erase boards can be moved and stored easily, making them ideal for environments with limited space. They can be brought out for use and then tucked away when not needed, optimizing the use of available space.
3. **Versatility**: They can be used for a variety of purposes, including brainstorming sessions, presentations, teaching, and project management. Many models are double-sided, providing additional writing space and functionality.
4. **Enhanced Collaboration**: By being easily movable, these boards encourage group interaction and collaboration. Teams can gather around the board to discuss ideas, make plans, and solve problems collectively, fostering a more interactive and engaging environment.
5. **Cost-Effective**: Investing in mobile dry-erase boards can be more economical than installing multiple fixed boards. Their versatility and reusability make them a cost-effective solution for many organizations.
6. **Improved Communication**: Visual aids are powerful tools for communication. Mobile dry-erase boards allow for the quick illustration of ideas, making complex information more accessible and understandable.
7. **Eco-Friendly**: Unlike paper-based methods, dry-erase boards are reusable, reducing the need for paper and contributing to environmental sustainability.
8. **Customization**: Many mobile boards come with features like magnetic surfaces, grid lines, or corkboard sections, allowing for tailored use according to specific needs.
Overall, mobile dry-erase boards are a practical and versatile tool that can significantly enhance productivity and communication in various settings.
How do specialty dry-erase boards simplify tasks and tracking?
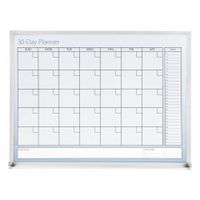
Specialty dry-erase boards simplify tasks and tracking by offering customizable and reusable surfaces tailored to specific needs. These boards often come with pre-printed templates, grids, or sections designed for particular tasks, such as project management, scheduling, or inventory tracking, which streamline organization and enhance efficiency. By providing a clear visual representation of tasks, deadlines, and progress, they help users prioritize and manage workloads effectively.
The erasable nature of these boards allows for easy updates and modifications, reducing the clutter and waste associated with paper-based systems. This flexibility supports dynamic environments where tasks and priorities frequently change, enabling quick adjustments without the need for new materials. Additionally, the ability to color-code information using different markers enhances clarity and aids in distinguishing between various tasks or categories at a glance.
Specialty dry-erase boards also facilitate collaboration and communication within teams. They serve as central hubs for information sharing, ensuring all team members are aligned and informed about current statuses and upcoming deadlines. This visibility fosters accountability and encourages proactive problem-solving, as team members can easily identify bottlenecks or areas requiring attention.
Moreover, these boards can be mounted in strategic locations, making them accessible and visible to all relevant parties, which minimizes the time spent searching for information and increases productivity. The tactile interaction with the board can also enhance memory retention and engagement, as physically writing and erasing can reinforce information more effectively than digital alternatives.
In summary, specialty dry-erase boards simplify tasks and tracking by providing organized, flexible, and collaborative platforms that enhance visibility, efficiency, and communication, ultimately leading to improved task management and productivity.
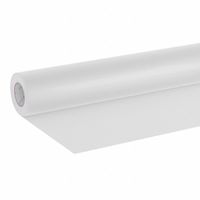
What are the advantages of using dry-erase sheets over traditional boards?
Dry-erase sheets offer several advantages over traditional boards:
1. **Portability**: Dry-erase sheets are lightweight and flexible, making them easy to transport and set up in various locations. This is particularly beneficial for educators, business professionals, or anyone who needs a mobile solution for presentations or teaching.
2. **Space Efficiency**: They can be applied to any flat surface, including walls, tables, or doors, allowing for efficient use of space. This is ideal for small rooms or offices where a traditional board might be too bulky.
3. **Cost-Effectiveness**: Generally, dry-erase sheets are more affordable than traditional boards. They eliminate the need for expensive installations and can be replaced easily if damaged.
4. **Ease of Installation**: Most dry-erase sheets come with adhesive backing, making them simple to install without the need for tools or professional help. This ease of setup is convenient for temporary or permanent use.
5. **Versatility**: They can be cut to size, allowing customization to fit specific needs or spaces. This adaptability makes them suitable for a variety of applications, from personal planners to large-scale brainstorming sessions.
6. **Aesthetic Appeal**: Available in various colors and designs, dry-erase sheets can blend seamlessly with interior decor, offering a more visually appealing option compared to traditional whiteboards.
7. **Maintenance**: They are easy to clean and maintain, often requiring just a simple wipe with a dry or damp cloth. This ease of maintenance ensures longevity and consistent performance.
8. **Environmental Impact**: Some dry-erase sheets are made from recyclable materials, offering a more environmentally friendly option compared to traditional boards, which may involve more resource-intensive manufacturing processes.
How can I prevent ghosting on dry-erase boards?
To prevent ghosting on dry-erase boards, follow these steps:
1. **Use Quality Markers**: Invest in high-quality, low-odor dry-erase markers. Cheaper markers often leave more residue, which can lead to ghosting.
2. **Regular Cleaning**: Clean the board regularly with a dry-erase board cleaner or a mixture of water and a few drops of mild dish soap. Avoid using abrasive cleaners or cloths that can damage the board's surface.
3. **Avoid Permanent Markers**: Ensure only dry-erase markers are used on the board. If a permanent marker is accidentally used, trace over it with a dry-erase marker and wipe it off immediately.
4. **Use a Microfiber Cloth**: Wipe the board with a microfiber cloth instead of paper towels or tissues, which can leave lint and contribute to ghosting.
5. **Condition the Board**: Occasionally condition the board by applying a thin layer of a board conditioner or a small amount of baby oil, then wipe it off. This can help maintain the board's surface.
6. **Avoid Prolonged Writing**: Do not leave writing on the board for extended periods. The longer the ink stays on the board, the more likely it is to leave a stain.
7. **Use a Whiteboard Eraser**: Use a dedicated whiteboard eraser for cleaning. Replace it when it becomes saturated with ink.
8. **Test New Products**: Before using new cleaning products or markers, test them on a small, inconspicuous area of the board to ensure they do not cause damage or ghosting.
9. **Maintain Humidity Levels**: Keep the room at a moderate humidity level, as very dry conditions can make ghosting worse.
By following these practices, you can significantly reduce the occurrence of ghosting on your dry-erase board.
What are the best practices for effectively communicating messages using dry-erase boards?
1. **Clarity and Simplicity**: Use clear, concise language and simple visuals. Avoid cluttering the board with too much information. Stick to key points and essential details.
2. **Organized Layout**: Structure the content logically. Use headings, bullet points, and numbering to guide the audience through the information. Group related items together.
3. **Legible Writing**: Write in large, clear letters. Use block letters if necessary to ensure readability from a distance. Maintain consistent spacing between words and lines.
4. **Color Coding**: Utilize different colors to differentiate between topics, highlight important information, or categorize data. Limit the palette to avoid confusion.
5. **Visual Aids**: Incorporate diagrams, charts, and symbols to complement text. Visuals can enhance understanding and retention of information.
6. **Engagement**: Involve the audience by asking questions or inviting them to contribute to the board. This interaction can increase engagement and comprehension.
7. **Erasability**: Regularly clean the board to maintain a clear surface. Erase unnecessary or outdated information promptly to avoid confusion.
8. **Preparation**: Plan the layout and content in advance. Practice writing and drawing to ensure smooth delivery during the presentation.
9. **Feedback**: Encourage feedback from the audience to ensure the message is understood. Adjust the presentation style based on their responses.
10. **Accessibility**: Ensure the board is positioned at an appropriate height and angle for all viewers. Consider the lighting to avoid glare and shadows.
11. **Consistency**: Use consistent symbols, colors, and terminology throughout the presentation to reinforce the message and aid memory.
12. **Time Management**: Allocate time wisely to cover all points without rushing. Prioritize key messages to ensure they are communicated effectively.
