Call +(254) 703 030 000 / 751 483 999 / 721 704 777
.....Read More
Frequently Asked Questions
What are the benefits of installing security lights?
Installing security lights offers several benefits:
1. **Deterrence of Criminal Activity**: Bright lights can deter potential intruders by eliminating dark areas where they might hide. Criminals are less likely to target well-lit properties due to the increased risk of being seen.
2. **Enhanced Safety**: Security lights illuminate pathways, driveways, and entrances, reducing the risk of accidents and falls. This is particularly beneficial for residents and visitors navigating the property at night.
3. **Increased Visibility**: Improved visibility allows homeowners to identify visitors or potential threats from a distance. This can be crucial for recognizing familiar faces or suspicious activity.
4. **Peace of Mind**: Knowing that your property is well-lit can provide a sense of security and peace of mind, especially during nighttime or when you are away from home.
5. **Improved Surveillance**: Security cameras work more effectively in well-lit areas. Adequate lighting ensures that cameras capture clear footage, which can be vital for identifying intruders or incidents.
6. **Aesthetic Appeal**: Well-placed security lights can enhance the aesthetic appeal of a property, highlighting architectural features and landscaping, thereby increasing curb appeal.
7. **Increased Property Value**: Homes with security features, including lighting, are often more attractive to potential buyers, potentially increasing property value.
8. **Energy Efficiency**: Modern security lights, such as LED options, are energy-efficient and can be equipped with motion sensors to activate only when needed, reducing electricity costs.
9. **Community Safety**: When multiple homes in a neighborhood have security lighting, it contributes to overall community safety, creating a safer environment for all residents.
10. **Customizable Options**: Security lighting systems can be tailored to specific needs, with options for motion detection, timers, and remote control, providing flexibility and convenience.
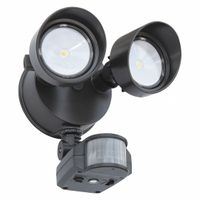
How do motion sensor security lights work?
Motion sensor security lights work by detecting movement within a specific area and automatically turning on the lights to illuminate the space. These systems typically use passive infrared (PIR) sensors, which detect changes in infrared radiation levels. All objects emit some level of infrared radiation, and when a warm object, like a human or animal, moves within the sensor's field of view, it causes a change in the infrared energy detected by the sensor.
The PIR sensor is composed of a pyroelectric sensor that can detect levels of infrared radiation. It is usually divided into two halves, each sensitive to infrared radiation. When the sensor is idle, both halves detect the same amount of infrared radiation. However, when a warm object moves across the sensor's field, it causes a change in the infrared radiation detected by one half of the sensor, triggering the light to turn on.
These sensors are often paired with a Fresnel lens, which helps focus the infrared signals onto the sensor and increases the detection range. The motion sensor is connected to a light fixture, and when motion is detected, it sends a signal to the light to turn on. The lights typically remain on for a pre-set duration, which can be adjusted by the user, before automatically turning off if no further motion is detected.
Some advanced models may also include features like adjustable sensitivity, range settings, and daylight sensors to prevent the lights from activating during daylight hours. These features help conserve energy and reduce unnecessary activation. Motion sensor security lights are commonly used for outdoor security, providing illumination and deterring potential intruders.
What is the best placement for outdoor security lights?
The best placement for outdoor security lights involves strategic positioning to maximize coverage and effectiveness while minimizing blind spots and light pollution. Here are key considerations:
1. **Entry Points**: Place lights near all entry points, including front and back doors, garage doors, and any side entrances. This deters intruders and provides visibility for residents.
2. **Pathways and Driveways**: Illuminate pathways and driveways to ensure safe navigation and deter potential intruders. Use path lights or bollard lights for even coverage.
3. **Dark Corners and Blind Spots**: Identify and illuminate dark corners and blind spots around the property where intruders might hide. Motion-activated lights are effective in these areas.
4. **Perimeter and Fencing**: Install lights along the perimeter of the property and on fences to create a boundary of light. This can include floodlights or wall-mounted lights.
5. **Garages and Sheds**: Ensure that detached structures like garages and sheds are well-lit to prevent unauthorized access.
6. **Landscaping Features**: Use uplights or spotlights to illuminate large trees or landscaping features, which can also serve as hiding spots for intruders.
7. **Height and Angle**: Mount lights high enough to prevent tampering but angled downward to cover the intended area without causing glare or light pollution.
8. **Motion Sensors and Timers**: Utilize motion sensors to activate lights only when movement is detected, conserving energy and alerting you to activity. Timers can ensure lights are on during peak hours of darkness.
9. **Cameras and Lights Integration**: Integrate lights with security cameras for enhanced surveillance. Lights can improve camera visibility and deter intruders.
10. **Neighborhood and Regulations**: Consider neighborhood aesthetics and local regulations to avoid disputes and ensure compliance with lighting ordinances.
By strategically placing outdoor security lights, you enhance safety, deter crime, and improve the overall security of your property.
How can I prevent false triggers in motion sensor lights?
To prevent false triggers in motion sensor lights, consider the following strategies:
1. **Adjust Sensitivity Settings**: Most motion sensors have adjustable sensitivity settings. Lower the sensitivity to reduce the range and prevent small animals or distant movements from triggering the light.
2. **Correct Placement**: Install the sensor at an appropriate height and angle. Avoid placing it near heat sources, air vents, or in direct sunlight, as these can cause false triggers.
3. **Use of Shields or Covers**: Install shields or covers to limit the sensor's field of view. This can help focus the detection area and prevent triggers from unwanted directions.
4. **Select the Right Sensor Type**: Choose a sensor that suits your environment. Passive Infrared (PIR) sensors are less likely to trigger falsely from non-heat sources, while dual-technology sensors combine PIR with microwave or ultrasonic sensors for more accurate detection.
5. **Environmental Considerations**: Trim nearby vegetation that might move with the wind and trigger the sensor. Ensure that the sensor is not facing areas with frequent movement, like roads or sidewalks.
6. **Regular Maintenance**: Clean the sensor regularly to remove dust, cobwebs, or debris that might interfere with its operation.
7. **Time Delay Adjustments**: Set an appropriate time delay for the light to stay on after activation. A shorter delay can help reduce the impact of false triggers.
8. **Firmware Updates**: If applicable, ensure the sensor's firmware is up-to-date to benefit from improvements and bug fixes.
9. **Use of Zones**: Some advanced sensors allow you to set detection zones. Configure these zones to focus on specific areas and ignore others.
Implementing these measures can significantly reduce false triggers, ensuring that your motion sensor lights operate efficiently and effectively.
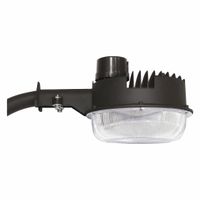
What are the differences between LED and halogen security lights?
LED and halogen security lights differ in several key aspects:
1. **Energy Efficiency**: LEDs are significantly more energy-efficient than halogen lights. They convert a higher percentage of electricity into light, reducing energy consumption and lowering electricity bills.
2. **Lifespan**: LED lights have a much longer lifespan, often lasting up to 25,000 to 50,000 hours, compared to halogen lights, which typically last around 2,000 to 4,000 hours.
3. **Heat Emission**: LEDs emit very little heat, making them safer and more efficient. Halogen lights, on the other hand, produce a lot of heat, which can be a safety hazard and lead to higher cooling costs.
4. **Brightness and Light Quality**: Both LEDs and halogens can provide bright light, but LEDs offer a range of color temperatures and are available in various brightness levels. Halogens generally emit a warm, yellowish light.
5. **Durability**: LEDs are more durable and resistant to shock and vibration, making them suitable for outdoor security lighting. Halogen bulbs are more fragile and can break more easily.
6. **Environmental Impact**: LEDs are more environmentally friendly as they consume less energy and have a longer lifespan, reducing waste. Halogens contain more materials that can be harmful if not disposed of properly.
7. **Cost**: While the initial cost of LED lights is higher, their energy efficiency and longevity make them more cost-effective in the long run. Halogen lights are cheaper upfront but incur higher operating costs over time.
8. **Instant Lighting**: LEDs provide instant full brightness when turned on, whereas halogens may take a moment to reach full brightness.
9. **Dimming Capability**: Both LEDs and halogens can be dimmed, but LEDs require compatible dimmers to function properly.
Overall, LEDs are generally preferred for security lighting due to their efficiency, longevity, and lower environmental impact.
How do I install outdoor security lights?
1. **Plan the Installation**: Determine the areas you want to illuminate and choose the appropriate type of security lights (e.g., motion sensor, floodlights). Ensure you have access to a power source.
2. **Gather Tools and Materials**: You will need a ladder, drill, screwdriver, wire stripper, electrical tape, voltage tester, and the security light kit. Ensure you have the correct bulbs if not included.
3. **Turn Off Power**: Locate the circuit breaker for the area where you will install the lights and turn it off to ensure safety.
4. **Mount the Fixture**: Use a ladder to reach the installation point. Drill holes and attach the mounting bracket that comes with the light fixture. Ensure it is securely fastened.
5. **Wire the Light**: Use a voltage tester to confirm the power is off. Connect the wires from the light fixture to the existing electrical wires. Typically, connect black to black (hot), white to white (neutral), and green or bare copper to the ground wire. Use wire nuts to secure connections and wrap them with electrical tape.
6. **Attach the Light Fixture**: Secure the light fixture to the mounting bracket. Ensure it is tightly fastened and adjust the angle of the lights as needed.
7. **Install Bulbs**: If the bulbs are not pre-installed, insert the correct type of bulbs into the fixture.
8. **Test the Lights**: Turn the power back on at the circuit breaker. Test the lights to ensure they work properly. Adjust the motion sensor settings if applicable.
9. **Seal and Weatherproof**: Apply silicone caulk around the fixture to prevent water ingress and ensure longevity.
10. **Final Adjustments**: Make any necessary adjustments to the light angle and sensor sensitivity to cover the desired area effectively.
How can I maintain and troubleshoot security lights?
To maintain and troubleshoot security lights, follow these steps:
1. **Regular Inspection**: Check lights monthly for damage, dirt, or obstructions. Ensure lenses are clean for optimal brightness.
2. **Clean Fixtures**: Use a soft cloth and mild detergent to clean lenses and fixtures. Avoid abrasive materials that can scratch surfaces.
3. **Check Bulbs**: Replace burnt-out bulbs promptly. Use the correct wattage and type as specified by the manufacturer.
4. **Test Sensors**: Regularly test motion sensors by walking in their range. Adjust sensitivity settings if they fail to detect movement or trigger unnecessarily.
5. **Inspect Wiring**: Look for frayed or exposed wires. Ensure connections are secure. If you find damage, consider hiring a professional electrician.
6. **Check Timers and Settings**: Ensure timers are set correctly, especially after power outages. Adjust settings for seasonal changes in daylight.
7. **Battery Maintenance**: For battery-operated lights, replace batteries annually or as needed. Use high-quality batteries for longer life.
8. **Weatherproofing**: Ensure all seals and gaskets are intact to prevent water ingress. Apply weatherproof sealant if necessary.
9. **Test Power Supply**: Verify that the power source is functioning. Check circuit breakers and fuses if lights are not working.
10. **Adjust Positioning**: Ensure lights are angled correctly to cover desired areas without causing glare or light pollution.
11. **Professional Inspection**: Schedule annual inspections by a professional to ensure all components are functioning correctly and safely.
12. **Document Issues**: Keep a log of maintenance and issues to identify patterns or recurring problems.
By following these steps, you can ensure your security lights remain effective and reliable, enhancing safety and security around your property.