Call +(254) 703 030 000 / 751 483 999 / 721 704 777
Showing 0 products
Frequently Asked Questions
What are the essential parts of a flashlight?
A flashlight, a portable hand-held electric light, consists of several essential components that work together to produce light. These parts include:
1. **Light Source**: Traditionally, flashlights used incandescent bulbs, but modern flashlights predominantly use LEDs (Light Emitting Diodes) due to their efficiency, longevity, and brightness.
2. **Reflector**: Positioned around or behind the light source, the reflector is usually made of polished metal or coated plastic. It directs and focuses the light into a beam, enhancing the flashlight's range and intensity.
3. **Lens**: The lens covers the light source and reflector, protecting them from dust and damage. It is typically made of clear plastic or glass and can be designed to further focus or diffuse the light beam.
4. **Battery**: The power source for the flashlight, batteries can be disposable (alkaline) or rechargeable (lithium-ion, nickel-metal hydride). The battery's capacity and type significantly affect the flashlight's runtime and brightness.
5. **Switch**: The switch controls the flow of electricity from the battery to the light source. It can be a simple on/off mechanism or a more complex system allowing for different modes (e.g., high, low, strobe).
6. **Circuitry**: This includes the wiring and electronic components that regulate the power from the battery to the light source, ensuring optimal performance and efficiency.
7. **Body**: The flashlight's casing, usually made of plastic, aluminum, or stainless steel, houses all the components. It is designed to be durable, often water-resistant or waterproof, and ergonomically shaped for easy handling.
8. **Bezel**: The front part of the flashlight, which holds the lens and reflector in place. It can sometimes be unscrewed to replace the lens or clean the interior.
These components work in unison to provide a reliable and efficient source of portable light.
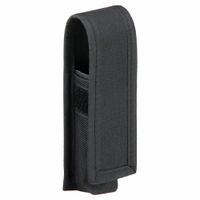
How do I choose the right flashlight holster or case?
To choose the right flashlight holster or case, consider the following factors:
1. **Size and Compatibility**: Ensure the holster fits your flashlight model. Check dimensions and compatibility with your flashlight's length, diameter, and shape.
2. **Material**: Opt for durable materials like nylon, leather, or Kydex. Nylon is lightweight and flexible, leather offers a classic look and durability, while Kydex provides rigidity and protection.
3. **Attachment Method**: Choose a holster with a secure attachment method that suits your needs, such as belt loops, clips, or MOLLE compatibility for tactical gear.
4. **Closure Type**: Consider the closure mechanism—Velcro, snap, or buckle. Velcro offers quick access, snaps provide security, and buckles offer a balance of both.
5. **Accessibility**: Ensure the holster allows easy access to the flashlight. Consider open-top designs for quick retrieval or closed designs for added security.
6. **Retention**: Look for features that keep the flashlight secure, such as adjustable retention straps or molded designs that hold the flashlight snugly.
7. **Weather Resistance**: If you’ll be using the flashlight outdoors, choose a holster with weather-resistant properties to protect against rain and moisture.
8. **Comfort and Ergonomics**: Consider the weight and comfort of carrying the holster for extended periods. Padded or contoured designs can enhance comfort.
9. **Brand and Reviews**: Research reputable brands and read customer reviews to gauge quality and user satisfaction.
10. **Price**: Balance cost with features and quality. A higher price often reflects better materials and construction.
By evaluating these factors, you can select a flashlight holster or case that meets your specific needs and preferences.
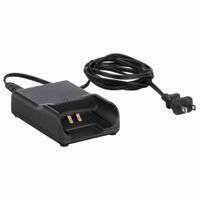
What type of charger is best for my rechargeable flashlight batteries?
The best charger for your rechargeable flashlight batteries depends on the type of batteries you are using. Here are some guidelines:
1. **NiMH (Nickel-Metal Hydride) Batteries**: Use a smart charger specifically designed for NiMH batteries. These chargers prevent overcharging by detecting when the battery is fully charged and switching to a trickle charge or shutting off. Look for features like individual charging channels, which allow you to charge batteries of different capacities simultaneously, and a refresh function to maintain battery health.
2. **Li-ion (Lithium-ion) Batteries**: Choose a charger that is compatible with the specific voltage and size of your Li-ion batteries (e.g., 18650, 14500). A smart charger with overcharge protection, short-circuit protection, and temperature monitoring is ideal. Some chargers offer USB compatibility for convenience and portability.
3. **NiCd (Nickel-Cadmium) Batteries**: Although less common, if you use NiCd batteries, select a charger that can handle the memory effect associated with these batteries. A charger with a discharge function can help maintain battery performance.
4. **Universal Chargers**: If you use multiple types of batteries, consider a universal charger that can handle NiMH, Li-ion, and NiCd batteries. Ensure it has the appropriate safety features and can automatically adjust to the correct charging mode for each battery type.
5. **Additional Features**: Look for chargers with LED indicators or LCD screens to monitor charging status. Some advanced models offer USB output for charging other devices, and fast-charging capabilities for quicker turnaround.
Always ensure the charger is from a reputable brand and matches the specifications of your batteries to ensure safety and longevity.
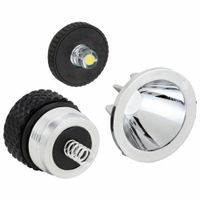
How do I replace a flashlight bulb or light module?
To replace a flashlight bulb or light module, follow these steps:
1. **Identify the Type**: Determine if your flashlight uses a traditional bulb or an LED module. Check the user manual or the manufacturer's website for specifics.
2. **Gather Tools and Parts**: Obtain the correct replacement bulb or LED module. You may need a screwdriver if the flashlight requires disassembly.
3. **Safety First**: Ensure the flashlight is turned off and remove the batteries to prevent any electrical hazards.
4. **Disassemble the Flashlight**:
- For most flashlights, unscrew the head or the tail cap. Some models may require you to unscrew the body.
- If screws are present, use a screwdriver to carefully remove them.
5. **Remove the Old Bulb/Module**:
- For traditional bulbs, gently pull or unscrew the bulb from its socket.
- For LED modules, you may need to disconnect wires or unscrew the module.
6. **Install the New Bulb/Module**:
- Insert the new bulb into the socket or connect the new LED module, ensuring it is securely in place.
- If wires are involved, connect them as per the original configuration.
7. **Reassemble the Flashlight**:
- Carefully reattach the head, tail cap, or body, ensuring all parts are aligned and secured.
- Replace any screws that were removed.
8. **Test the Flashlight**:
- Reinsert the batteries, ensuring correct polarity.
- Turn on the flashlight to check if the new bulb or module is functioning properly.
9. **Dispose of the Old Bulb/Module**: Follow local regulations for disposing of electronic waste or bulbs.
10. **Maintenance**: Regularly check and clean the flashlight to ensure longevity and optimal performance.
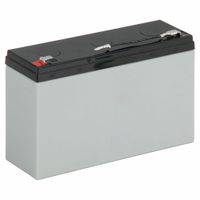
What are the benefits of using rechargeable battery packs for flashlights?
Rechargeable battery packs for flashlights offer several benefits:
1. **Cost-Effectiveness**: Over time, rechargeable batteries are more economical than disposable ones. Although the initial investment is higher, they can be recharged hundreds of times, reducing the need for frequent replacements.
2. **Environmental Impact**: Rechargeable batteries reduce waste and environmental pollution. Fewer batteries are discarded, decreasing the number of toxic materials like lead and cadmium entering landfills.
3. **Convenience**: Rechargeable batteries eliminate the need to constantly purchase new batteries. They can be recharged using various methods, including USB ports, solar chargers, or dedicated charging stations, making them versatile and easy to maintain.
4. **Performance Consistency**: Rechargeable batteries often provide a more stable voltage output, ensuring consistent flashlight performance. This is particularly beneficial for high-drain devices like powerful LED flashlights.
5. **Long-Term Reliability**: Many rechargeable batteries, such as lithium-ion, have a low self-discharge rate, meaning they retain their charge longer when not in use. This reliability is crucial for emergency preparedness.
6. **High Energy Density**: Rechargeable batteries, especially lithium-ion types, have a high energy density, allowing for longer usage times between charges compared to traditional alkaline batteries.
7. **Advanced Technology**: Rechargeable batteries often incorporate advanced technology, such as built-in protection circuits to prevent overcharging, overheating, and short-circuiting, enhancing safety and longevity.
8. **Sustainability**: Using rechargeable batteries supports sustainable practices by reducing the demand for raw materials needed to produce disposable batteries.
9. **Versatility**: Many rechargeable battery packs are designed to be compatible with multiple devices, not just flashlights, increasing their utility and value.
Overall, rechargeable battery packs offer a blend of economic, environmental, and practical advantages, making them a superior choice for flashlight power.
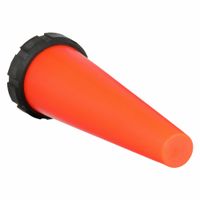
How can I convert my flashlight into a traffic baton or warning light?
To convert your flashlight into a traffic baton or warning light, follow these steps:
1. **Materials Needed**:
- A flashlight with a detachable head or lens.
- A translucent colored cone (red or orange is ideal).
- Reflective tape (optional).
- Adhesive or Velcro strips.
2. **Select the Cone**:
- Purchase a traffic wand attachment or use a translucent plastic cone. Ensure it fits snugly over the flashlight's head.
3. **Attach the Cone**:
- If using a traffic wand attachment, simply slide it over the flashlight's head.
- For a DIY cone, secure it using adhesive or Velcro strips. Ensure it is stable and won't fall off during use.
4. **Enhance Visibility**:
- Wrap reflective tape around the cone to increase visibility, especially at night.
5. **Test the Setup**:
- Turn on the flashlight to ensure the light diffuses evenly through the cone, creating a bright, visible signal.
6. **Optional Features**:
- If your flashlight has multiple modes, use the strobe or flashing mode for added attention.
- Consider adding a wrist strap for easy handling.
7. **Usage**:
- Use the baton for directing traffic, signaling, or as a warning light in emergencies.
By following these steps, you can effectively transform your flashlight into a versatile traffic baton or warning light.
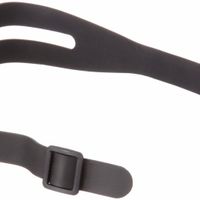
What are the best mounting options for hands-free flashlight use?
The best mounting options for hands-free flashlight use include:
1. **Headlamps**: These are flashlights mounted on adjustable headbands, allowing the light to follow the direction of your gaze. They are ideal for activities like hiking, camping, or working in low-light conditions.
2. **Helmet Mounts**: Flashlights can be attached to helmets using clips or straps, making them suitable for construction workers, cyclists, or anyone needing hands-free lighting while wearing a helmet.
3. **Chest or Vest Mounts**: Flashlights can be clipped or strapped to the chest or a tactical vest, providing a stable and centered light source. This is useful for military personnel, law enforcement, or outdoor enthusiasts.
4. **Magnetic Mounts**: Flashlights with magnetic bases can be attached to metal surfaces, offering flexibility in positioning. This is particularly useful in automotive repair or industrial settings.
5. **Clip-on Flashlights**: These can be attached to belts, pockets, or backpack straps, providing convenient access and directional lighting. They are versatile for everyday carry and outdoor activities.
6. **Bicycle Mounts**: Special mounts allow flashlights to be attached to bicycle handlebars, providing illumination for night riding.
7. **Tripod Mounts**: Some flashlights can be mounted on tripods, offering adjustable and stable lighting for photography, videography, or detailed work.
8. **Armband Mounts**: Flashlights can be strapped to the arm, providing mobility and light for running or walking in low-light conditions.
9. **GoPro Mounts**: Adaptors allow flashlights to be mounted on GoPro-style mounts, offering versatile positioning for action sports or filming.
10. **Flexible or Bendable Mounts**: These allow the flashlight to be positioned at various angles, useful for tasks requiring specific lighting angles.
Each option offers unique benefits depending on the activity and environment, ensuring optimal hands-free lighting.