Call +(254) 703 030 000 / 751 483 999 / 721 704 777
- Home
- Lab Supplies
- Lab Equipment
- Microscopes Cameras Stands Lenses
.....Read More
Frequently Asked Questions
What are the different types of microscopes used in research and healthcare?
Microscopes are essential tools in research and healthcare, offering various types to suit different applications:
1. **Light Microscopes**: These are the most common and include:
- **Compound Microscopes**: Use multiple lenses to magnify samples, ideal for viewing thin sections of tissues or cells.
- **Stereo Microscopes**: Provide a 3D view of the specimen, useful for dissection or examining larger samples.
2. **Fluorescence Microscopes**: Utilize high-intensity light to excite fluorescent dyes in samples, allowing for the visualization of specific proteins or structures within cells.
3. **Confocal Microscopes**: Use laser light to scan samples and create sharp, 3D images, reducing out-of-focus light and improving resolution.
4. **Electron Microscopes**: Offer higher magnification and resolution than light microscopes, including:
- **Transmission Electron Microscopes (TEM)**: Pass electrons through thin samples to view internal structures at the molecular level.
- **Scanning Electron Microscopes (SEM)**: Scan the surface of a sample with electrons to produce detailed 3D images.
5. **Scanning Probe Microscopes**: Include techniques like Atomic Force Microscopy (AFM) and Scanning Tunneling Microscopy (STM), which provide atomic-level resolution by scanning a probe over the sample surface.
6. **Phase Contrast Microscopes**: Enhance contrast in transparent specimens without staining, useful for observing live cells.
7. **Polarizing Microscopes**: Use polarized light to study samples with birefringent properties, such as crystals or fibers.
8. **Digital Microscopes**: Capture images electronically for analysis and sharing, often integrated with software for enhanced imaging capabilities.
Each type of microscope serves specific purposes, from basic cell observation to detailed molecular analysis, playing a crucial role in advancing scientific and medical knowledge.
How does a microscope work to magnify samples?
A microscope magnifies samples through a series of lenses that bend light to enlarge the image of the specimen. The basic components include the objective lens, the eyepiece lens, and the light source.
1. **Objective Lens**: Positioned close to the specimen, the objective lens collects light from the sample and creates a magnified real image. Different objective lenses offer varying magnification levels, typically ranging from 4x to 100x.
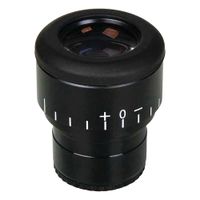
2. **Eyepiece Lens**: Also known as the ocular lens, it further magnifies the real image produced by the objective lens. The eyepiece typically provides an additional 10x magnification. The total magnification is the product of the objective and eyepiece magnifications.
3. **Light Source**: Illumination is crucial for viewing samples. Light microscopes use transmitted light, which passes through the specimen, or reflected light, which bounces off the surface. The condenser lens focuses the light onto the specimen, enhancing clarity and contrast.
4. **Focusing Mechanism**: Coarse and fine focus knobs adjust the distance between the objective lens and the specimen, bringing the image into sharp focus.
5. **Resolution**: The microscope's ability to distinguish two close points as separate is determined by its resolution, which depends on the wavelength of light and the numerical aperture of the lenses. Higher resolution provides clearer, more detailed images.
By manipulating these components, microscopes can magnify samples, allowing detailed observation of structures not visible to the naked eye.
What are the key components of a microscope?
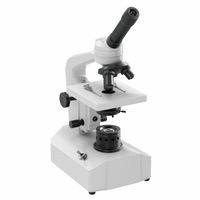
A microscope is an intricate device designed to magnify small objects, allowing for detailed observation. The key components include:
1. **Eyepiece (Ocular Lens):** Located at the top, it is the lens through which the viewer looks. It typically magnifies the image 10x to 15x.
2. **Objective Lenses:** These are the primary lenses that magnify the specimen. They are usually found on a rotating nosepiece and come in various magnifications, such as 4x, 10x, 40x, and 100x.
3. **Stage:** The flat platform where the slide is placed. It often includes clips to hold the slide in position and may have mechanical controls for precise movement.
4. **Illuminator:** A light source, either a mirror reflecting external light or an electric bulb, that illuminates the specimen for better viewing.
5. **Condenser:** Located beneath the stage, it focuses light onto the specimen. It often includes an adjustable diaphragm to control light intensity and contrast.
6. **Focus Mechanism:** Comprising coarse and fine adjustment knobs, it allows for the precise focusing of the specimen by moving the stage or the objective lenses.
7. **Arm:** The part of the microscope that connects the base to the head and provides support for the optical components.
8. **Base:** The bottom part of the microscope, providing stability and housing the illuminator in some models.
9. **Body Tube (Head):** Connects the eyepiece to the objective lenses, maintaining the correct distance for proper focus.
These components work together to magnify and resolve the details of the specimen, enabling detailed study and analysis.
How do you properly maintain and clean a microscope?
To properly maintain and clean a microscope, follow these steps:
1. **Preparation**: Turn off and unplug the microscope. Remove any slides and cover the microscope with a dust cover when not in use.
2. **Cleaning Lenses**: Use lens paper or a microfiber cloth to clean the eyepiece and objective lenses. Avoid using regular tissues or cloths as they can scratch the lenses. For stubborn dirt, use a small amount of lens cleaning solution or distilled water on the lens paper.
3. **Cleaning the Body**: Wipe the microscope's body with a soft, damp cloth. Avoid using harsh chemicals or solvents that can damage the finish.
4. **Stage and Mechanical Parts**: Clean the stage and any mechanical parts with a soft brush or compressed air to remove dust and debris. Ensure that the stage is free of any residue that might interfere with slide movement.
5. **Focus Mechanism**: Regularly check and lubricate the focus mechanism with a small amount of microscope grease if it feels stiff. Avoid over-lubricating as it can attract dust.
6. **Light Source**: Clean the light source and any filters with a soft cloth. Replace bulbs as needed, ensuring the microscope is unplugged during replacement.
7. **Storage**: Store the microscope in a dry, clean environment. Use a dust cover to protect it from dust and environmental contaminants.
8. **Regular Maintenance**: Schedule regular professional maintenance to ensure optimal performance. This includes alignment checks and any necessary repairs.
By following these steps, you can ensure the longevity and optimal performance of your microscope.
What are the applications of microscopy in healthcare?
Microscopy plays a crucial role in healthcare by enabling detailed visualization of biological specimens, which is essential for diagnosis, research, and treatment. In pathology, microscopes are used to examine tissue samples and identify abnormalities such as cancerous cells, infections, and other diseases. This helps in accurate diagnosis and determining the appropriate treatment plan.
In microbiology, microscopy is vital for identifying microorganisms like bacteria, viruses, and fungi. Techniques such as Gram staining and fluorescence microscopy allow for the visualization and differentiation of pathogens, aiding in the diagnosis of infectious diseases and guiding antibiotic therapy.
Microscopy is also integral in hematology for analyzing blood samples. It helps in identifying blood disorders such as anemia, leukemia, and other hematological conditions by examining the morphology of blood cells.
In research, advanced microscopy techniques like electron microscopy and confocal microscopy provide high-resolution images of cellular structures and processes. This aids in understanding disease mechanisms, drug interactions, and the development of new therapies.
In surgical procedures, particularly in neurosurgery and ophthalmology, operating microscopes provide magnified views of delicate structures, enhancing precision and outcomes.
Microscopy is also used in reproductive medicine, particularly in in vitro fertilization (IVF), where it assists in sperm and egg analysis and embryo selection.
Furthermore, in dermatology, dermoscopy, a form of microscopy, is used to examine skin lesions and moles, aiding in the early detection of skin cancers.
Overall, microscopy is indispensable in healthcare for its ability to provide detailed insights into the microscopic world, facilitating early diagnosis, effective treatment, and advancing medical research.
How do you prepare a sample for microscopic analysis?
To prepare a sample for microscopic analysis, follow these steps:
1. **Sample Collection**: Obtain a representative sample of the material you wish to analyze. Ensure it is free from contamination.
2. **Fixation**: Preserve the sample's structure by using a fixative, such as formaldehyde, to prevent degradation and maintain cellular integrity.
3. **Dehydration**: Gradually remove water from the sample using a series of increasing concentrations of alcohol (ethanol or isopropanol).
4. **Embedding**: Infiltrate the sample with a medium like paraffin wax or resin to provide support for thin sectioning.
5. **Sectioning**: Use a microtome to cut thin sections of the embedded sample, typically 5-10 micrometers thick, for light microscopy, or ultrathin sections (50-100 nanometers) for electron microscopy.
6. **Mounting**: Place the sections on a microscope slide. For electron microscopy, sections are placed on a grid.
7. **Staining**: Apply appropriate stains to enhance contrast and highlight specific structures. Common stains include hematoxylin and eosin for light microscopy, and heavy metals like lead citrate for electron microscopy.
8. **Clearing**: If necessary, use a clearing agent like xylene to make the sample more transparent and improve optical clarity.
9. **Cover Slipping**: Apply a cover slip over the sample on the slide to protect it and improve image quality.
10. **Examination**: Use the appropriate microscope (light, fluorescence, or electron) to analyze the sample, adjusting the focus and magnification as needed.
11. **Documentation**: Capture images or record observations for further analysis and reporting.
Each step may vary depending on the type of sample and the specific requirements of the microscopic technique being used.
What are the differences between light and electron microscopes?
Light microscopes and electron microscopes differ primarily in their source of illumination and resolution capabilities.
Light microscopes use visible light to illuminate specimens and glass lenses to magnify images. They are suitable for viewing live cells and tissues, offering magnifications up to around 1,000-1,500 times. The resolution limit is approximately 200 nanometers due to the wavelength of visible light. Light microscopes are generally more affordable, easier to use, and allow for the observation of natural colors in samples.
Electron microscopes, on the other hand, use beams of electrons for illumination, which have much shorter wavelengths than visible light, allowing for higher resolution. There are two main types: Transmission Electron Microscopes (TEM) and Scanning Electron Microscopes (SEM). TEMs can achieve magnifications of up to 2 million times and resolutions below 1 nanometer, making them ideal for viewing the internal structure of cells and viruses. SEMs provide detailed 3D images of surfaces with resolutions around 1-20 nanometers.
Electron microscopes require samples to be placed in a vacuum and often involve complex preparation, such as dehydration and coating with conductive materials, which can kill living specimens. They are more expensive, require more maintenance, and need specialized training to operate.
In summary, light microscopes are suitable for general laboratory use, especially for live specimens, while electron microscopes are used for detailed, high-resolution imaging of non-living samples.


