Call +(254) 703 030 000 / 751 483 999 / 721 704 777
- Home
- Lab Supplies
- Lab Equipment
- Lab Supports Lifts Clamps
.....Read More
Frequently Asked Questions
What are lab clamps used for?
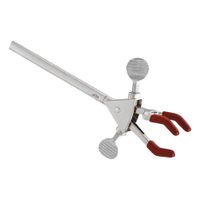
Lab clamps are essential tools in laboratory settings, used to securely hold and stabilize various apparatus and equipment during experiments. They are designed to provide a firm grip on objects, ensuring safety and precision in scientific procedures. Here are some common uses of lab clamps:
1. **Holding Glassware**: Lab clamps are often used to hold glassware such as beakers, flasks, and test tubes. This is crucial during heating or mixing processes, where stability is necessary to prevent spills or breakage.
2. **Supporting Equipment**: Clamps can support equipment like burettes, condensers, and thermometers. By attaching these items to a stand, clamps allow for hands-free operation, which is vital for conducting accurate and consistent experiments.
3. **Adjustable Positioning**: Many lab clamps are adjustable, allowing scientists to position equipment at various angles and heights. This flexibility is important for setting up complex apparatus configurations and ensuring optimal experimental conditions.
4. **Securing Reactions**: During chemical reactions, it is often necessary to keep reactants in a fixed position. Clamps ensure that reaction vessels remain stable, reducing the risk of accidents and contamination.
5. **Facilitating Measurements**: Clamps help in maintaining the position of measuring instruments, such as pipettes and burettes, ensuring precise and repeatable measurements.
6. **Versatility**: Lab clamps come in various designs, such as three-prong clamps, boss head clamps, and retort clamps, each suited for specific tasks. This versatility makes them indispensable in diverse laboratory applications.
Overall, lab clamps are vital for maintaining order and safety in the laboratory, allowing scientists to conduct experiments efficiently and effectively.
How do you secure a Bunsen burner with lab equipment?
To secure a Bunsen burner with lab equipment, follow these steps:
1. **Location**: Place the Bunsen burner on a stable, heat-resistant surface, away from flammable materials and overhanging shelves.
2. **Clamp Stand**: Use a clamp stand to hold the Bunsen burner in place. Attach a clamp to the stand and secure the burner’s base or neck to prevent tipping.
3. **Heat Mat**: Position a heat-resistant mat under the Bunsen burner to protect the work surface from heat damage.
4. **Gas Hose**: Ensure the gas hose is in good condition, free from cracks or leaks. Connect it securely to the gas tap and the burner. Use hose clips if necessary to prevent disconnection.
5. **Gas Tap**: Check that the gas tap is functioning properly. Turn it off when not in use to prevent gas leaks.
6. **Safety Flame**: When lighting the burner, start with the air hole closed to produce a yellow safety flame, reducing the risk of accidental burns.
7. **Air Hole Adjustment**: Adjust the air hole to control the flame type. A blue flame indicates complete combustion and is ideal for heating.
8. **Fire Extinguisher**: Keep a fire extinguisher nearby, ensuring it is appropriate for gas fires and easily accessible.
9. **Ventilation**: Ensure the lab is well-ventilated to disperse any gas that may escape and to prevent accumulation.
10. **Supervision**: Never leave a lit Bunsen burner unattended. Always have someone present to monitor its use.
11. **Personal Protective Equipment (PPE)**: Wear appropriate PPE, such as lab coats, safety goggles, and heat-resistant gloves, to protect against accidental burns or splashes.
12. **Emergency Procedures**: Familiarize yourself with emergency procedures, including how to shut off the gas supply quickly in case of an emergency.
What is the purpose of lab supports and rods?
Lab supports and rods are essential components in laboratory setups, primarily used to hold and stabilize various apparatus during experiments. Their main purpose is to provide a stable framework for securing equipment such as burettes, flasks, test tubes, and other glassware, ensuring safety and precision in experimental procedures.
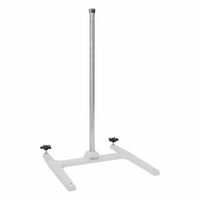
Lab supports typically consist of a heavy base and a vertical rod. The base provides stability, preventing the apparatus from tipping over, while the rod serves as a vertical support structure. Clamps and rings can be attached to the rod to hold equipment at desired heights and angles, allowing for versatile configurations tailored to specific experimental needs.
These supports are crucial in experiments involving heating, titration, or any process requiring precise positioning of equipment. For instance, in titration, a burette is held securely by a clamp attached to the rod, allowing for accurate measurement and dispensing of liquids. Similarly, when heating substances, a flask or beaker can be held above a Bunsen burner using a ring clamp, ensuring even heating and reducing the risk of accidents.
Moreover, lab supports and rods facilitate multitasking by allowing multiple pieces of equipment to be arranged vertically, optimizing space and organization within the lab. This setup is particularly beneficial in complex experiments requiring simultaneous use of various apparatus.
In summary, lab supports and rods are vital for maintaining safety, accuracy, and efficiency in laboratory experiments. They provide a stable and flexible framework for securing equipment, enabling precise control over experimental conditions and contributing to successful scientific outcomes.
How do lab lifts work in a laboratory setting?
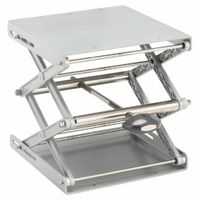
Lab lifts, also known as laboratory jacks or scissor jacks, are mechanical devices used to raise and lower equipment or containers in a laboratory setting. They consist of a platform supported by a scissor-like mechanism that can be adjusted to different heights. The operation of a lab lift involves a few key components and steps:
1. **Base and Platform**: The base provides stability, while the platform is the surface where equipment or containers are placed. The platform is typically made of stainless steel or aluminum for durability and resistance to chemicals.
2. **Scissor Mechanism**: The scissor mechanism is the core component, consisting of crossed metal arms that expand and contract. This mechanism allows the platform to be raised or lowered smoothly.
3. **Adjustment Knob or Handle**: A knob or handle is used to adjust the height of the platform. Turning the knob or handle rotates a lead screw or threaded rod, which moves the scissor arms closer or further apart, thus raising or lowering the platform.
4. **Load Capacity**: Lab lifts are designed to support a specific weight range, ensuring stability and safety. It's important to not exceed the recommended load capacity to prevent accidents or damage.
5. **Applications**: Lab lifts are used for various purposes, such as adjusting the height of equipment for ergonomic access, aligning apparatus for experiments, or elevating containers for heating or cooling processes.
6. **Safety and Maintenance**: Regular maintenance, such as cleaning and lubrication, ensures smooth operation. Users should also check for any signs of wear or damage to prevent malfunctions.
Lab lifts provide a versatile and adjustable platform, enhancing the efficiency and safety of laboratory operations by allowing precise control over the positioning of equipment and materials.
What types of lab clamps are available?
There are several types of lab clamps, each designed for specific applications in laboratory settings:
1. **Utility Clamps**: Versatile clamps used to hold various lab apparatus like flasks, tubes, or thermometers. They often have adjustable jaws and can be attached to retort stands.
2. **Burette Clamps**: Specifically designed to hold burettes securely in place during titration experiments. They usually have a spring mechanism for easy attachment and release.
3. **Test Tube Clamps**: Used to hold test tubes, especially when heating them over a flame. They provide a secure grip to prevent accidents.
4. **Bosshead Clamps**: These are used to connect rods and other apparatus to a retort stand. They provide a stable and adjustable connection point.
5. **Three-Prong Clamps**: Feature three adjustable prongs to hold irregularly shaped objects. They provide a firm grip and are often used for larger apparatus.
6. **Extension Clamps**: Used to hold equipment at a distance from the stand, providing flexibility in positioning.
7. **Hoffman Clamps**: Used to control the flow of liquids through tubing. They can pinch off or allow flow by adjusting the screw mechanism.
8. **Pinch Clamps**: Simple clamps used to stop the flow in flexible tubing. They are easy to use and adjust.
9. **Fisher Clamps**: Designed for holding larger apparatus like condensers or columns. They provide a strong grip and stability.
10. **Micro Clamps**: Smaller clamps used for delicate or small-scale apparatus, often in micro-scale experiments.
11. **Swivel Clamps**: Allow for rotation and adjustment of the apparatus, providing flexibility in positioning.
12. **Chain Clamps**: Used for holding large, cylindrical objects like columns or large flasks. They use a chain mechanism for secure attachment.
Each type of clamp serves a specific purpose, ensuring safety and precision in laboratory work.
How do you safely use lab equipment near open flames?
To safely use lab equipment near open flames, follow these guidelines:
1. **Personal Protective Equipment (PPE):** Wear flame-resistant lab coats, safety goggles, and heat-resistant gloves. Tie back long hair and avoid loose clothing.
2. **Clear Workspace:** Keep the area around the flame free of flammable materials, including paper, chemicals, and solvents. Use a fire-resistant mat if necessary.
3. **Equipment Check:** Inspect equipment for damage or leaks before use. Ensure that Bunsen burners and other flame-producing devices are in good working condition.
4. **Ventilation:** Ensure proper ventilation to prevent the accumulation of flammable vapors. Use fume hoods when necessary.
5. **Flame Control:** Use a spark lighter to ignite flames instead of matches. Adjust the flame to a manageable size and never leave it unattended.
6. **Chemical Handling:** Store flammable chemicals away from the flame. Use appropriate containers and transfer chemicals using pipettes or dispensers to minimize spills.
7. **Fire Safety Equipment:** Know the location and operation of fire extinguishers, fire blankets, and emergency exits. Ensure they are easily accessible.
8. **Behavioral Protocols:** Do not reach over open flames. Maintain a safe distance and use tongs or heat-resistant tools to handle hot equipment.
9. **Training and Awareness:** Ensure all personnel are trained in fire safety procedures and emergency response. Conduct regular safety drills.
10. **Emergency Procedures:** In case of a fire, follow the lab’s emergency protocol. Use a fire extinguisher if trained, or evacuate and alert emergency services.
By adhering to these safety measures, you can minimize the risk of accidents and ensure a safe working environment near open flames in the lab.
What are the best practices for using lab supports and frames?
1. **Selection of Appropriate Equipment**: Choose lab supports and frames that are suitable for the specific experiment. Consider the weight and size of the apparatus to ensure stability and safety.
2. **Proper Assembly**: Follow manufacturer instructions for assembling supports and frames. Ensure all components are securely tightened to prevent accidents.
3. **Stable Base**: Use a wide and heavy base to provide stability. This prevents tipping over, especially when working with tall or heavy apparatus.
4. **Correct Positioning**: Position supports and frames on a flat, stable surface. Ensure they are not obstructing walkways or emergency exits.
5. **Secure Fastening**: Use clamps and holders to securely fasten equipment to the frames. Double-check that all connections are tight before starting the experiment.
6. **Load Distribution**: Distribute weight evenly across the frame to prevent imbalance. Avoid overloading the frame beyond its capacity.
7. **Regular Inspection**: Regularly inspect supports and frames for wear and tear. Replace any damaged or worn-out parts immediately.
8. **Safety Precautions**: Wear appropriate personal protective equipment (PPE) when assembling and using lab supports and frames. Be aware of potential hazards such as falling objects.
9. **Clear Labeling**: Clearly label all components and ensure that all users are familiar with the setup and operation of the equipment.
10. **Training and Supervision**: Ensure that all personnel are trained in the proper use of lab supports and frames. Supervise inexperienced users to prevent mishandling.
11. **Disassembly and Storage**: After use, carefully disassemble the equipment and store it properly to prevent damage and ensure readiness for future use.
12. **Documentation**: Keep records of equipment maintenance and inspections to ensure compliance with safety standards and regulations.


