Call +(254) 703 030 000 / 751 483 999 / 721 704 777
.....Read More
Frequently Asked Questions
What size air conditioner do I need for my room?
To determine the appropriate size air conditioner for your room, you need to calculate the room's square footage and consider several factors that affect cooling needs. Here's a step-by-step guide:
1. **Measure the Room**: Calculate the square footage by multiplying the room's length by its width. For example, a room that is 10 feet by 15 feet is 150 square feet.
2. **BTU Calculation**: Air conditioners are rated in BTUs (British Thermal Units), which measure cooling capacity. As a general rule, you need about 20 BTUs per square foot of living space. For a 150-square-foot room, you would need a 3,000 BTU air conditioner.
3. **Adjust for Room Characteristics**:
- **Ceiling Height**: If the ceiling is higher than 8 feet, increase the BTU capacity by 10% for each additional foot.
- **Sunlight**: If the room receives a lot of sunlight, increase the BTU by 10%. If it’s heavily shaded, reduce it by 10%.
- **Number of Occupants**: Add 600 BTUs for each additional person if more than two people regularly occupy the room.
- **Appliances**: If the room contains heat-generating appliances, add 4,000 BTUs.
4. **Consider Room Type**: Kitchens typically require more cooling power due to heat from cooking appliances. Add 4,000 BTUs for a kitchen.
5. **Final Calculation**: Sum up all adjustments to find the total BTU requirement.
By following these steps, you can select an air conditioner that efficiently cools your room without wasting energy.
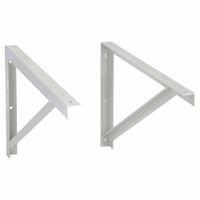
How do I install an air conditioner mounting bracket?
1. **Choose the Right Bracket**: Ensure the bracket is compatible with your air conditioner model and window type.
2. **Gather Tools and Materials**: You’ll need a drill, screwdriver, level, measuring tape, pencil, and the mounting bracket kit.
3. **Prepare the Window**: Open the window and clean the sill and frame. Remove any obstructions.
4. **Measure and Mark**: Measure the width of the window and mark the center point. Use the level to ensure your marks are straight.
5. **Assemble the Bracket**: Follow the manufacturer’s instructions to assemble the bracket. This usually involves connecting arms and supports.
6. **Position the Bracket**: Place the bracket on the window sill, aligning it with your center mark. Ensure it’s level.
7. **Secure the Bracket**: Drill pilot holes into the window sill or frame as needed. Use screws provided in the kit to secure the bracket firmly.
8. **Adjust the Bracket**: Adjust the bracket arms to fit the air conditioner’s dimensions. Ensure it’s stable and level.
9. **Install the Air Conditioner**: With assistance, lift the air conditioner onto the bracket. Ensure it’s securely seated and balanced.
10. **Secure the Air Conditioner**: Use any additional hardware provided to secure the air conditioner to the bracket. This may include straps or additional screws.
11. **Seal the Window**: Close the window onto the air conditioner. Use foam or weather stripping to seal gaps and prevent air leaks.
12. **Test Stability**: Gently shake the air conditioner to ensure it’s stable and securely mounted.
13. **Final Check**: Ensure all screws and components are tight. Double-check the level and stability.
14. **Plug In and Test**: Plug in the air conditioner and test its operation. Adjust as necessary.
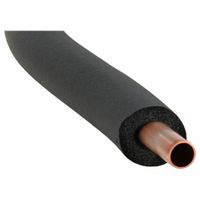
What is the best way to insulate refrigerant line sets?
The best way to insulate refrigerant line sets involves selecting the right materials and ensuring proper installation to maximize efficiency and prevent energy loss. Use closed-cell foam insulation, specifically designed for refrigerant lines, as it provides excellent thermal resistance and moisture barrier properties. The insulation should have a minimum thickness of 3/4 inch for optimal performance.
Begin by cleaning the line sets to remove any dirt or oil, ensuring a good adhesion surface for the insulation. Measure and cut the insulation to fit the length of the line sets, allowing for a snug fit without compressing the material, as compression reduces its effectiveness.
Install the insulation by sliding it over the line sets, ensuring there are no gaps or spaces. Use insulation tape or adhesive to seal the seams and joints, preventing air and moisture infiltration. Pay special attention to bends and fittings, as these areas are prone to energy loss. Use pre-formed insulation elbows or carefully cut and fit the insulation to cover these areas completely.
For outdoor installations, protect the insulation from UV exposure and weather elements by using a UV-resistant coating or a protective covering, such as a PVC jacket. This prolongs the insulation's lifespan and maintains its insulating properties.
Regularly inspect the insulation for signs of wear, damage, or degradation, and replace or repair as necessary to maintain efficiency. Properly insulated refrigerant line sets reduce energy consumption, improve system performance, and extend the lifespan of HVAC equipment.
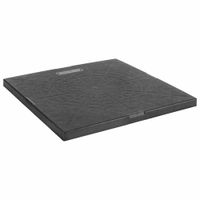
How do I properly level an air conditioner mounting pad?
1. **Select Location**: Choose a flat, stable area with good drainage to prevent water pooling.
2. **Clear the Area**: Remove debris, rocks, and vegetation from the site to ensure a smooth surface.
3. **Excavate the Site**: Dig a shallow area slightly larger than the pad, about 4-6 inches deep.
4. **Add Base Material**: Fill the excavated area with a layer of gravel or crushed stone, about 2-3 inches thick, to promote drainage and stability.
5. **Compact the Base**: Use a tamper or plate compactor to compact the gravel layer, ensuring it is level and firm.
6. **Check Level**: Use a carpenter’s level to check the surface. Adjust by adding or removing gravel as needed to achieve a level base.
7. **Place the Pad**: Position the air conditioner pad on the compacted base. Concrete or composite pads are commonly used for durability.
8. **Level the Pad**: Place the level on the pad. Adjust by adding or removing gravel under the pad corners until it is perfectly level.
9. **Secure the Pad**: Once level, ensure the pad is stable and does not rock. Add more gravel around the edges if necessary for support.
10. **Final Check**: Recheck the level after a few days, as settling may occur. Adjust if needed.
11. **Install the Unit**: Once the pad is stable and level, proceed with installing the air conditioning unit on top.
12. **Regular Maintenance**: Periodically check the pad’s level and stability, especially after heavy rains or ground shifts. Adjust as necessary to maintain proper leveling.
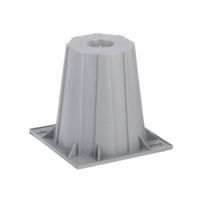
What are the benefits of using risers for air conditioners?
Using risers for air conditioners offers several benefits:
1. **Improved Airflow**: Elevating the air conditioning unit enhances airflow around the unit, which can improve efficiency and performance. Better airflow helps in effective heat dissipation, reducing the workload on the compressor.
2. **Protection from Debris**: Risers keep the unit off the ground, protecting it from debris, dirt, leaves, and other materials that can accumulate around the base. This reduces the risk of clogging and potential damage to the unit.
3. **Moisture Prevention**: By lifting the unit, risers help prevent moisture accumulation and water damage. This is particularly beneficial in areas prone to flooding or heavy rainfall, as it reduces the risk of rust and corrosion.
4. **Pest Prevention**: Elevating the unit can deter pests and insects from nesting inside or around the air conditioner. This helps maintain the unit's integrity and reduces the need for frequent maintenance.
5. **Noise Reduction**: Risers can help in dampening vibrations and noise produced by the air conditioning unit. This is especially useful in residential areas where noise levels need to be minimized.
6. **Ease of Maintenance**: With the unit elevated, maintenance tasks such as cleaning and repairs become more accessible. Technicians can easily access the underside of the unit without obstruction.
7. **Extended Lifespan**: By protecting the unit from environmental hazards and improving operational efficiency, risers can contribute to a longer lifespan for the air conditioning system.
8. **Aesthetic Appeal**: Risers can provide a cleaner, more organized appearance by keeping the unit off the ground and away from clutter.
Overall, using risers can enhance the performance, durability, and maintenance of air conditioning units, making them a valuable addition to HVAC installations.
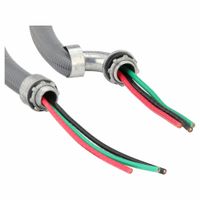
How do I connect a conduit kit to my air conditioning system?
1. **Turn Off Power**: Ensure the air conditioning system is turned off at the main power supply to prevent any electrical hazards.
2. **Gather Tools and Materials**: You will need a conduit kit, a drill, a screwdriver, a hacksaw, a measuring tape, and appropriate fittings.
3. **Plan the Route**: Determine the path for the conduit from the air conditioning unit to the power source. Ensure the path is clear of obstacles and complies with local building codes.
4. **Measure and Cut Conduit**: Use the measuring tape to measure the required length of the conduit. Cut the conduit to size using a hacksaw.
5. **Install Conduit**: Begin at the air conditioning unit. Attach the conduit to the unit using the appropriate fittings. Secure the conduit along the planned route using brackets or straps, ensuring it is firmly attached to walls or other structures.
6. **Connect to Power Source**: Run the conduit to the power source. Attach the conduit to the power source using the appropriate fittings. Ensure all connections are tight and secure.
7. **Pull Wires Through Conduit**: Use fish tape to pull the electrical wires through the conduit from the power source to the air conditioning unit. Ensure the wires are the correct gauge for the system's power requirements.
8. **Make Electrical Connections**: Connect the wires to the air conditioning unit and the power source. Follow the manufacturer's wiring diagram and ensure all connections are secure.
9. **Test the System**: Turn the power back on and test the air conditioning system to ensure it is functioning correctly.
10. **Inspect and Secure**: Inspect the entire installation for any loose connections or unsecured conduit. Make any necessary adjustments to ensure safety and compliance with local codes.
How often should I check and maintain my air conditioning system?
You should check and maintain your air conditioning system at least once a year. Ideally, this should be done in the spring before the cooling season begins. Regular maintenance ensures the system operates efficiently, reduces the risk of breakdowns, and extends its lifespan. During this annual check-up, a professional technician should inspect and clean the components, including the coils, filters, and fins, and check the refrigerant levels.
In addition to the annual professional maintenance, you should perform some basic checks and maintenance tasks yourself throughout the year. Monthly or bi-monthly, depending on usage, you should check and replace or clean the air filters. Clogged filters can reduce efficiency and air quality. Also, ensure that the outdoor unit is free from debris, leaves, and dirt, which can obstruct airflow.
If your system is used heavily or in a particularly dusty environment, more frequent checks might be necessary. Pay attention to any unusual noises, reduced cooling efficiency, or increased energy bills, as these can be signs that maintenance is needed sooner.
By adhering to a regular maintenance schedule, you can ensure your air conditioning system runs smoothly, efficiently, and reliably, providing comfort during the hot months.