Call +(254) 703 030 000 / 751 483 999 / 721 704 777
.....Read More
Frequently Asked Questions
What are the different types of refrigeration access valves?
Refrigeration access valves are crucial components in HVAC systems, allowing for the monitoring, charging, and evacuation of refrigerants. The primary types include:
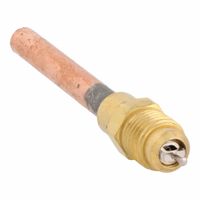
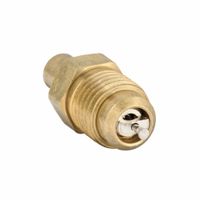
1. **Schrader Valves**: These are the most common type, similar to those found on car tires. They consist of a valve core within a threaded valve stem, allowing for easy connection and disconnection. Schrader valves are used for charging and pressure checking.
2. **Service Valves**: These are manually operated valves that can isolate sections of the system. They are typically found on compressors and allow for maintenance without evacuating the entire system. Service valves can be back-seating, front-seating, or mid-seating, depending on the desired flow control.
3. **Ball Valves**: These valves use a spherical disc to control flow. They are known for their durability and ability to provide a tight seal. Ball valves are often used in larger systems where quick shut-off is necessary.
4. **Rotolock Valves**: These are used in larger systems and provide a secure, leak-proof connection. They have a rotatable locking mechanism that ensures a tight seal and are often used in conjunction with service valves.
5. **Piercing Valves**: These are temporary valves used for quick access to the system without permanent installation. They clamp onto the refrigerant line and pierce it to allow for charging or evacuation.
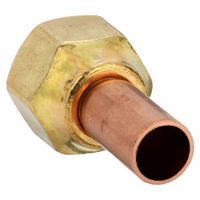
6. **Access Fittings**: These are permanent fittings installed in the system to provide access points for gauges and charging hoses. They often incorporate Schrader valves for ease of use.
Each type of valve serves a specific purpose and is chosen based on the system requirements, size, and the type of refrigerant used. Proper selection and maintenance of these valves are essential for efficient and safe operation of refrigeration systems.
How do you install an access valve on an HVAC system?
1. **Safety First**: Turn off the HVAC system and disconnect the power supply. Wear safety goggles and gloves.
2. **Identify the Location**: Locate the low-pressure side of the HVAC system, typically on the suction line near the compressor.
3. **Select the Valve**: Choose an appropriate access valve (Schrader valve) compatible with the system's refrigerant type and pressure.
4. **Prepare the Area**: Clean the area where the valve will be installed to ensure a proper seal.
5. **Cut the Line**: Use a pipe cutter to make a clean cut on the suction line. Ensure the cut is straight and free of burrs.
6. **Install the Valve**:
- If using a saddle valve, place it over the cut section and tighten the screws to secure it.
- For a brazed valve, slide the valve onto the cut section and braze it using a torch and brazing rod. Ensure the joint is airtight.
7. **Check for Leaks**: Pressurize the system with nitrogen and use a leak detector or soapy water to check for leaks around the valve.
8. **Evacuate the System**: If no leaks are detected, evacuate the system using a vacuum pump to remove air and moisture.
9. **Recharge the System**: Refill the system with the appropriate refrigerant to the specified level.
10. **Test the System**: Reconnect the power and turn on the HVAC system. Monitor the system to ensure it operates correctly and efficiently.
11. **Final Inspection**: Perform a final check for leaks and ensure the valve cap is securely tightened to prevent refrigerant loss.
What tools are needed for installing and repairing access valves?
To install and repair access valves, you will need the following tools:
1. **Wrenches**: Adjustable wrenches or specific-sized wrenches are essential for tightening or loosening valve connections.
2. **Pipe Cutters**: Used for cutting pipes to the desired length when installing or replacing valves.
3. **Pipe Threader**: Necessary for creating threads on the ends of pipes to ensure a secure fit with threaded valves.
4. **Screwdrivers**: Both flathead and Phillips screwdrivers are needed for removing or securing screws on valve components.
5. **Pliers**: Needle-nose or slip-joint pliers are useful for gripping and manipulating small parts or components.
6. **Teflon Tape**: Also known as plumber's tape, it is used to seal pipe threads and prevent leaks.
7. **Pipe Sealant**: An alternative to Teflon tape, used to ensure a watertight seal on threaded connections.
8. **Valve Core Remover/Installer**: A specialized tool for removing and installing the valve core in access valves.
9. **Pressure Gauge**: To measure the pressure in the system and ensure it is within the desired range after installation or repair.
10. **Leak Detection Solution**: Used to check for leaks around the valve connections after installation or repair.
11. **Torch or Soldering Kit**: If working with copper pipes, a torch and soldering kit may be needed to join pipes and valves.
12. **Safety Gear**: Gloves, goggles, and other protective equipment to ensure safety during installation or repair.
13. **Vacuum Pump**: For systems that require evacuation before valve installation or repair.
14. **Multimeter**: For checking electrical connections if the valve is part of an electrically controlled system.
These tools will help ensure a proper and efficient installation or repair of access valves.
How do you troubleshoot a leaking access valve?
1. **Identify the Leak**: Use a soap and water solution to spray around the access valve. Bubbles will form at the site of the leak.
2. **Tighten the Valve Core**: Use a valve core tool to gently tighten the valve core. Be cautious not to overtighten, as this can damage the valve.
3. **Replace the Valve Core**: If tightening doesn't stop the leak, use the valve core tool to remove the old valve core and replace it with a new one. Ensure the replacement is compatible with the system.
4. **Check the Valve Cap**: Ensure the valve cap is intact and properly seated. A missing or damaged cap can lead to leaks.
5. **Inspect for Damage**: Examine the valve and surrounding area for any physical damage or corrosion that might be causing the leak.
6. **Seal the Valve**: Apply a thread sealant or Teflon tape to the valve threads to ensure a tight seal when reassembling.
7. **Test for Leaks Again**: After making adjustments or replacements, reapply the soap and water solution to confirm the leak has been resolved.
8. **Consult a Professional**: If the leak persists, it may indicate a more serious issue. Contact a professional technician for further diagnosis and repair.
What are the best practices for maintaining access valves in HVAC systems?
1. **Regular Inspection**: Conduct routine inspections to check for leaks, corrosion, or physical damage. Ensure that valves are easily accessible and not obstructed by other equipment.
2. **Proper Labeling**: Clearly label all access valves to identify their function and the system they belong to. This aids in quick identification during maintenance or emergencies.
3. **Leak Testing**: Perform periodic leak tests using appropriate methods such as soap solution or electronic leak detectors to ensure valve integrity.
4. **Lubrication**: Apply suitable lubricants to valve stems and moving parts to prevent seizing and ensure smooth operation. Use lubricants recommended by the valve manufacturer.
5. **Tightening and Adjustments**: Regularly check and tighten valve connections and fittings to prevent leaks. Adjust packing nuts if necessary to stop leaks around the valve stem.
6. **Cleaning**: Keep valves clean from dust, dirt, and debris. Use appropriate cleaning agents that do not damage valve materials.
7. **Corrosion Protection**: Apply anti-corrosion coatings or wraps to valves exposed to harsh environments to extend their lifespan.
8. **Functional Testing**: Operate valves periodically to ensure they open and close properly. This prevents sticking and verifies operational readiness.
9. **Replacement of Worn Parts**: Replace worn or damaged parts such as seals, gaskets, and packing to maintain valve performance and prevent leaks.
10. **Documentation**: Maintain detailed records of all maintenance activities, including inspections, repairs, and replacements. This helps in tracking valve performance and planning future maintenance.
11. **Training**: Ensure that maintenance personnel are trained in valve operation and maintenance procedures to prevent mishandling and ensure safety.
12. **Compliance with Standards**: Follow industry standards and manufacturer guidelines for valve maintenance to ensure safety and efficiency.
How do you choose the right adapter or fitting for an access valve?
To choose the right adapter or fitting for an access valve, consider the following factors:
1. **Valve Type and Size**: Identify the type and size of the access valve. Ensure the adapter or fitting matches the valve's specifications, including thread type and diameter.
2. **Material Compatibility**: Select an adapter made from materials compatible with the fluid or gas being handled. Common materials include brass, stainless steel, and plastic, each suitable for different applications and environments.
3. **Pressure and Temperature Ratings**: Check the pressure and temperature ratings of the adapter to ensure they meet or exceed the system's requirements. This ensures safety and reliability under operating conditions.
4. **Connection Type**: Determine the connection type needed, such as threaded, flanged, or quick-connect. The connection type should match the existing system for a secure and leak-free fit.
5. **Application Requirements**: Consider the specific application requirements, such as the need for corrosion resistance, chemical compatibility, or specific industry standards (e.g., HVAC, refrigeration).
6. **Regulatory Compliance**: Ensure the adapter complies with relevant industry standards and regulations, such as ASME, ANSI, or ISO, to ensure safety and performance.
7. **Manufacturer Recommendations**: Consult the valve and system manufacturers' recommendations for compatible adapters and fittings to ensure optimal performance and warranty compliance.
8. **Ease of Installation and Maintenance**: Choose an adapter that is easy to install and maintain, reducing downtime and labor costs.
9. **Cost and Availability**: Consider the cost and availability of the adapter. While cost-effective options are important, ensure they do not compromise quality and performance.
By evaluating these factors, you can select the appropriate adapter or fitting for your access valve, ensuring a secure, efficient, and reliable connection.
What are common issues with access valves and how can they be fixed?
Common issues with access valves include:
1. **Leaks**: Often caused by worn-out seals or improper installation. Fix by replacing seals, ensuring proper tightening, or using thread sealant.
2. **Corrosion**: Due to exposure to moisture or chemicals. Fix by replacing corroded parts and using corrosion-resistant materials.
3. **Blockages**: Caused by debris or sediment buildup. Fix by cleaning the valve and ensuring the system is flushed regularly.
4. **Sticking or Jamming**: Due to lack of lubrication or debris. Fix by cleaning and lubricating the valve components.
5. **Improper Operation**: Resulting from misalignment or mechanical failure. Fix by realigning or replacing faulty parts.
6. **Pressure Issues**: Caused by incorrect valve size or pressure settings. Fix by adjusting settings or replacing with a correctly sized valve.
7. **Temperature Fluctuations**: Leading to expansion or contraction issues. Fix by using valves designed for specific temperature ranges.
8. **Wear and Tear**: Due to frequent use. Fix by regular maintenance and timely replacement of worn parts.
9. **Vibration**: Can loosen connections. Fix by securing connections and using vibration-dampening supports.
10. **Incorrect Installation**: Leading to operational issues. Fix by following manufacturer guidelines and ensuring proper installation.
Regular maintenance, proper installation, and using quality materials can prevent many of these issues.