Call +(254) 703 030 000 / 751 483 999 / 721 704 777
Showing 0 products
Frequently Asked Questions
What are the different types of shelf brackets and their uses?
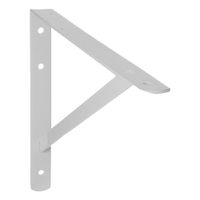
1. **L-Brackets**: These are the most common type of shelf brackets, shaped like the letter "L." They are used for supporting light to medium-weight shelves and are ideal for bookshelves, kitchen shelves, and general storage.
2. **Floating Brackets**: Designed to be hidden, these brackets give the appearance of a shelf floating on the wall. They are used for a minimalist look and are suitable for light to medium-weight shelves, often in living rooms or bedrooms.
3. **Heavy-Duty Brackets**: Made from robust materials like steel, these brackets are used for supporting heavy loads. They are ideal for garage storage, industrial settings, or any place where heavy items need to be stored.
4. **Decorative Brackets**: These brackets come in various designs and finishes, adding an aesthetic element to the shelving. They are used in living spaces where the bracket itself is part of the decor, such as in vintage or rustic-themed rooms.
5. **Adjustable Brackets**: These allow for the height of the shelf to be adjusted. They are used in situations where flexibility is needed, such as in retail displays or in homes where shelf height may need to change over time.
6. **Corner Brackets**: Specifically designed for corner shelves, these brackets maximize space in small areas. They are used in kitchens, bathrooms, or any room where corner space needs to be utilized.
7. **Lip Brackets**: These have a small lip to prevent items from sliding off the shelf. They are used in areas where items might be prone to slipping, such as in workshops or garages.
8. **Pipe Brackets**: Made from industrial pipes, these brackets offer a rugged, industrial look. They are used in modern or industrial-themed interiors, often in lofts or urban apartments.
How do I install closet rods securely?
1. **Measure and Plan**: Determine the height and length for the closet rod. Standard height is about 66 inches from the floor, but adjust based on your needs. Ensure the rod is level and mark the positions on both walls.
2. **Choose the Right Rod and Brackets**: Select a rod that fits your closet width and can support the weight of your clothes. Use sturdy brackets or rod supports, especially for longer spans.
3. **Locate Wall Studs**: Use a stud finder to locate studs in the walls where you’ll install the brackets. Mark these locations. If studs are not available, use heavy-duty wall anchors.
4. **Install Brackets**: Align the brackets with your marks. Drill pilot holes into the studs or use wall anchors if necessary. Secure the brackets with screws, ensuring they are level and firmly attached.
5. **Cut the Rod (if necessary)**: If the rod is too long, measure the required length and cut it using a hacksaw. Smooth any rough edges with sandpaper.
6. **Install the Rod**: Slide the rod into the brackets. If using center supports for longer rods, ensure they are evenly spaced and secure.
7. **Test Stability**: Gently pull down on the rod to ensure it is securely installed. Adjust as necessary to ensure it can support the weight of your clothes.
8. **Final Adjustments**: Make any necessary adjustments to ensure the rod is level and secure. Double-check all screws and anchors for tightness.
By following these steps, you can install closet rods securely, ensuring they are stable and capable of holding your clothing without sagging or falling.
What materials are best for closet hardware?
The best materials for closet hardware are those that offer durability, strength, and aesthetic appeal. Here are some top choices:
1. **Stainless Steel**: Known for its strength and resistance to rust and corrosion, stainless steel is ideal for closet rods, brackets, and handles. It offers a sleek, modern look and can support heavy loads without bending.
2. **Brass**: Brass hardware is durable and has a classic, elegant appearance. It is resistant to tarnishing and corrosion, making it suitable for decorative knobs, handles, and hooks.
3. **Aluminum**: Lightweight yet strong, aluminum is a cost-effective option for closet hardware. It is resistant to rust and can be anodized for added durability and color options.
4. **Zinc Alloy**: Often used for decorative hardware, zinc alloy is versatile and can be finished to mimic more expensive materials like brass or nickel. It is durable and resistant to corrosion.
5. **Wood**: For a more traditional or rustic look, wood can be used for closet rods and shelving brackets. Hardwoods like oak or maple are preferred for their strength and aesthetic appeal.
6. **Plastic**: While not as durable as metal, high-quality plastic can be used for lightweight applications such as drawer slides and shelf supports. It is resistant to moisture and available in various colors.
7. **Nickel**: Often used as a finish over other metals, nickel provides a polished, contemporary look. It is durable and resistant to corrosion, making it suitable for handles and knobs.
Choosing the right material depends on the specific needs of your closet, including load requirements, style preferences, and budget.
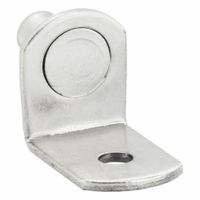
How do I choose the right size shelf support?
To choose the right size shelf support, consider the following factors:
1. **Shelf Material and Thickness**: Determine the material (wood, glass, metal) and thickness of the shelf. Heavier materials and thicker shelves require stronger supports.
2. **Load Capacity**: Estimate the weight the shelf will hold, including the shelf itself and the items placed on it. Choose supports that can handle this weight. Manufacturers often provide load ratings for their products.
3. **Support Type**: Decide between brackets, floating shelf supports, or adjustable systems. Brackets are visible and provide strong support, while floating supports offer a cleaner look but may have lower weight limits.
4. **Shelf Dimensions**: Measure the length and depth of the shelf. Longer shelves may need additional supports to prevent sagging. Typically, supports should be placed every 16 to 24 inches.
5. **Wall Type**: Identify the wall material (drywall, plaster, concrete) where the shelf will be mounted. Use appropriate anchors or screws for the wall type to ensure stability.
6. **Aesthetic Considerations**: Choose supports that match the style of the room and the shelf. Consider color, finish, and design.
7. **Installation Requirements**: Ensure you have the necessary tools and skills for installation. Some supports may require precise drilling and leveling.
8. **Adjustability**: If you anticipate changing the shelf height or configuration, consider adjustable systems that offer flexibility.
By evaluating these factors, you can select the appropriate size and type of shelf support to ensure safety, functionality, and aesthetic appeal.
What is the weight capacity of typical shelf brackets?
The weight capacity of typical shelf brackets can vary significantly based on several factors, including the material, size, design, and installation method. Generally, standard shelf brackets are made from materials such as steel, aluminum, or plastic, each offering different levels of strength and durability.
1. **Material**:
- **Steel Brackets**: These are the most common and can support a wide range of weights. Light-duty steel brackets might support around 20-50 pounds per pair, while heavy-duty options can hold up to 500 pounds or more.
- **Aluminum Brackets**: Typically lighter than steel, aluminum brackets are often used for medium-duty applications, supporting around 50-200 pounds per pair.
- **Plastic Brackets**: These are generally used for light-duty purposes, supporting around 10-50 pounds per pair.
2. **Size and Design**:
- Larger brackets with more surface area and additional support features (like gussets) can hold more weight. For example, a 12-inch bracket will generally support more weight than an 8-inch bracket.
- Designs such as L-brackets, Z-brackets, or those with diagonal supports can also influence weight capacity.
3. **Installation**:
- Proper installation is crucial. Brackets must be securely attached to wall studs or appropriate anchors. The type of wall (drywall, concrete, etc.) and the quality of the fasteners used can significantly affect the weight capacity.
- Even the strongest bracket will fail if not properly installed.
4. **Spacing**:
- The distance between brackets also affects capacity. Closer spacing generally increases the overall weight the shelf can support.
In summary, while typical shelf brackets can support anywhere from 10 to 500 pounds, it is essential to consider the specific bracket type, material, and installation method to determine the exact weight capacity for your needs.
How can I maximize storage space in my closet?
To maximize storage space in your closet, start by decluttering. Remove items you no longer need or use. Categorize your belongings into keep, donate, and discard piles. Once decluttered, consider the following strategies:
1. **Use Vertical Space**: Install additional shelves above existing ones to store less frequently used items. Use stackable bins or boxes to organize smaller items.
2. **Double Hanging Rods**: Add a second rod below the existing one to hang shorter items like shirts and pants, effectively doubling your hanging space.
3. **Shelf Dividers**: Use dividers to keep stacks of clothes neat and prevent them from toppling over.
4. **Over-the-Door Organizers**: Utilize the back of the closet door for shoe racks, hooks, or pocket organizers for accessories.
5. **Slim Hangers**: Replace bulky hangers with slim, non-slip versions to create more room on the rod.
6. **Drawer Organizers**: Use organizers or dividers in drawers to keep small items like socks, underwear, and accessories tidy.
7. **Under-Shelf Baskets**: Attach baskets under shelves to store items like scarves or clutches.
8. **Clear Storage Bins**: Use clear bins for easy visibility and stack them to utilize vertical space.
9. **Hooks and Pegs**: Install hooks or pegs on walls or inside doors for bags, hats, or jewelry.
10. **Rotate Seasonally**: Store off-season clothing in vacuum-sealed bags or bins to free up space for current season items.
11. **Label Everything**: Clearly label boxes and bins to quickly find what you need without rummaging.
By implementing these strategies, you can efficiently organize and maximize the storage space in your closet.
What tools are needed for installing closet hardware?
To install closet hardware, you will need the following tools:
1. **Measuring Tape**: For accurate measurements of the space and placement of hardware.
2. **Level**: Ensures that shelves, rods, and other hardware are installed straight and even.
3. **Pencil**: For marking measurements and placement points on the wall.
4. **Drill**: Essential for making holes in the wall to secure hardware. A cordless drill is often preferred for ease of use.
5. **Drill Bits**: Various sizes are needed depending on the type of screws and anchors used.
6. **Screwdriver**: Both Phillips and flathead types may be needed to tighten screws.
7. **Stud Finder**: Helps locate wall studs to ensure secure installation of heavy items.
8. **Level**: Ensures that shelves and rods are installed straight.
9. **Hammer**: Useful for tapping in anchors or nails.
10. **Wall Anchors**: Necessary if you are installing hardware on drywall without studs.
11. **Screws**: Appropriate size and type for the hardware being installed.
12. **Saw**: A hand saw or power saw may be needed to cut shelves or rods to the correct length.
13. **Pliers**: Useful for gripping and twisting, especially if you need to adjust or remove hardware.
14. **Safety Gear**: Safety glasses and gloves to protect against dust and sharp edges.
15. **Ladder or Step Stool**: To reach higher areas safely.
These tools will help ensure a secure and professional installation of closet hardware.