Call +(254) 703 030 000 / 751 483 999 / 721 704 777
Frequently Asked Questions
What are the essential bartending supplies for a home bar?
To set up a functional home bar, you'll need a mix of tools, glassware, and ingredients. Here's a comprehensive list:
1. **Tools:**
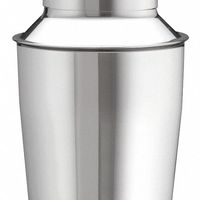
- **Cocktail Shaker:** Essential for mixing drinks. A Boston shaker or a cobbler shaker works well.
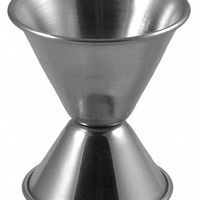
- **Jigger:** For precise measurement of spirits and mixers.
- **Bar Spoon:** Long-handled spoon for stirring cocktails.
- **Muddler:** Used to crush ingredients like mint or fruit.
- **Strainer:** A Hawthorne or fine mesh strainer to remove ice and solids.
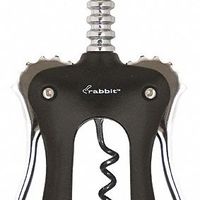
- **Corkscrew:** For opening wine bottles.
- **Bottle Opener:** For beer and soda bottles.
- **Peeler/Zester:** For garnishes like citrus twists.
- **Ice Bucket and Tongs:** To keep ice handy and clean.
2. **Glassware:**
- **Rocks Glasses:** For serving spirits neat or on the rocks.
- **Highball Glasses:** For mixed drinks like gin and tonic.
- **Martini Glasses:** For cocktails like martinis and cosmopolitans.
- **Wine Glasses:** Both red and white wine glasses.
- **Shot Glasses:** For measuring and serving shots.
3. **Ingredients:**
- **Spirits:** Vodka, gin, rum, tequila, whiskey, and a liqueur like triple sec.
- **Mixers:** Tonic water, club soda, cola, ginger ale, and juices (orange, cranberry, lime).
- **Bitters:** Angostura bitters for adding depth to cocktails.
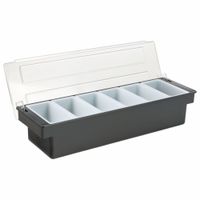
- **Garnishes:** Lemons, limes, olives, cherries, and fresh herbs like mint.
- **Simple Syrup:** For sweetening cocktails.
4. **Additional Items:**
- **Mixing Glass:** For stirred cocktails.
- **Cutting Board and Knife:** For preparing garnishes.
- **Coasters and Napkins:** To protect surfaces and for serving.
These essentials will equip you to make a wide range of cocktails and entertain guests effectively.
How do I choose the right cocktail shaker?
To choose the right cocktail shaker, consider the following factors:
1. **Type**: There are three main types of shakers:
- **Boston Shaker**: Consists of a metal tin and a mixing glass or another tin. It's preferred by professionals for its large capacity and efficiency but requires a separate strainer.
- **Cobbler Shaker**: Features a built-in strainer and cap, making it user-friendly for beginners. However, it can be prone to leaking and is harder to open when cold.
- **French Shaker**: A two-piece shaker similar to the Boston but without a glass component. It combines style with functionality but also needs a separate strainer.
2. **Material**: Most shakers are made of stainless steel, which is durable, easy to clean, and maintains temperature well. Glass shakers offer visibility but are fragile. Copper and other metals provide aesthetic appeal but may require more maintenance.
3. **Size**: Standard shakers hold around 18-28 ounces. Choose a size based on your typical serving needs. Larger shakers are ideal for multiple drinks, while smaller ones suit individual servings.
4. **Ease of Use**: Consider how comfortable the shaker is to hold and shake. A good seal is crucial to prevent leaks. Test the ease of opening and closing, especially for Cobbler shakers.
5. **Design and Aesthetics**: Choose a design that matches your style and bar setup. Sleek, modern designs or vintage styles can enhance your bar's appearance.
6. **Price**: Set a budget. While high-end shakers offer better quality and aesthetics, affordable options can still be functional and durable.
7. **Brand and Reviews**: Research reputable brands and read reviews to ensure reliability and customer satisfaction.
By evaluating these factors, you can select a cocktail shaker that suits your needs and enhances your bartending experience.
What tools are needed for creating cocktail garnishes?
To create cocktail garnishes, you need a variety of tools to ensure precision and creativity. Here are the essential tools:
1. **Paring Knife**: A small, sharp knife for peeling and slicing fruits and vegetables with precision.
2. **Channel Knife**: Used to create long, thin strips of citrus peel for twists.
3. **Zester**: Ideal for grating the outer peel of citrus fruits to add aromatic zest.
4. **Peeler**: A vegetable peeler can be used to create wide strips of citrus peel or to peel fruits and vegetables.
5. **Muddler**: While primarily used for muddling ingredients, it can also help in crushing herbs for garnishes.
6. **Citrus Reamer or Juicer**: Useful for extracting juice from citrus fruits, which can be used in garnishes like citrus wheels.
7. **Cutting Board**: A sturdy surface for cutting and preparing garnishes.
8. **Cocktail Picks or Skewers**: Used to hold garnishes like olives, cherries, or fruit slices together.
9. **Jigger**: While primarily for measuring, it can help in creating consistent garnish sizes.
10. **Tweezers or Tongs**: For placing delicate garnishes precisely on the drink.
11. **Grater**: For grating spices like nutmeg or chocolate over cocktails.
12. **Melon Baller**: To create small, round fruit balls for garnishing.
13. **Scissors**: For cutting herbs or edible flowers.
14. **Ice Molds**: To create decorative ice shapes that can serve as a garnish.
15. **Edible Flowers**: While not a tool, having a selection of edible flowers can enhance the visual appeal of cocktails.
These tools help in crafting visually appealing and aromatic garnishes that enhance the overall cocktail experience.
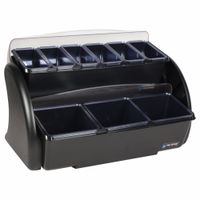
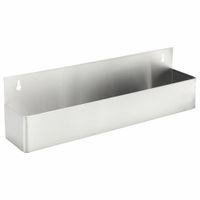
How do I properly organize bottles in a bar setting?
To properly organize bottles in a bar setting, follow these steps:
1. **Categorize by Type**: Group bottles by type, such as spirits, liqueurs, wines, and beers. Within spirits, further categorize by whiskey, vodka, rum, gin, tequila, etc.
2. **Prioritize Popularity**: Place the most frequently used bottles at eye level and within easy reach. This includes well liquors and popular brands.
3. **Arrange by Brand and Size**: Organize bottles by brand and size within each category. Keep similar brands together for easy identification and access.
4. **Use Shelving Effectively**: Utilize tiered shelving to display bottles at different heights, ensuring visibility of all labels. This helps bartenders quickly locate and grab bottles.
5. **Label Visibility**: Ensure labels face forward for easy identification. This is crucial for quick service and inventory management.
6. **Color Coordination**: For aesthetic appeal, consider arranging bottles by color, especially for liqueurs and mixers. This can enhance the visual appeal of the bar.
7. **Accessibility**: Keep frequently used mixers and garnishes nearby. Use speed rails for the most commonly used spirits to facilitate quick service.
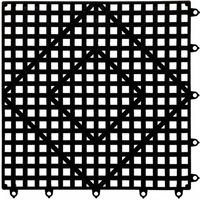
8. **Safety and Stability**: Ensure bottles are stable and not at risk of falling. Use non-slip mats on shelves if necessary.
9. **Inventory Management**: Regularly check and update inventory. Keep backup stock organized in a separate storage area, ensuring easy restocking.
10. **Cleanliness and Maintenance**: Regularly clean shelves and bottles to maintain a tidy appearance. Check for expired or low-stock items frequently.
11. **Compliance**: Adhere to local regulations regarding alcohol storage and display, ensuring all legal requirements are met.
By following these guidelines, you can create an efficient, visually appealing, and functional bar setup.
What is the best way to chill beverage bottles and cans?
The best way to chill beverage bottles and cans quickly and efficiently is by using an ice-water-salt bath. This method leverages the principles of thermodynamics to rapidly lower the temperature of the beverages. Here's how it works:
1. **Container Selection**: Use a large cooler, bucket, or sink that can accommodate the number of bottles or cans you need to chill.
2. **Ice and Water Ratio**: Fill the container with ice, then add cold water. The water should fill the spaces between the ice, ensuring maximum contact with the beverage containers. The ideal ratio is about 1:1 of ice to water.
3. **Salt Addition**: Add a generous amount of salt to the ice-water mixture. Salt lowers the freezing point of water, allowing the mixture to become colder than ice alone. This creates a super-chilled environment that can rapidly cool the beverages.
4. **Submersion**: Fully submerge the bottles or cans in the ice-water-salt bath. Ensure they are completely covered for even cooling.
5. **Agitation**: Occasionally stir the mixture to maintain even temperature distribution and prevent the formation of warm spots.
6. **Time Efficiency**: This method can chill beverages in as little as 15-20 minutes, making it ideal for last-minute cooling needs.
7. **Alternative Methods**: If an ice-water-salt bath is not feasible, wrapping bottles or cans in a wet paper towel and placing them in the freezer can also expedite cooling, though it is less effective than the ice-water-salt method.
This approach is efficient, cost-effective, and can be easily scaled depending on the number of beverages needing chilling.
How do I maintain and clean bar utensils?
To maintain and clean bar utensils effectively, follow these steps:
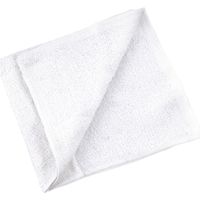
1. **Daily Cleaning**: After each use, rinse utensils like shakers, strainers, and jiggers with warm water to remove residue. Use a mild dish soap and a soft sponge to clean thoroughly. Avoid abrasive materials that can scratch surfaces.
2. **Sanitizing**: Regularly sanitize utensils by soaking them in a solution of one tablespoon of bleach per gallon of water for a few minutes. Rinse thoroughly with clean water afterward.
3. **Drying**: Air-dry utensils on a clean towel or drying rack. Ensure they are completely dry before storing to prevent rust and bacterial growth.
4. **Polishing**: For metal utensils, use a non-abrasive polish to maintain shine and prevent tarnish. Follow the manufacturer's instructions for specific products.
5. **Wooden Utensils**: Clean wooden items with mild soap and water. Avoid soaking them to prevent warping. Periodically treat with food-grade mineral oil to maintain the wood's condition.
6. **Glassware**: Hand wash delicate glassware with warm, soapy water. Use a soft brush for intricate designs. Rinse with vinegar to remove soap residue and enhance shine.
7. **Dishwasher Use**: Check if utensils are dishwasher-safe. If so, place them securely to avoid damage. Use a gentle cycle and avoid high heat settings.
8. **Storage**: Store utensils in a dry, clean area. Use drawer organizers or utensil holders to prevent scratches and maintain order.
9. **Regular Inspection**: Periodically inspect utensils for signs of wear, rust, or damage. Replace any items that are no longer in good condition to ensure safety and hygiene.
10. **Specialty Tools**: Follow specific care instructions for specialty tools like muddlers or zesters, as they may require unique cleaning methods.
By adhering to these practices, you can ensure your bar utensils remain in excellent condition, promoting hygiene and efficiency in your bar setup.
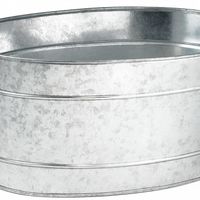
What are the differences between various types of ice buckets and wine buckets?
Ice buckets and wine buckets serve distinct purposes and have design differences to accommodate their specific uses.
1. **Purpose**:
- **Ice Buckets**: Primarily used to hold ice cubes or crushed ice for serving in drinks. They are often used in bars or at parties to provide easy access to ice.
- **Wine Buckets**: Specifically designed to chill and maintain the temperature of wine bottles. They are used in dining settings to keep wine at the optimal serving temperature.
2. **Design and Size**:
- **Ice Buckets**: Typically smaller and more compact, designed to hold a moderate amount of ice. They often come with a lid to prevent ice from melting quickly and may include tongs or a scoop for easy serving.
- **Wine Buckets**: Larger and deeper to accommodate one or more wine bottles. They are often open-topped to allow easy access to the bottle and may have a wider base for stability.
3. **Material**:
- **Ice Buckets**: Made from a variety of materials including stainless steel, plastic, glass, or acrylic. Insulated versions are common to slow down the melting of ice.
- **Wine Buckets**: Often made from stainless steel, silver, or other metals that provide good thermal conductivity to keep the wine chilled. Some may have double-walled construction for better insulation.
4. **Aesthetic and Features**:
- **Ice Buckets**: Can be decorative, with various colors and designs to match party themes or bar decor.
- **Wine Buckets**: Tend to have a more elegant and sophisticated appearance, often polished or with a classic design to complement fine dining settings. Some may include handles for easy transport.
5. **Accessories**:
- **Ice Buckets**: May come with additional accessories like tongs, scoops, or a lid.
- **Wine Buckets**: Sometimes paired with a stand to elevate the bucket off the table for easier access.