Call +(254) 703 030 000 / 751 483 999 / 721 704 777
Frequently Asked Questions
What is the best outdoor grill for beginners?
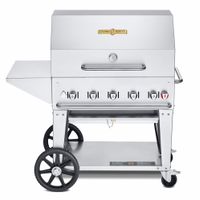
For beginners, a propane gas grill is often recommended due to its ease of use and quick heat-up time. Look for models with at least two burners for direct and indirect cooking, a built-in thermometer, and side tables for prep space. Brands like Weber and Char-Broil offer reliable options. A charcoal grill, while offering a distinct smoky flavor, requires more practice to control temperature and heat, making it less ideal for absolute beginners. Electric grills are also an option, particularly for balconies or areas with restrictions on open flames, but they generally offer less intense heat and flavor compared to gas or charcoal.
How do I clean and maintain my outdoor grill?
To clean and maintain your outdoor grill, start by preheating it to high heat after each use to burn off any food residue. Once cooled, use a grill brush to scrape off charred bits from the grates. For a deeper clean, remove the grates and wash them with warm, soapy water and a scrub brush.
Clean the interior of the grill body by scraping off any accumulated grease and food particles into a catch pan. Empty and clean the grease tray regularly to prevent flare-ups and blockages. For stainless steel exteriors, use a specialized stainless steel cleaner and a microfiber cloth to prevent streaks and maintain its shine. Painted or porcelain-coated surfaces can be wiped down with mild soap and water.
Periodically, inspect and clean the burners, heat deflectors, and other internal components. Ensure burner ports are clear of debris to maintain even flame distribution. Check for any signs of rust or damage on all parts.
For maintenance, cover your grill when not in use to protect it from the elements. If storing for a longer period, ensure it's thoroughly cleaned and dry to prevent mold and corrosion. Regularly check gas connections for leaks if you have a gas grill, and ensure all electrical components are in good working order for electric models. Following these steps will extend the life of your grill and ensure safe, enjoyable cooking experiences.
What are the differences between gas, charcoal, and electric grills?
Gas grills offer convenience and precise temperature control, heating up quickly and allowing for easy adjustment. Charcoal grills provide a smoky flavor due to the burning charcoal and wood chips, but they require more time to heat up and clean. Electric grills are the most convenient, plugging into an outlet and requiring minimal cleanup, though they may not reach the same high temperatures or impart the same smoky flavor as gas or charcoal grills.
How do I choose the right size grill for my needs?
Choosing the right size grill depends on several factors, primarily the number of people you typically cook for and the type of grilling you'll be doing. For individuals or couples, a compact portable grill or a small 2-burner gas grill with a cooking area of around 200-300 square inches might suffice. This size is also great for camping or tailgating.
If you often host small gatherings of 4-6 people, consider a medium-sized grill with 3-4 burners and 400-500 square inches of primary cooking space. This allows for grilling multiple items simultaneously and offers more versatility.
For larger families or frequent entertainers (6+ people), a large grill with 5 or more burners and over 500 square inches of cooking area is ideal. Some models even come with side burners or rotisserie kits, expanding your cooking capabilities.
Beyond the number of people, think about what you’ll be grilling. If you frequently cook large cuts of meat like briskets or whole chickens, you’ll need more indirect cooking space. If you mainly grill burgers and hot dogs, direct heat and a smaller surface might be fine. Also, consider your available outdoor space; a smaller patio might necessitate a more compact grill. Finally, factor in storage and portability if you plan on moving the grill frequently.
What are the essential accessories for outdoor grilling?
Essential accessories for outdoor grilling include: * Grill brush: For cleaning grill grates before and after use.
* Tongs: Long-handled tongs are crucial for safely flipping and moving food on the hot grill.
* Spatula: A sturdy, wide spatula is ideal for burgers and other delicate items.
* Meat thermometer: To ensure food is cooked to safe internal temperatures and desired doneness.
* Grill gloves: Heat-resistant gloves protect your hands from burns.
* Basting brush: For applying marinades and sauces.
* Chimney starter: For quickly and efficiently lighting charcoal.
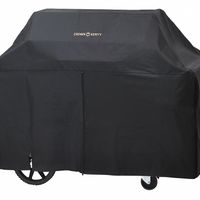
* Grill cover: To protect your grill from the elements when not in use.
* Fuel (charcoal or propane): Depending on your grill type, ensuring you have enough fuel is key.
* Aluminum foil and drip pans: For indirect cooking, preventing flare-ups, and easy cleanup.
How do I prevent flare-ups on my grill?
To prevent flare-ups on your grill, there are several key strategies you can employ. First, ensure your grill grates are clean before each use. Leftover grease and food particles from previous cooks are common culprits for flare-ups. A good grill brush can help with this.
Secondly, trim excess fat from your meats. While some fat is good for flavor, too much can drip down and ignite. For fattier cuts, consider cooking them over indirect heat or using a drip pan to catch rendered fat.
Manage your grill temperature carefully. If the grill gets too hot, fats and oils can vaporize and ignite. Cook at the recommended temperature for your food, and adjust burners as needed.
Avoid using too much oil or marinade. While marinades add flavor, excessive amounts can drip onto the heat source. Dab off any excess before placing food on the grill.
Finally, keep a spray bottle filled with water handy. If a flare-up occurs, a quick spritz can extinguish the flames without significantly cooling down your grill. For more serious flare-ups, close the grill lid for a few seconds to cut off the oxygen supply, but avoid closing it for too long as this can lead to a smoky flavor. Never use water to extinguish a grease fire; instead, try to smother it or use a fire extinguisher.
What is the best way to store a grill during the off-season?
To store a grill during the off-season, start by thoroughly cleaning it. Remove all food debris, grease, and ash from grates, burners, and the interior. For gas grills, disconnect the propane tank and store it upright in a well-ventilated area outdoors, away from direct sunlight and heat sources. If your grill has a side burner, clean that as well. For charcoal grills, empty the ash catcher.
Once clean, dry all components completely to prevent rust. Apply a light coat of cooking oil to cast iron grates to protect them. Consider removing smaller, more sensitive parts like electronic igniters or temperature gauges and storing them indoors in a dry place.
For protection from the elements, invest in a high-quality, weather-resistant grill cover. Ensure the cover fits snugly to prevent wind and moisture from getting underneath. If possible, store the grill in a sheltered location like a garage, shed, or covered patio. This will offer additional protection from extreme temperatures, rain, and snow, extending the life of your grill.
How do I convert a grill from propane to natural gas?
Converting a grill from propane to natural gas typically involves replacing specific components to accommodate the different fuel types and pressures. Propane (LP) operates at a higher pressure than natural gas (NG), so a conversion usually requires changing the gas regulator, orifices, and sometimes the gas hose and burner valves.
First, you'll need a natural gas conversion kit specific to your grill's make and model. This kit usually includes a new natural gas regulator, orifices for each burner (which have larger openings than propane orifices to allow for the lower pressure of natural gas), and potentially a longer natural gas hose.
The process generally involves disconnecting the propane tank and regulator, then unscrewing and replacing the propane orifices in each burner with the natural gas orifices provided in the kit. It's crucial to ensure these are correctly installed and tightened to prevent gas leaks. Next, the natural gas regulator and hose are attached, and the grill is connected to a natural gas supply line.
After conversion, it's essential to perform a leak test using a soapy water solution on all connections to ensure there are no gas leaks. Bubbles indicate a leak, which must be addressed before operating the grill. If you are not comfortable performing this conversion yourself, it is always recommended to consult a qualified technician or the grill manufacturer's instructions to ensure safety and proper operation.
What are the best portable grills for camping or tailgating?
When choosing the best portable grills for camping or tailgating, consider factors like fuel type (propane, charcoal, or electric), cooking area size, portability features (collapsible legs, wheels, carrying handles), and extra features such as side tables or thermometers. Popular options include propane grills for their convenience and quick heating, charcoal grills for their smoky flavor, and electric grills for areas with power access. Brands like Weber Q series, Coleman RoadTrip, and George Foreman are often highly rated for their compact designs and efficient performance, making them ideal for outdoor adventures.
How do I season a new grill or griddle?
Seasoning a new grill or griddle is an essential step to ensure longevity, prevent rust, and create a non-stick surface for cooking. This process involves applying a thin layer of oil and heating it, allowing the oil to polymerize and bond with the metal.
For a new cast iron grill or griddle, start by washing it with warm, soapy water and a stiff brush to remove any manufacturing residues, then dry it thoroughly to prevent rust. Apply a very thin, even layer of a high smoke point oil, such as flaxseed oil, grapeseed oil, or vegetable oil, to all surfaces of the cooking area. You can use a paper towel to wipe off any excess oil, as too much will result in a sticky, gummy surface.
Next, place the grill or griddle in an oven preheated to 450-500°F (232-260°C) upside down to allow any excess oil to drip off. Bake for at least one hour. After an hour, turn off the oven and let the grill or griddle cool down slowly inside the oven. This slow cooling helps the oil polymerize effectively. Repeat this oiling and baking process at least three to four times to build up a durable seasoning layer.
For gas or charcoal grills with grates, the process is slightly different. First, clean the grates thoroughly. Then, preheat the grill to a medium-high temperature. Once hot, apply a thin layer of oil to the grates using a paper towel or a spray. Close the lid and let it heat for 15-20 minutes. This will burn off any residues and help the oil create a protective layer. Repeat this process a few times.
Regardless of the type, consistent use and proper cleaning (avoiding harsh soaps that strip seasoning) will continue to build and maintain the non-stick properties over time.