Call +(254) 703 030 000 / 751 483 999 / 721 704 777
Frequently Asked Questions
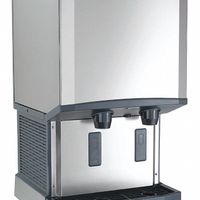
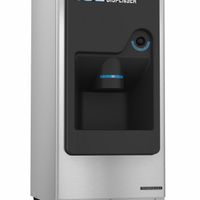
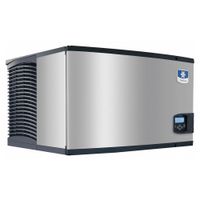
What is the difference between an ice maker and an ice dispenser?
An ice maker and an ice dispenser serve different functions in the process of producing and delivering ice, though they are often found together in modern appliances.
An ice maker is a device that produces ice. It can be a standalone appliance or a component within a refrigerator. The ice-making process involves freezing water in a mold to form ice cubes or other shapes. Ice makers can be manual, where water is poured into trays and frozen, or automatic, where water is supplied through a connected water line. Automatic ice makers typically have a mechanism to release the ice into a storage bin once it is frozen. They can produce a continuous supply of ice, depending on the capacity and design.
An ice dispenser, on the other hand, is a mechanism that delivers ice to the user. It is commonly found on the exterior of a refrigerator door or as part of a standalone ice machine. The dispenser allows users to access ice without opening the freezer compartment. It typically includes a chute or lever system that releases ice cubes or crushed ice directly into a glass or container. Some dispensers also offer options for selecting the type of ice, such as cubed or crushed.
In summary, the primary difference lies in their functions: the ice maker is responsible for creating ice, while the ice dispenser is designed to deliver the ice to the user. They often work in tandem, with the ice maker producing and storing ice, and the dispenser providing convenient access to it.
How do I clean and maintain an ice maker?
1. **Unplug and Empty**: Turn off and unplug the ice maker. Remove any remaining ice and water from the machine.
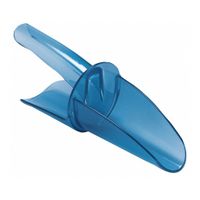
2. **Disassemble**: Take out removable parts like the ice bin, scoop, and water reservoir. Refer to the user manual for guidance.
3. **Clean Removable Parts**: Wash these parts with warm, soapy water. Rinse thoroughly and dry completely before reassembling.
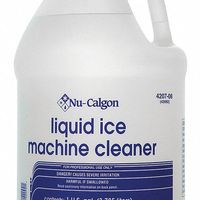
4. **Prepare Cleaning Solution**: Mix a solution of equal parts water and white vinegar or use a commercial ice machine cleaner.
5. **Clean Interior**: Use a soft cloth or sponge dipped in the cleaning solution to wipe down the interior surfaces of the ice maker. Pay special attention to the ice mold and water reservoir.
6. **Rinse**: Wipe the interior with a clean, damp cloth to remove any cleaning solution residue.
7. **Sanitize**: Mix a solution of one tablespoon of bleach per gallon of water. Wipe down the interior surfaces with this solution to sanitize.
8. **Rinse Again**: Use a clean, damp cloth to remove any bleach residue.
9. **Reassemble**: Once all parts are dry, reassemble the ice maker.
10. **Run a Cleaning Cycle**: Plug in the ice maker and run a cleaning cycle if your model has this feature. Discard the first batch of ice to ensure any remaining cleaning solution is flushed out.
11. **Regular Maintenance**: Clean the ice maker every 3-6 months. Regularly check and replace the water filter if applicable.
12. **Exterior Cleaning**: Wipe the exterior with a damp cloth and mild detergent. Avoid abrasive cleaners that can damage the finish.
13. **Check for Issues**: Regularly inspect for leaks, unusual noises, or decreased ice production, which may indicate maintenance needs.
What size ice maker do I need for my business?
To determine the appropriate size ice maker for your business, consider the following factors:
1. **Type of Business**: Different businesses have varying ice needs. Restaurants, bars, hotels, and healthcare facilities each have unique requirements. For example, a bar might need more ice for cocktails, while a hotel might need ice for guest rooms and dining services.
2. **Daily Ice Consumption**: Estimate your daily ice usage. Restaurants typically need 1.5 pounds of ice per customer, bars require 3 pounds per seat, hotels need 5 pounds per room, and healthcare facilities might need 10 pounds per patient.
3. **Peak Demand**: Consider peak times when ice demand is highest. Ensure the ice maker can handle these periods without running out.
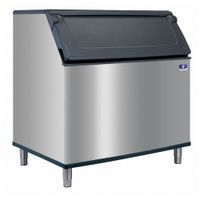
4. **Storage Capacity**: Choose a machine with adequate storage to hold ice during off-peak times, ensuring availability during busy periods.
5. **Space and Location**: Assess the available space for the ice maker. Consider undercounter models for limited space or larger machines for back-of-house areas.
6. **Water and Drainage**: Ensure proper water supply and drainage are available. Some machines require specific plumbing setups.
7. **Energy Efficiency**: Look for energy-efficient models to reduce operational costs. Check for Energy Star ratings.
8. **Growth Projections**: Consider future growth. Choose a machine that can accommodate increased demand as your business expands.
9. **Budget**: Balance your needs with your budget. Higher capacity machines may have a higher upfront cost but can be more cost-effective in the long run.
By evaluating these factors, you can select an ice maker that meets your business's specific needs, ensuring efficient and reliable ice production.
How do I troubleshoot common ice maker problems?
To troubleshoot common ice maker problems, follow these steps:
1. **Check the Power Supply**: Ensure the ice maker is plugged in and the circuit breaker is not tripped. Reset if necessary.
2. **Inspect the Water Supply**: Verify that the water line is connected and the water valve is open. Check for kinks or blockages in the line.
3. **Examine the Water Filter**: A clogged filter can restrict water flow. Replace the filter if it’s dirty or hasn’t been changed in the recommended time frame.
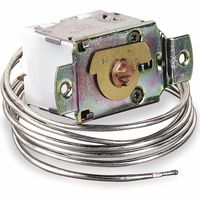
4. **Adjust the Thermostat**: Ensure the freezer temperature is set between 0-5°F (-18 to -15°C). A warmer setting can hinder ice production.
5. **Check the Ice Maker Switch**: Make sure the ice maker is turned on. Some models have a switch or lever that can be accidentally turned off.
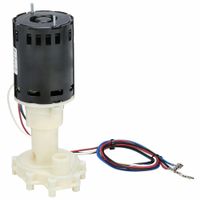
6. **Inspect the Ice Maker Components**: Look for jammed ice cubes in the ejector arm or mold. Clear any obstructions.
7. **Test the Water Inlet Valve**: If the ice maker isn’t filling with water, the inlet valve might be faulty. Test it with a multimeter for continuity and replace if defective.
8. **Examine the Ice Mold Thermostat**: This component signals the ice maker to release ice. If it’s malfunctioning, the ice maker may not cycle properly.
9. **Look for Leaks**: Check for water pooling around the ice maker, which could indicate a leak in the water line or connections.
10. **Reset the Ice Maker**: Some models have a reset button. Press it to restart the ice-making cycle.
11. **Consult the Manual**: Refer to the user manual for model-specific troubleshooting tips.
12. **Call a Professional**: If the problem persists, contact a technician for a thorough diagnosis and repair.
What are the best ice machine cleaners and disinfectants?
Some of the best ice machine cleaners and disinfectants include:
1. **Nu-Calgon Nickel-Safe Ice Machine Cleaner**: This cleaner is specifically designed for ice machines with nickel-plated evaporators. It effectively removes scale and mineral deposits without damaging the machine.
2. **Scotsman Clear 1 Scale Remover**: Ideal for Scotsman ice machines, this cleaner efficiently removes scale buildup and is safe for use on all machine components.
3. **Moldex Mold Killer**: This disinfectant is effective against mold, mildew, and bacteria, ensuring the ice machine remains hygienic. It is suitable for use on hard, non-porous surfaces.
4. **Zep Calcium, Lime, and Rust Remover**: This cleaner is excellent for removing tough mineral deposits and rust stains, ensuring the ice machine operates efficiently.
5. **Ice-O-Matic Nickel-Safe Cleaner**: Designed for Ice-O-Matic machines, this cleaner safely removes scale and mineral deposits from nickel-plated and other surfaces.
6. **Manitowoc Ice Machine Cleaner**: Specifically formulated for Manitowoc ice machines, this cleaner effectively removes lime scale and mineral deposits, ensuring optimal performance.
7. **Diversey Suma Calc D5.2**: A versatile cleaner that removes lime scale from kitchen equipment, including ice machines. It is safe for use on stainless steel and other surfaces.
8. **Clorox Commercial Solutions Clorox Disinfecting Spray**: This disinfectant spray kills 99.9% of bacteria and viruses, making it ideal for sanitizing ice machine surfaces.
9. **EcoLab Ice Machine Cleaner**: Known for its effectiveness in removing scale and mineral deposits, this cleaner is safe for use on a variety of ice machine surfaces.
10. **Affresh Ice Machine Cleaner**: This cleaner is designed to remove hard water and mineral deposits, ensuring the ice machine remains clean and efficient.
Regular cleaning and disinfecting with these products can help maintain the efficiency and hygiene of ice machines.
How do I install an ice maker or dispenser?
1. **Choose the Location**: Select a spot near a water line and electrical outlet. Ensure there's enough space for ventilation and access.
2. **Gather Tools and Materials**: You'll need a drill, adjustable wrench, screwdriver, tubing cutter, water line kit, and possibly a saddle valve.
3. **Turn Off Water Supply**: Shut off the main water supply to prevent leaks during installation.
4. **Install Water Line**:
- If your refrigerator doesn't have a water line, install one. Use a saddle valve to tap into a nearby cold water pipe.
- Attach the water line to the saddle valve and run it to the refrigerator.
5. **Connect Water Line to Refrigerator**:
- Locate the water inlet valve on the back of the refrigerator.
- Attach the water line to the inlet valve using a compression fitting.
6. **Install Ice Maker**:
- If not pre-installed, place the ice maker inside the freezer compartment.
- Secure it with screws provided in the kit.
- Connect the ice maker's wiring harness to the refrigerator's electrical connector.
7. **Install Water Filter (if applicable)**:
- Some models require a water filter. Install it according to the manufacturer's instructions.
8. **Turn On Water Supply**:
- Slowly turn on the water supply and check for leaks.
- Tighten connections if necessary.
9. **Plug In Refrigerator**:
- Connect the refrigerator to the electrical outlet.
10. **Test the Ice Maker**:
- Allow the ice maker to cycle through a few batches of ice to ensure proper operation.
- Discard the first few batches of ice to clear any impurities.
11. **Adjust Settings**:
- Set the ice maker's controls according to your preference.
12. **Check for Leaks**:
- Inspect all connections for leaks and tighten if needed.
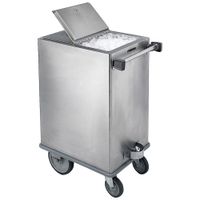
What are the benefits of using ice caddies and totes?
Ice caddies and totes offer several benefits, particularly in commercial and event settings. They provide efficient ice storage and transportation, ensuring that ice remains clean and accessible. These tools help maintain the ice's temperature, reducing melting and ensuring a consistent supply. Ice caddies are typically insulated, which helps in preserving ice for extended periods, minimizing waste and the need for frequent refills.
Using ice caddies and totes enhances hygiene by reducing direct contact with ice, thus preventing contamination. This is crucial in food service and hospitality industries where health standards are paramount. The design of these tools often includes features like drainage systems to remove excess water, keeping the ice dry and usable.
They also improve operational efficiency. Ice caddies and totes are mobile, often equipped with wheels or handles, allowing staff to transport large quantities of ice quickly and with minimal effort. This mobility is particularly beneficial in large venues or outdoor events where ice needs to be distributed across various locations.
Furthermore, these tools are durable and designed to withstand the rigors of frequent use. Made from robust materials, they offer a long service life, providing a cost-effective solution for businesses. Their ergonomic design reduces the risk of injury from lifting heavy loads, promoting workplace safety.
In summary, ice caddies and totes are essential for maintaining ice quality, ensuring hygiene, enhancing operational efficiency, and promoting safety in environments where ice is frequently used.