Call +(254) 703 030 000 / 751 483 999 / 721 704 777
- Home
- Furnishings Appliances Hospitality
- Appliances
- Garbage Disposals Mounting Hardware
Frequently Asked Questions
How do I install a garbage disposal?
1. **Turn Off Power and Water**: Ensure the power to the kitchen is off at the circuit breaker. Turn off the water supply.
2. **Remove Existing Disposal**: If replacing, disconnect the drain pipes and remove the disposal unit by twisting it off the mounting ring. Detach the mounting assembly.
3. **Install New Mounting Assembly**: Apply plumber’s putty around the sink flange. Insert the flange into the sink drain hole. Underneath, attach the gasket, backup ring, and mounting ring. Tighten the screws evenly.
4. **Prepare the Disposal Unit**: If connecting to a dishwasher, knock out the dishwasher plug on the disposal. Attach the discharge tube to the disposal unit.
5. **Mount the Disposal**: Align the disposal with the mounting assembly. Turn the lower mounting ring until the disposal is supported. Tighten the mounting screws.
6. **Connect the Plumbing**: Attach the discharge tube to the drain pipe. Connect the dishwasher hose if applicable. Ensure all connections are tight.
7. **Wire the Disposal**: Remove the electrical cover plate. Connect the wires: black to black, white to white, and green to ground. Replace the cover plate.
8. **Test the Installation**: Restore power and water. Run water and test the disposal. Check for leaks and ensure the unit operates smoothly.
9. **Final Adjustments**: Tighten any loose connections and ensure the disposal is securely mounted.
10. **Clean Up**: Remove any excess plumber’s putty and clean the area.
Always refer to the specific disposal unit’s manual for detailed instructions and safety precautions.
What size garbage disposal do I need?
To determine the appropriate size of a garbage disposal for your needs, consider the following factors:
1. **Household Size**:
- **1-2 people**: A 1/3 to 1/2 horsepower (HP) disposal is typically sufficient.
- **3-6 people**: A 1/2 to 3/4 HP disposal is recommended.
- **More than 6 people**: A 1 HP or larger disposal is advisable.
2. **Usage Frequency**:
- **Light Use**: If you rarely use the disposal, a 1/3 HP unit may suffice.
- **Moderate Use**: For regular use, a 1/2 to 3/4 HP unit is better.
- **Heavy Use**: For frequent use or grinding tough waste, opt for 1 HP or more.
3. **Type of Waste**:
- **Soft Waste**: Smaller disposals can handle soft waste like fruit peels.
- **Hard Waste**: Larger disposals are needed for hard waste like bones.
4. **Noise Level**:
- Larger disposals often have better sound insulation, reducing noise.
5. **Space Availability**:
- Ensure the disposal fits under your sink and is compatible with your plumbing.
6. **Budget**:
- Higher HP disposals are more expensive but offer better performance and durability.
7. **Environmental Considerations**:
- Consider energy-efficient models to reduce environmental impact.
8. **Local Regulations**:
- Check local plumbing codes and regulations regarding garbage disposals.
By evaluating these factors, you can choose a garbage disposal that meets your household's needs, ensuring efficient and effective waste management.
How do I unclog a garbage disposal?
1. **Safety First**: Turn off the power to the garbage disposal. Unplug it from the outlet under the sink or turn off the circuit breaker to ensure it doesn't accidentally turn on while you're working.
2. **Inspect the Disposal**: Use a flashlight to look inside the disposal through the sink drain. Avoid putting your hand inside. Look for any visible obstructions like food particles or foreign objects.
3. **Use Tongs or Pliers**: If you see any objects, use tongs or pliers to carefully remove them. Never use your hands to reach inside the disposal.
4. **Reset the Disposal**: Locate the reset button on the bottom of the disposal unit. Press it to reset the disposal, which can sometimes resolve minor clogs.
5. **Use a Plunger**: If the disposal is still clogged, try using a sink plunger. Fill the sink with a few inches of water, place the plunger over the drain, and plunge vigorously to dislodge the clog.
6. **Use a Hex Wrench**: If the disposal is still jammed, use a hex wrench (often provided with the disposal) to manually turn the disposal's motor. Insert the wrench into the hex-shaped hole at the bottom of the unit and turn it back and forth to free the impeller.
7. **Flush with Water**: Once the clog is cleared, run cold water through the disposal for a few minutes to flush out any remaining debris.
8. **Test the Disposal**: Restore power to the disposal and test it by running water and turning it on to ensure it operates smoothly.
9. **Prevent Future Clogs**: Avoid putting fibrous, starchy, or hard materials down the disposal. Regularly clean it with ice cubes and lemon peels to maintain efficiency.
What can and cannot go in a garbage disposal?
A garbage disposal is a convenient kitchen appliance designed to grind food waste into small particles that can be safely washed down the drain. However, not all food waste is suitable for disposal.
**What Can Go in a Garbage Disposal:**
1. **Soft Foods:** Most soft foods like fruit scraps, vegetable peels, and small amounts of cooked meat can be processed.
2. **Citrus Rinds:** Lemon or orange peels can help clean and deodorize the disposal.
3. **Small Bones:** Small chicken or fish bones can be ground, but larger bones should be avoided.
4. **Coffee Grounds:** In moderation, they can be disposed of, but excessive amounts may cause clogs.
5. **Eggshells:** These can be ground, but some plumbers advise against it due to potential for creating granular waste that can stick to pipes.
**What Cannot Go in a Garbage Disposal:**
1. **Fibrous Vegetables:** Celery, corn husks, and asparagus can wrap around blades and cause jams.
2. **Grease and Oil:** These can solidify and cause clogs in pipes.
3. **Large Bones:** Beef or pork bones are too hard and can damage the disposal.
4. **Pasta and Rice:** These expand with water and can cause blockages.
5. **Non-Food Items:** Plastic, metal, glass, and paper should never be put in the disposal.
6. **Potato Peels:** They can form a starchy paste that clogs pipes.
7. **Onion Skins:** These can wrap around the blades and cause jams.
8. **Shells:** Shells from seafood like shrimp or crabs are too hard and can damage the disposal.
Proper use of a garbage disposal involves running cold water while operating it and avoiding overloading it with waste. Regular maintenance and mindful disposal practices can extend the life of the appliance and prevent plumbing issues.
How do I clean and maintain a garbage disposal?
To clean and maintain a garbage disposal, follow these steps:
1. **Power Off**: Always turn off the disposal at the circuit breaker to ensure safety.
2. **Remove Debris**: Use tongs or pliers to remove any visible debris or food particles from the disposal.
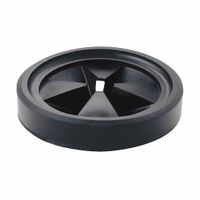
3. **Clean the Splash Guard**: Detach the rubber splash guard and scrub it with a brush and dish soap to remove grime and odors.
4. **Flush with Water**: Run cold water through the disposal for about 30 seconds to flush out loose particles.
5. **Use Ice and Salt**: Pour a cup of ice cubes and half a cup of rock salt into the disposal. Run cold water and turn on the disposal to grind the ice, which helps dislodge debris and sharpen blades.
6. **Deodorize with Citrus**: Cut a lemon or lime into small wedges and feed them into the disposal while it’s running with cold water. The citrus oils will help eliminate odors.
7. **Baking Soda and Vinegar**: Pour half a cup of baking soda into the disposal, followed by a cup of white vinegar. Let it fizz for a few minutes, then rinse with hot water to clean and deodorize.
8. **Brush the Interior**: Use a long-handled brush to scrub the interior walls and under the splash guard.
9. **Regular Use**: Run the disposal regularly with cold water to prevent rust and corrosion.
10. **Avoid Certain Foods**: Do not dispose of fibrous foods, grease, or large bones to prevent clogs and damage.
11. **Routine Checks**: Periodically check for leaks and ensure the disposal is securely mounted.
By following these steps, you can keep your garbage disposal clean, efficient, and odor-free.
How do I replace a garbage disposal?
1. **Turn Off Power**: Disconnect the power to the garbage disposal at the circuit breaker to ensure safety.
2. **Disconnect Drain Lines**: Place a bucket under the sink to catch any water. Use pliers to loosen the slip nuts on the drain pipes and remove the pipes. Detach the dishwasher drain hose if connected.
3. **Remove Disposal Unit**: Insert a hex wrench into the mounting ring on the disposal unit. Turn counterclockwise to loosen and remove the disposal. If it’s stuck, tap gently with a hammer.
4. **Remove Mounting Assembly**: Unscrew the mounting ring and remove the mounting assembly from the sink flange. Clean the area thoroughly.
5. **Install New Mounting Assembly**: Apply plumber’s putty around the new sink flange. Insert the flange into the sink hole. Under the sink, attach the gasket, backup ring, and mounting ring. Tighten the screws evenly.
6. **Attach New Disposal**: Align the disposal’s mounting tabs with the mounting ring. Turn the disposal clockwise to lock it in place. Ensure it’s secure.
7. **Reconnect Drain Lines**: Reattach the drain pipes and dishwasher hose. Ensure all connections are tight to prevent leaks.
8. **Wire the Disposal**: If the new disposal doesn’t have a power cord, remove the cover plate, connect the wires (black to black, white to white, and green to ground), and replace the cover.
9. **Test the Disposal**: Restore power at the circuit breaker. Run water and turn on the disposal to check for leaks and proper operation.
10. **Final Check**: Ensure all connections are secure and there are no leaks. Adjust as necessary.
Why is my garbage disposal making noise?
A garbage disposal making noise can be attributed to several potential issues:
1. **Foreign Objects**: Items like utensils, bones, or other non-grindable materials may have accidentally fallen into the disposal, causing a rattling or grinding noise.
2. **Loose Components**: Over time, components such as mounting screws or internal parts can become loose, leading to unusual sounds during operation.
3. **Worn Bearings**: The motor bearings can wear out, resulting in a humming or grinding noise. This often indicates the need for repair or replacement.
4. **Jammed Flywheel**: If the flywheel is jammed, it can cause a humming noise as the motor struggles to turn. This can be due to debris or a mechanical failure.
5. **Damaged Blades**: The impellers or blades might be damaged or misaligned, causing a loud clattering noise as they hit against the disposal's walls.
6. **Motor Issues**: A failing motor can produce a humming or buzzing noise, indicating that it is not functioning properly and may need replacement.
7. **Clogged or Blocked Drain**: A blockage in the drain can cause the disposal to make gurgling or bubbling noises as water struggles to pass through.
8. **Improper Installation**: If the disposal was not installed correctly, it might vibrate excessively, leading to noise.
9. **Age and Wear**: Older units may simply be worn out, with various components failing, leading to increased noise levels.
To address these issues, ensure the disposal is turned off and disconnected from power before inspecting. Remove any foreign objects, tighten loose parts, or consider professional repair or replacement if necessary. Regular maintenance can prevent many of these problems.

