Call +(254) 703 030 000 / 751 483 999 / 721 704 777
.....Read More
Frequently Asked Questions
What is the difference between LED and LCD TVs?
LED TVs are a type of LCD TV. The primary difference lies in the backlighting technology used.
LCD TVs use cold cathode fluorescent lamps (CCFLs) for backlighting. These lamps illuminate the liquid crystal display, allowing the screen to produce images. CCFLs provide uniform brightness but are less energy-efficient and bulkier.
LED TVs, on the other hand, use light-emitting diodes (LEDs) for backlighting. This technology offers several advantages over CCFLs:
1. **Energy Efficiency**: LEDs consume less power, making LED TVs more energy-efficient.
2. **Slim Design**: LEDs are smaller, allowing for thinner and lighter TV designs.
3. **Brightness and Contrast**: LED TVs can achieve higher brightness levels and better contrast ratios, enhancing picture quality.
4. **Color Accuracy**: LEDs provide more precise color control, resulting in more vibrant and accurate colors.
5. **Lifespan**: LEDs generally have a longer lifespan compared to CCFLs.
LED TVs can be further categorized into edge-lit and full-array (or direct-lit) models. Edge-lit LED TVs have LEDs around the screen's edges, while full-array models have LEDs distributed across the entire back of the screen, offering better local dimming and contrast.
In summary, while both LED and LCD TVs use liquid crystal displays, the difference in backlighting technology results in variations in energy efficiency, design, picture quality, and overall performance.
How do I choose the right size TV for my room?
1. **Room Size and Viewing Distance**: Measure the distance from where you plan to sit to where the TV will be placed. A general rule is to sit at a distance that is 1.5 to 2.5 times the diagonal size of the TV. For example, for a 55-inch TV, the ideal viewing distance is between 6.9 and 11.5 feet.
2. **Resolution**: Higher resolutions like 4K allow you to sit closer without noticing pixels. This means you can opt for a larger screen even in smaller rooms.
3. **Room Layout**: Consider the layout and furniture arrangement. Ensure the TV size complements the room without overwhelming it. The TV should be at eye level when seated.
4. **Screen Size Preference**: Personal preference plays a role. Some prefer a more immersive experience with a larger screen, while others may opt for a smaller size for a more subtle presence.
5. **Wall Space**: If wall-mounting, ensure the wall can accommodate the TV size. Consider the height and width of the TV and ensure it fits comfortably on the wall.
6. **Budget**: Larger TVs generally cost more. Balance your desired size with your budget constraints.
7. **Lighting Conditions**: Consider the room’s lighting. Larger screens can be beneficial in bright rooms as they are easier to see from a distance.
8. **Future-Proofing**: Consider future needs. If you plan to upgrade your space or move, a slightly larger TV might be a better long-term investment.
9. **Aspect Ratio**: Most modern TVs are 16:9, but ensure the aspect ratio fits your viewing habits, especially if you watch a lot of movies or sports.
10. **Test Viewing**: If possible, visit a store to view different sizes and see what feels comfortable for your viewing habits.
What are the benefits of 4K resolution over HD?
1. **Higher Pixel Count**: 4K resolution offers approximately 8.3 million pixels (3840 x 2160), compared to HD's 2 million pixels (1920 x 1080). This results in sharper and more detailed images.
2. **Improved Clarity**: The increased pixel density in 4K provides clearer and more defined images, enhancing the viewing experience, especially on larger screens.
3. **Enhanced Color Depth**: 4K content often supports a wider color gamut and higher dynamic range, resulting in more vibrant and realistic colors.
4. **Better Viewing Angles**: With more pixels, 4K displays allow for better viewing angles without loss of quality, making it ideal for larger audiences.
5. **Future-Proofing**: As 4K becomes the standard, investing in 4K technology ensures compatibility with future content and devices.
6. **Improved Streaming and Gaming**: Many streaming services and gaming consoles now support 4K, offering higher quality content and more immersive gaming experiences.
7. **Superior Upscaling**: 4K TVs often have advanced upscaling technology, improving the quality of HD content to appear closer to 4K.
8. **Professional Use**: For professionals in video production and photography, 4K provides greater detail and flexibility in editing and post-production.
9. **Enhanced Immersion**: The increased detail and clarity contribute to a more immersive viewing experience, making it ideal for home theaters.
10. **Better for Large Screens**: 4K resolution is particularly beneficial for large screens, where HD might appear pixelated or blurry.
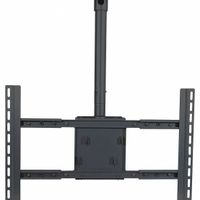
How do I mount a TV on the wall?
1. **Choose the Location**: Select a wall that can support the TV's weight. Avoid areas with direct sunlight or glare.
2. **Find the Studs**: Use a stud finder to locate the wall studs. Mark their positions with a pencil.
3. **Select the Mount**: Choose a mount compatible with your TV size and weight. Ensure it fits your TV's VESA pattern.
4. **Gather Tools and Materials**: You’ll need a drill, level, screwdriver, tape measure, pencil, and the mounting kit.
5. **Attach the Mounting Bracket to the TV**: Follow the instructions to attach the bracket to the back of the TV using the provided screws.
6. **Mark the Mounting Holes**: Hold the wall mount against the wall, aligning it with the studs. Use a level to ensure it’s straight, then mark the holes.
7. **Drill Pilot Holes**: Drill pilot holes into the marked spots on the studs to make it easier to insert screws.
8. **Attach the Wall Mount**: Secure the wall mount to the wall using the provided screws and a drill. Ensure it’s tightly fastened.
9. **Hang the TV**: With help, lift the TV and align the bracket with the wall mount. Secure it according to the mount’s instructions.
10. **Check Stability**: Ensure the TV is securely mounted and level. Adjust if necessary.
11. **Conceal Cables**: Use cable management solutions to hide wires for a clean look.
12. **Test the Setup**: Turn on the TV to ensure it’s functioning properly and adjust the angle if the mount allows.
13. **Final Adjustments**: Make any final adjustments to the tilt or angle for optimal viewing.
What accessories do I need for my new TV?
1. **Wall Mount or Stand**: Choose a wall mount for a sleek look or a stand if you prefer placing the TV on furniture.
2. **Sound System**: Consider a soundbar or a home theater system for enhanced audio quality.
3. **Streaming Device**: If your TV isn't a smart TV, a streaming device like Roku, Amazon Fire Stick, or Apple TV can provide access to streaming services.
4. **HDMI Cables**: Ensure you have high-speed HDMI cables for connecting devices like gaming consoles, Blu-ray players, or streaming devices.
5. **Surge Protector**: Protect your TV and connected devices from power surges with a quality surge protector.
6. **Universal Remote**: Simplify control of multiple devices with a universal remote.
7. **Cable Management**: Use cable management solutions to keep cords organized and out of sight.
8. **Antenna**: For access to local channels, consider an HD antenna.
9. **Gaming Console**: If you're a gamer, connect a console like PlayStation, Xbox, or Nintendo Switch.
10. **Blu-ray Player**: For high-definition movie viewing, a Blu-ray player is a good addition.
11. **Calibration Tool**: Use a calibration tool or service to optimize picture quality.
12. **Smart Home Integration**: Devices like Google Home or Amazon Echo can integrate your TV into a smart home setup.
13. **Cleaning Kit**: Keep your screen clean with a microfiber cloth and screen cleaner.
14. **Media Storage**: If you have physical media, consider a storage solution for organization.
15. **Wi-Fi Extender**: Ensure strong internet connectivity with a Wi-Fi extender if needed.
16. **Headphones**: Wireless headphones can provide a private listening experience.
17. **Console or Media Cabinet**: Store and organize your devices and media.
How do I connect my TV to the internet?
1. **Check TV Compatibility**: Ensure your TV is a smart TV with internet capabilities. If not, consider using a streaming device like Roku, Amazon Fire Stick, or Chromecast.
2. **Wired Connection (Ethernet)**:
- Locate the Ethernet port on your TV.
- Connect one end of an Ethernet cable to the TV and the other to your router.
- Access the TV’s settings menu, navigate to network settings, and select “Wired” or “Ethernet” to establish the connection.
3. **Wireless Connection (Wi-Fi)**:
- Turn on your TV and access the settings menu.
- Navigate to network settings and select “Wireless” or “Wi-Fi.”
- Choose your Wi-Fi network from the list of available networks.
- Enter your Wi-Fi password using the remote control.
- Confirm the connection and wait for the TV to connect to the internet.
4. **Using a Streaming Device**:
- Connect the streaming device to an HDMI port on your TV.
- Power on the device and switch the TV to the corresponding HDMI input.
- Follow the on-screen instructions to connect the device to your Wi-Fi network.
5. **Troubleshooting**:
- Ensure the router is functioning and within range.
- Restart the TV and router if the connection fails.
- Update the TV’s firmware if necessary.
- Check for any network restrictions or parental controls that might block the connection.
6. **Final Steps**:
- Once connected, test the internet by accessing apps or streaming content.
- Adjust settings for optimal performance, such as screen resolution and audio output.
What is the lifespan of an LED TV?
The lifespan of an LED TV typically ranges from 40,000 to 100,000 hours. This translates to approximately 4.5 to 11 years of continuous use, assuming the TV is on for 24 hours a day. However, under normal viewing conditions, where the TV is used for about 4 to 6 hours a day, an LED TV can last anywhere from 15 to 25 years.
Several factors influence the lifespan of an LED TV:
1. **Quality of Components**: Higher-quality components generally lead to a longer lifespan. Premium brands often use better materials and technology, which can enhance durability.
2. **Usage Patterns**: Continuous, prolonged use can shorten the lifespan. Regularly turning off the TV when not in use can help extend its life.
3. **Brightness Settings**: Operating the TV at maximum brightness can accelerate wear and tear. Reducing brightness to a comfortable level can prolong the LED backlight's life.
4. **Environmental Conditions**: Exposure to extreme temperatures, humidity, or dust can negatively impact the TV's longevity. Keeping the TV in a stable, clean environment is beneficial.
5. **Power Surges**: Frequent power surges can damage internal components. Using a surge protector can mitigate this risk.
6. **Technological Advancements**: As technology evolves, newer models with improved efficiency and longevity are introduced, potentially offering longer lifespans than older models.
While the LED backlight is often the first component to degrade, other parts like the power supply or capacitors can also fail over time. Regular maintenance and proper care can help maximize the lifespan of an LED TV.