Call +(254) 703 030 000 / 751 483 999 / 721 704 777
- Home
- Electrical
- Industrial Controls Automation And Machine Safety
- Operator Switches Pilot Lights
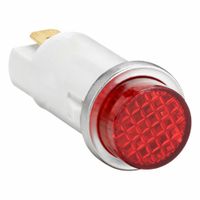
- Pilot Indicator Lights
.....Read More
Frequently Asked Questions
What is the purpose of a pilot light in machinery?
A pilot light is a small flame that serves as an ignition source for a larger burner in various types of machinery, such as gas furnaces, water heaters, and stoves. Its primary purpose is to ensure that the main burner can be ignited safely and efficiently whenever needed. By maintaining a constant flame, the pilot light allows for the immediate ignition of the main burner, eliminating the need for manual lighting each time the equipment is used.
In addition to providing a reliable ignition source, the pilot light also plays a crucial role in safety. It helps prevent the accumulation of unburned gas, which could lead to dangerous explosions or fires. If the pilot light goes out, many systems are equipped with a safety mechanism, such as a thermocouple, that automatically shuts off the gas supply to prevent leaks.
Furthermore, the pilot light can serve as an indicator of the system's operational status. A consistently burning pilot light suggests that the system is ready for use, while a pilot light that frequently goes out may indicate a problem, such as a draft, a faulty thermocouple, or an issue with the gas supply.
Overall, the pilot light is an essential component in gas-powered machinery, providing both functionality and safety by ensuring the main burner can be ignited quickly and preventing potential hazards associated with gas leaks.
How do you install a pilot light in a control panel?
1. **Safety First**: Ensure the power to the control panel is turned off. Use a multimeter to confirm no voltage is present.
2. **Select the Pilot Light**: Choose a pilot light suitable for your panel's voltage and current requirements.
3. **Prepare the Panel**: Identify the location for the pilot light on the control panel. Use a drill to create a hole that matches the diameter of the pilot light.
4. **Install the Pilot Light**: Insert the pilot light into the hole. Secure it using the provided mounting hardware, typically a nut or a clip.
5. **Wiring**:
- Connect the pilot light to the power source. Use appropriate gauge wires.
- Connect one terminal of the pilot light to the load side of the circuit breaker or switch.
- Connect the other terminal to the neutral or ground, depending on the circuit design.
6. **Use Terminal Blocks**: If available, use terminal blocks for a secure and organized connection.
7. **Labeling**: Clearly label the pilot light and its connections for easy identification and future maintenance.
8. **Testing**: Restore power to the control panel. Test the pilot light to ensure it illuminates correctly when the circuit is active.
9. **Final Inspection**: Check all connections for tightness and ensure there are no exposed wires. Confirm that the panel door closes properly without interference.
10. **Documentation**: Update the control panel's schematic and documentation to reflect the addition of the pilot light.
Always follow local electrical codes and standards during installation.
What are the differences between modular and monolithic pilot lights?
Modular pilot lights are designed with interchangeable components, allowing for easy customization and maintenance. They consist of separate parts such as the lens, lamp, and housing, which can be individually replaced or upgraded. This modularity offers flexibility in terms of design and functionality, enabling users to adapt the pilot light to specific requirements or to replace only the faulty component without discarding the entire unit. Modular pilot lights are often used in environments where frequent changes or maintenance are expected.
Monolithic pilot lights, on the other hand, are constructed as a single, integrated unit. All components are encapsulated within a single housing, making them more robust and less prone to environmental damage. This design typically results in a more compact and durable product, suitable for harsh or demanding environments where reliability is critical. However, if a component fails, the entire unit usually needs to be replaced, which can be less cost-effective in the long run.
In summary, the primary differences between modular and monolithic pilot lights lie in their design and maintenance. Modular pilot lights offer flexibility and ease of maintenance due to their interchangeable components, while monolithic pilot lights provide durability and simplicity with their integrated design. The choice between the two depends on the specific application requirements, including factors like environmental conditions, maintenance capabilities, and cost considerations.
How do you choose the right pilot light for hazardous locations?
To choose the right pilot light for hazardous locations, consider the following factors:
1. **Classification of Hazardous Location**: Determine the class, division, and group of the hazardous area. Class I involves flammable gases or vapors, Class II involves combustible dust, and Class III involves ignitable fibers. Divisions indicate the likelihood of the hazard being present, while groups specify the type of substance.
2. **Certification and Compliance**: Ensure the pilot light is certified for use in the specific hazardous location by relevant authorities such as UL, ATEX, or IECEx. Compliance with standards like NEC, CEC, or IEC is crucial.
3. **Enclosure Rating**: Select a pilot light with an appropriate enclosure rating, such as NEMA or IP, to protect against environmental factors like dust, water, and corrosion.
4. **Material and Construction**: Choose materials that resist the specific chemicals or environmental conditions present. Common materials include stainless steel, aluminum, or polycarbonate.
5. **Temperature Rating**: Ensure the pilot light can operate within the temperature range of the hazardous location to prevent ignition of flammable substances.
6. **Voltage and Current Requirements**: Match the pilot light’s voltage and current specifications with the electrical system to ensure compatibility and safety.
7. **Visibility and Color**: Select a pilot light with adequate brightness and the appropriate color for the application, ensuring visibility in the specific environment.
8. **Maintenance and Durability**: Consider ease of maintenance and the durability of the pilot light to minimize downtime and ensure long-term reliability.
9. **Manufacturer Reputation**: Choose products from reputable manufacturers known for quality and reliability in hazardous location equipment.
By considering these factors, you can select a pilot light that ensures safety, compliance, and functionality in hazardous locations.
What are the common issues with pilot lights and how can they be fixed?
Common issues with pilot lights include:
1. **Pilot Light Won't Stay Lit**: This can be caused by a faulty thermocouple, which is a safety device that shuts off the gas if the pilot light goes out. To fix it, clean or replace the thermocouple. Ensure it's properly aligned with the flame.
2. **Dirty Pilot Orifice**: Dirt or debris can clog the pilot orifice, preventing the pilot light from staying lit. Clean the orifice with a needle or compressed air to remove any blockages.
3. **Weak Flame**: A weak flame can be caused by a dirty pilot tube or insufficient gas pressure. Clean the pilot tube and check the gas supply. Adjust the flame by turning the pilot adjustment screw if necessary.
4. **Drafts**: Drafts can blow out the pilot light. Ensure the area around the appliance is free from drafts by sealing windows or doors and checking for any gaps.
5. **Gas Valve Issues**: A malfunctioning gas valve can prevent the pilot light from staying lit. Inspect the gas valve for any signs of damage or wear and replace it if necessary.
6. **Faulty Igniter**: If the pilot light won't ignite, the igniter may be faulty. Check the igniter for damage and replace it if needed.
7. **Thermocouple Misalignment**: Ensure the thermocouple is properly aligned with the pilot flame. Adjust its position if necessary to ensure it is heated adequately.
8. **Air in Gas Line**: Air trapped in the gas line can prevent the pilot light from igniting. Bleed the line by holding the pilot button down for a few minutes to allow the air to escape.
Regular maintenance and inspection can prevent many of these issues. If problems persist, consult a professional technician.
How do you replace a lens on a pilot light?
1. **Turn Off Power**: Ensure the power to the pilot light is turned off to prevent electrical shock.
2. **Access the Pilot Light**: Locate the panel or fixture where the pilot light is housed. This may require removing a cover or panel.
3. **Remove the Old Lens**: Gently twist or unscrew the existing lens counterclockwise. Some lenses may have clips or screws holding them in place, so use a screwdriver if necessary.
4. **Inspect the Housing**: Check the housing for any damage or debris. Clean the area to ensure a proper fit for the new lens.
5. **Select the Correct Replacement Lens**: Ensure the new lens matches the specifications of the old one in terms of size, shape, and color.
6. **Install the New Lens**: Align the new lens with the housing. If it’s a screw-type, twist it clockwise until secure. For clip-on types, press it into place until it clicks.
7. **Reassemble the Fixture**: Replace any covers or panels that were removed to access the pilot light.
8. **Restore Power**: Turn the power back on and test the pilot light to ensure it is functioning correctly with the new lens.
9. **Safety Check**: Ensure everything is securely in place and there are no loose parts or exposed wires.
What are the safety considerations when working with pilot lights in industrial settings?
1. **Gas Leaks**: Regularly inspect for gas leaks using appropriate detection methods. Ensure all connections are secure and free from corrosion.
2. **Ventilation**: Maintain proper ventilation to prevent the accumulation of gas, which can lead to explosions or asphyxiation.
3. **Ignition Sources**: Keep flammable materials and ignition sources away from pilot lights to prevent accidental fires.
4. **Training**: Ensure personnel are trained in the operation and maintenance of pilot lights, including emergency procedures.
5. **Equipment Maintenance**: Regularly maintain and inspect equipment to ensure pilot lights function correctly and safely.
6. **Emergency Shut-off**: Install and familiarize staff with emergency shut-off valves to quickly stop gas flow in case of a malfunction.
7. **Personal Protective Equipment (PPE)**: Use appropriate PPE, such as flame-resistant clothing and safety goggles, when working near pilot lights.
8. **Signage and Labels**: Clearly label pilot light areas and post warning signs to alert personnel of potential hazards.
9. **Fire Suppression Systems**: Ensure fire suppression systems are in place and functional to quickly address any fires that may occur.
10. **Compliance with Regulations**: Adhere to local, state, and federal regulations regarding the use and maintenance of pilot lights.
11. **Regular Audits**: Conduct regular safety audits to identify and mitigate potential risks associated with pilot lights.
12. **Communication**: Maintain clear communication channels for reporting issues or concerns related to pilot lights.
13. **Documentation**: Keep detailed records of inspections, maintenance, and training related to pilot lights for accountability and continuous improvement.
