Call +(254) 703 030 000 / 751 483 999 / 721 704 777
.....Read More
Frequently Asked Questions
What are contact blocks and how do they work in operator switches?
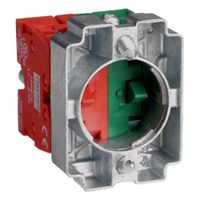
Contact blocks are essential components in operator switches, used to control electrical circuits. They consist of a set of electrical contacts that open or close a circuit when actuated by the switch. Contact blocks are typically mounted behind the operator switch, such as pushbuttons or selector switches, and are responsible for the actual electrical connection.
In operation, when the operator switch is activated, it mechanically moves the contact block's internal components. This movement either brings the contacts together to close the circuit or separates them to open the circuit. Contact blocks can be normally open (NO) or normally closed (NC). A normally open contact block closes the circuit when the switch is activated, while a normally closed contact block opens the circuit upon activation.
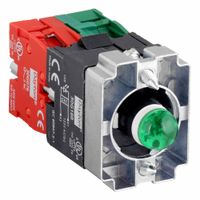
Contact blocks are modular, allowing for easy configuration and replacement. They can be stacked or combined to create complex control schemes, enabling multiple circuits to be controlled by a single operator switch. This modularity also allows for customization, as different contact blocks can be selected based on the required electrical ratings and functions.
The materials used in contact blocks are chosen for durability and conductivity, often involving metals like silver or gold plating to ensure reliable performance and reduce contact resistance. Contact blocks are designed to handle specific voltage and current ratings, ensuring safe and efficient operation within their specified limits.
Overall, contact blocks are crucial for the functionality of operator switches, providing the necessary interface between the mechanical action of the switch and the electrical circuit it controls.
How do I replace a lamp module in an operator switch?
1. **Turn Off Power**: Ensure the power to the switch is turned off at the circuit breaker to prevent electrical shock.
2. **Access the Switch**: Remove the switch cover or panel to access the internal components. This may require unscrewing or unclipping the cover.
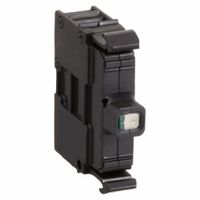
3. **Identify the Lamp Module**: Locate the lamp module within the switch. It is usually a small bulb or LED component.
4. **Remove the Old Lamp Module**: Carefully disconnect the lamp module. This may involve unscrewing, unclipping, or gently pulling it out, depending on the design.
5. **Select the Correct Replacement**: Ensure the replacement lamp module matches the specifications of the original, including voltage, size, and type (e.g., LED, incandescent).
6. **Install the New Lamp Module**: Insert the new lamp module into the socket or holder. Ensure it is securely connected and properly seated.
7. **Reassemble the Switch**: Replace the switch cover or panel, ensuring all screws or clips are securely fastened.
8. **Restore Power**: Turn the power back on at the circuit breaker.
9. **Test the Switch**: Operate the switch to ensure the new lamp module functions correctly.
10. **Safety Check**: Verify there are no loose connections or exposed wires. Ensure the switch operates smoothly and safely.
11. **Dispose of Old Lamp Module**: Properly dispose of the old lamp module according to local regulations, especially if it contains hazardous materials like mercury.
12. **Consult Documentation**: Refer to the switch’s manual or manufacturer’s instructions for specific guidance related to your model.
What are the common issues with contact blocks and lamp modules?
Common issues with contact blocks and lamp modules include:
1. **Wear and Tear**: Frequent use can lead to mechanical wear, causing poor contact or failure in contact blocks. Lamp modules may experience filament burnout or LED degradation.
2. **Corrosion**: Exposure to moisture or corrosive environments can lead to oxidation on contact surfaces, resulting in poor conductivity and intermittent connections.
3. **Vibration and Shock**: Mechanical vibrations or shocks can loosen connections or damage components, leading to unreliable operation.
4. **Overloading**: Exceeding the rated current or voltage can cause overheating, melting, or burning of contact blocks and lamp modules.
5. **Poor Installation**: Incorrect installation or alignment can lead to improper contact engagement or damage to the components.
6. **Material Fatigue**: Repeated cycling can cause material fatigue, leading to cracks or breaks in contact blocks or lamp module components.
7. **Electrical Noise**: Inductive loads or poor grounding can introduce electrical noise, affecting the performance of lamp modules.
8. **Temperature Extremes**: High temperatures can cause thermal expansion, affecting contact pressure, while low temperatures can make materials brittle.
9. **Contamination**: Dust, dirt, or other contaminants can obstruct contact surfaces, leading to poor electrical connections.
10. **Aging**: Over time, materials can degrade, affecting the performance and reliability of both contact blocks and lamp modules.
11. **Design Flaws**: Inadequate design can lead to insufficient contact pressure or poor heat dissipation, affecting performance.
12. **Compatibility Issues**: Using incompatible components can lead to improper functioning or damage.
13. **Voltage Fluctuations**: Sudden changes in voltage can cause flickering or failure in lamp modules.
14. **Manufacturing Defects**: Defects in manufacturing can lead to premature failure or inconsistent performance.
How do I troubleshoot a non-functioning pilot light in an operator switch?
1. **Safety First**: Ensure the power to the switch is turned off to prevent electrical shock.
2. **Visual Inspection**: Check for any visible damage or loose connections around the switch and pilot light.
3. **Check the Bulb**: Remove the pilot light cover and inspect the bulb. Replace it if it appears burnt out or damaged.
4. **Test the Bulb**: Use a multimeter to test the bulb for continuity. If there is no continuity, replace the bulb.
5. **Inspect the Wiring**: Examine the wiring connections to the pilot light. Ensure all wires are securely connected and not frayed or damaged.
6. **Test the Circuit**: Use a multimeter to check for voltage at the pilot light terminals. If there is no voltage, trace back to find where the circuit is broken.
7. **Check the Switch**: Ensure the operator switch is functioning properly. Test it with a multimeter to confirm it is making and breaking the circuit as intended.
8. **Examine the Power Source**: Verify that the power source to the switch is active. Check circuit breakers or fuses that may have tripped or blown.
9. **Inspect the Control Circuit**: If the pilot light is part of a larger control circuit, ensure all components in the circuit are functioning correctly.
10. **Replace Components**: If any component (bulb, wiring, switch) is found faulty, replace it with a compatible part.
11. **Reassemble and Test**: Once repairs are made, reassemble the switch and pilot light, restore power, and test for proper operation.
12. **Consult Documentation**: Refer to the operator switch’s manual for specific troubleshooting steps or contact the manufacturer for support if the issue persists.
What are the best practices for wiring contact blocks and lamp modules?
1. **Identify Requirements**: Determine the voltage, current, and type of contact block or lamp module needed for your application.
2. **Use Correct Tools**: Utilize appropriate tools such as wire strippers, crimpers, and screwdrivers to ensure secure connections.
3. **Select Proper Wire Gauge**: Choose the correct wire gauge based on the current load to prevent overheating and ensure efficient operation.
4. **Ensure Proper Insulation**: Use wires with adequate insulation to prevent short circuits and electrical hazards.
5. **Follow Color Codes**: Adhere to standard color codes for wiring to maintain consistency and safety, making future maintenance easier.
6. **Secure Connections**: Tighten all terminal screws properly to avoid loose connections, which can lead to arcing and potential failure.
7. **Use Ferrules**: Employ ferrules on stranded wires to prevent fraying and ensure a solid connection at terminal points.
8. **Label Wires**: Clearly label all wires for easy identification during troubleshooting and maintenance.
9. **Maintain Neatness**: Arrange wires neatly to avoid tangling and ensure easy access for future modifications or repairs.
10. **Test Connections**: After wiring, test all connections with a multimeter to ensure continuity and correct voltage levels.
11. **Use Proper Enclosures**: Install contact blocks and lamp modules in appropriate enclosures to protect them from environmental factors and accidental contact.
12. **Adhere to Standards**: Follow relevant electrical standards and codes (e.g., NEC, IEC) to ensure compliance and safety.
13. **Document Wiring**: Keep detailed documentation of the wiring layout and connections for future reference and troubleshooting.
14. **Regular Maintenance**: Schedule regular inspections and maintenance to ensure the integrity and functionality of the wiring system.
How do I choose the right contact block for my operator switch?
To choose the right contact block for your operator switch, consider the following factors:
1. **Switch Type**: Determine if the switch is a pushbutton, selector, or emergency stop. Each type may require different contact configurations.
2. **Contact Configuration**: Identify the required contact arrangement, such as Normally Open (NO), Normally Closed (NC), or a combination. This depends on the circuit logic and control requirements.
3. **Electrical Ratings**: Ensure the contact block can handle the voltage and current levels of your application. Check for AC or DC ratings and ensure they match your system's specifications.
4. **Mounting Compatibility**: Verify that the contact block is compatible with the operator switch's mounting style. Consider the panel cutout size and mounting depth.
5. **Environmental Conditions**: Assess the operating environment. Choose contact blocks with appropriate IP ratings for dust and moisture resistance if used in harsh conditions.
6. **Material and Durability**: Select contact blocks made from durable materials, especially if they will be used in high-vibration or corrosive environments.
7. **Standards and Certifications**: Ensure the contact block complies with relevant industry standards and certifications, such as UL, CE, or IEC, for safety and reliability.
8. **Manufacturer Compatibility**: Use contact blocks from the same manufacturer as the operator switch to ensure compatibility and warranty coverage.
9. **Auxiliary Functions**: Consider if additional features like LED indicators or special contact materials (e.g., gold-plated for low-voltage applications) are needed.
10. **Cost and Availability**: Balance the cost with the availability of the contact block. Ensure it fits within your budget and is readily available for maintenance or replacement.
By evaluating these factors, you can select a contact block that meets your operational needs and ensures reliable performance.
Can I combine contact blocks and lamp modules in one assembly?
Yes, you can combine contact blocks and lamp modules in one assembly, provided they are compatible and designed to work together. Contact blocks are used in electrical circuits to open or close a circuit, while lamp modules are used to indicate the status of a circuit or machine. When combining them, ensure that:
1. **Compatibility**: Both components should be from the same manufacturer or designed to be compatible with each other. This ensures proper fit and function.
2. **Mounting**: Ensure that the assembly allows for secure mounting of both the contact blocks and lamp modules. They should fit within the designated space without interfering with each other’s operation.
3. **Electrical Ratings**: Check that the electrical ratings (voltage and current) of both components are suitable for your application. They should be able to handle the electrical load without risk of failure.
4. **Wiring**: Proper wiring is crucial. Ensure that the wiring connections are correct and secure to prevent short circuits or malfunction.
5. **Functionality**: The combined assembly should meet the functional requirements of your application. The contact blocks should operate as intended, and the lamp modules should provide clear and accurate status indication.
6. **Safety Standards**: Ensure that the assembly complies with relevant safety standards and regulations to prevent hazards.
7. **Testing**: After assembly, conduct thorough testing to ensure that both components work together seamlessly and reliably.
By considering these factors, you can successfully combine contact blocks and lamp modules in one assembly for efficient and effective operation.