Call +(254) 703 030 000 / 751 483 999 / 721 704 777
.....Read More
Frequently Asked Questions
What is a timer switch and how does it work?
A timer switch is a device that automatically turns electrical appliances or lights on and off at predetermined times. It is used to control the operation of devices without manual intervention, enhancing convenience, energy efficiency, and security.
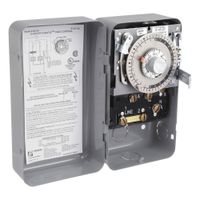
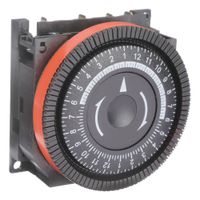
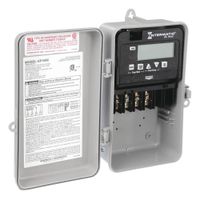
Timer switches can be mechanical or digital. Mechanical timer switches use a dial and pins or tabs to set the on/off times. As the dial rotates, it triggers the switch at the set times. Digital timer switches, on the other hand, use electronic circuits and a digital display to set and control the timing. They often offer more precise control and additional features like multiple on/off settings, countdown timers, and random modes to simulate occupancy.
The basic working principle involves an internal clock that keeps track of time. Users program the switch by setting specific times for the device to turn on and off. When the internal clock reaches these times, it sends a signal to the switch mechanism, either closing or opening the circuit to power the connected device.
Timer switches are commonly used for lighting control, heating systems, irrigation systems, and appliances like coffee makers. They help reduce energy consumption by ensuring devices are only on when needed and enhance security by automating lighting to give the appearance of occupancy when no one is home.
How do I install a timer switch?
1. **Turn Off Power**: Switch off the circuit breaker to the switch you are replacing to ensure safety.
2. **Remove Existing Switch**: Unscrew the faceplate and the switch from the wall. Carefully pull out the switch to expose the wires.
3. **Identify Wires**: Note the wire connections. Typically, there are line (hot), load, neutral, and ground wires. Use a voltage tester to confirm the power is off.
4. **Prepare Timer Switch**: Read the timer switch instructions. Some timers require a neutral wire; ensure compatibility with your wiring.
5. **Connect Wires**:
- **Line Wire**: Connect the line wire from the wall to the line terminal on the timer.
- **Load Wire**: Connect the load wire to the load terminal.
- **Neutral Wire**: If required, connect the neutral wire to the neutral terminal.
- **Ground Wire**: Connect the ground wire to the ground terminal.
6. **Secure Connections**: Use wire nuts to secure connections. Ensure no exposed copper is visible.
7. **Mount Timer Switch**: Carefully push the wires back into the box and mount the timer switch using screws.
8. **Attach Faceplate**: Screw the faceplate onto the timer switch.
9. **Restore Power**: Turn the circuit breaker back on.
10. **Test Timer**: Set the timer according to the manufacturer's instructions and test its functionality.
11. **Adjust Settings**: If necessary, adjust the timer settings for desired operation.
12. **Safety Check**: Ensure the switch operates correctly and there are no sparks or unusual sounds.
13. **Final Inspection**: Double-check all connections and ensure the faceplate is securely attached.
What are the different types of timer switches?
1. **Mechanical Timer Switches**: These use a dial or a set of pins to set the on/off times. They are simple, cost-effective, and do not require a power source to operate.
2. **Digital Timer Switches**: These offer more precision and flexibility with programmable settings. They often include features like multiple on/off cycles, random settings for security, and battery backup.
3. **Programmable Timer Switches**: A subset of digital timers, these allow users to set specific schedules for different days of the week, making them ideal for complex timing needs.
4. **Smart Timer Switches**: Integrated with Wi-Fi or Bluetooth, these can be controlled remotely via smartphone apps. They often support voice control through smart home systems like Amazon Alexa or Google Assistant.
5. **Astronomical Timer Switches**: These adjust on/off times based on sunrise and sunset, which is useful for outdoor lighting. They automatically update for seasonal changes and daylight saving time.
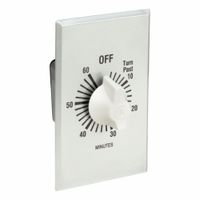
6. **Countdown Timer Switches**: These are set for a specific duration and automatically turn off after the time elapses. They are commonly used for bathroom fans or heaters.
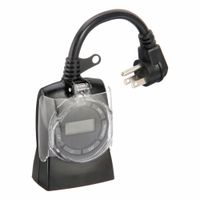
7. **Plug-in Timer Switches**: These are portable and plug directly into an outlet, allowing devices to be plugged into them. They are ideal for lamps and small appliances.
8. **In-wall Timer Switches**: Installed in place of a standard wall switch, these are used for controlling built-in lighting or fans. They can be mechanical, digital, or smart.
9. **Outdoor Timer Switches**: Designed to withstand weather conditions, these are used for garden lights, holiday decorations, or pool pumps. They often come with protective covers.
10. **Heavy-Duty Timer Switches**: Built to handle high power loads, these are used for industrial applications or large appliances like water heaters.
How do I set a timer switch for my lights?
1. **Choose the Right Timer Switch**: Select a timer switch compatible with your light system (incandescent, LED, etc.). Options include mechanical, digital, or smart timers.
2. **Turn Off Power**: Switch off the circuit breaker for the lights you’re working on to ensure safety.
3. **Remove Existing Switch**: Unscrew the faceplate and remove the existing light switch. Carefully disconnect the wires.
4. **Connect Timer Switch**:
- **Mechanical Timer**: Connect the wires from the wall to the timer switch as per the instructions. Typically, connect the black (hot) wire to the timer’s black wire, the white (neutral) wire to the timer’s white wire, and the ground wire to the timer’s green wire.
- **Digital/Smart Timer**: Follow the same wiring process, ensuring any additional wires (like a red wire for 3-way switches) are connected as per the manual.
5. **Mount Timer Switch**: Secure the timer switch into the wall box and attach the faceplate.
6. **Program Timer**:
- **Mechanical Timer**: Set the pins or dial to the desired on/off times.
- **Digital Timer**: Use the buttons to set the current time and desired on/off schedule.
- **Smart Timer**: Use the app to set schedules and control remotely.
7. **Test the Timer**: Turn the power back on and test the timer to ensure it operates as programmed.
8. **Adjust as Needed**: Make any necessary adjustments to the schedule or settings for optimal performance.
Can timer switches save energy and reduce electricity bills?
Yes, timer switches can save energy and reduce electricity bills. They work by automatically turning electrical devices on or off at predetermined times, ensuring that appliances and lights are only in use when needed. This prevents energy wastage from devices being left on unnecessarily.
For lighting, timer switches can ensure that lights are only on during specific hours, such as in the evening or early morning, reducing the time they are unnecessarily illuminated. This is particularly useful for outdoor lighting or in rooms that are not frequently used.
In heating and cooling systems, timer switches can optimize energy use by aligning operation with occupancy patterns. For example, a timer can turn on the heating system shortly before people arrive home and turn it off when they leave, ensuring comfort without wasting energy.
For appliances like water heaters, pool pumps, or electric car chargers, timers can schedule operation during off-peak hours when electricity rates are lower, further reducing costs.
Additionally, timer switches can enhance security by simulating occupancy when no one is home, deterring potential intruders without the need for continuous lighting.
Overall, by automating the control of electrical devices, timer switches help in minimizing energy consumption, leading to lower electricity bills and contributing to environmental conservation.
What are the best timer switches for home automation?
1. **TP-Link Kasa Smart Wi-Fi Plug Mini**: This smart plug offers scheduling, remote control, and voice control via Alexa and Google Assistant. It integrates seamlessly with the Kasa app, allowing for easy automation and energy monitoring.
2. **Lutron Caseta Wireless Smart Lighting Dimmer Switch**: Known for its reliability, this switch works with Alexa, Apple HomeKit, and Google Assistant. It offers advanced scheduling, geofencing, and can control multiple bulbs simultaneously.
3. **Leviton Decora Smart Wi-Fi Switch**: This switch provides robust scheduling options and integrates with Alexa, Google Assistant, and IFTTT. It features a sleek design and offers remote control via the My Leviton app.
4. **Honeywell Home RPLS740B Econoswitch**: Ideal for those who prefer a non-Wi-Fi option, this programmable switch offers 7-day scheduling and a random mode for added security. It’s compatible with LED, CFL, and incandescent bulbs.
5. **Intermatic ST01 Timer Switch**: This in-wall timer switch is perfect for controlling lights and fans. It offers up to 40 on/off settings per week and features an astronomic clock to adjust for sunrise and sunset times.
6. **GE Cync Smart Switch**: This switch offers easy installation and works with Alexa and Google Assistant. It provides scheduling, remote control, and can be part of a larger Cync smart home ecosystem.
7. **Wemo Smart Light Switch**: Known for its user-friendly app, this switch offers scheduling, away mode, and voice control via Alexa, Google Assistant, and Apple HomeKit. It’s easy to install and doesn’t require a hub.
8. **Ecobee Switch+**: This smart switch includes a built-in Alexa speaker, offering voice control and smart home integration. It provides scheduling, motion detection, and can be part of the Ecobee smart home system.
How do I troubleshoot a malfunctioning timer switch?
1. **Check Power Supply**: Ensure the timer switch is receiving power. Verify that the circuit breaker is on and the fuse is not blown.
2. **Inspect Wiring**: Turn off the power and remove the timer switch cover. Check for loose, disconnected, or damaged wires. Tighten connections and replace any damaged wires.
3. **Examine Settings**: Confirm that the timer is set correctly. Check the current time, on/off settings, and ensure the mode (manual/auto) is appropriate for your needs.
4. **Test Manual Override**: Use the manual override switch to see if the connected device turns on/off. If it works manually, the issue may be with the timer settings.
5. **Replace Batteries**: If the timer uses batteries, replace them with fresh ones to ensure it has enough power to operate.
6. **Reset Timer**: Reset the timer to its default settings. This can resolve software glitches. Refer to the manual for reset instructions.
7. **Check Load Compatibility**: Ensure the timer switch is rated for the load it controls. Overloading can cause malfunction.
8. **Inspect Timer Mechanism**: For mechanical timers, check for obstructions or debris in the gears. Clean if necessary.
9. **Test with Multimeter**: Use a multimeter to check for continuity and ensure the timer is functioning electrically.
10. **Observe for Physical Damage**: Look for signs of wear, corrosion, or damage on the timer switch. Replace if necessary.
11. **Consult Manual**: Refer to the user manual for troubleshooting tips specific to your timer model.
12. **Replace Timer**: If all else fails, consider replacing the timer switch, especially if it’s old or frequently malfunctions.
