Call +(254) 703 030 000 / 751 483 999 / 721 704 777
.....Read More
Frequently Asked Questions
What are compression lugs and connectors used for?
Compression lugs and connectors are used in electrical systems to establish secure and reliable connections between conductors, such as wires or cables, and other electrical components. They serve several key purposes:
1. **Electrical Connectivity**: They ensure a stable and efficient electrical connection, minimizing resistance and potential power loss. This is crucial for maintaining the integrity and performance of electrical systems.
2. **Mechanical Stability**: Compression lugs and connectors provide mechanical support to the conductors, preventing them from loosening or disconnecting due to vibrations, thermal expansion, or mechanical stress.
3. **Safety**: By ensuring a secure connection, they reduce the risk of electrical faults, such as short circuits or arcing, which can lead to fires or equipment damage.
4. **Corrosion Resistance**: Many compression lugs and connectors are made from materials like copper or aluminum, often with protective coatings, to resist corrosion and ensure long-term reliability in various environmental conditions.
5. **Ease of Installation**: They are designed for straightforward installation using compression tools, which compress the lug or connector onto the conductor, ensuring a tight and secure fit.
6. **Versatility**: Available in various sizes and configurations, they can accommodate different conductor sizes and types, making them suitable for a wide range of applications, from residential wiring to industrial power distribution.
7. **Compliance with Standards**: They are manufactured to meet industry standards and regulations, ensuring compatibility and safety in electrical installations.
Overall, compression lugs and connectors are essential components in electrical systems, providing reliable, safe, and efficient connections that are critical for the proper functioning of electrical networks.
How do you install compression lugs and connectors?
1. **Select the Right Lug/Connector**: Choose the appropriate size and type of compression lug or connector based on the conductor size and application requirements.
2. **Prepare the Conductor**: Strip the insulation from the conductor to the appropriate length, ensuring not to nick or damage the wire strands.
3. **Clean the Conductor**: Clean the exposed conductor strands to remove any oxidation or contaminants using a wire brush or emery cloth.
4. **Insert the Conductor**: Insert the stripped conductor into the barrel of the lug or connector. Ensure that all strands are fully inserted and visible through the inspection hole, if present.
5. **Select the Crimping Tool**: Use a crimping tool that matches the lug or connector type and size. Ensure the tool is calibrated and in good working condition.
6. **Position the Tool**: Place the crimping tool over the lug or connector barrel. Align it according to the manufacturer's instructions, typically starting from the end closest to the palm or tongue.
7. **Crimp the Lug/Connector**: Apply pressure to the crimping tool to compress the lug or connector onto the conductor. Follow the recommended number of crimps and crimping sequence as specified by the manufacturer.
8. **Inspect the Crimp**: Check the crimp for proper compression and ensure there are no visible gaps. Verify that the conductor is secure and the lug or connector is properly attached.
9. **Seal and Protect**: If required, apply heat shrink tubing or insulating tape over the connection to provide additional protection against environmental factors.
10. **Test the Connection**: Perform a pull test to ensure the connection is secure. Optionally, conduct an electrical test to verify conductivity and resistance.
11. **Install the Lug/Connector**: Attach the lug or connector to the terminal or bus bar using the appropriate hardware, ensuring a tight and secure fit.
What tools are needed for crimping compression lugs?
To crimp compression lugs, you need the following tools:
1. **Crimping Tool**: A specialized crimping tool or crimper is essential. It should be compatible with the size and type of lug and cable you are working with. Options include manual, hydraulic, or battery-powered crimpers.
2. **Cable Cutter**: A high-quality cable cutter is necessary to ensure clean cuts on the cable, preventing frayed ends that can affect the crimping process.
3. **Wire Stripper**: This tool is used to strip the insulation from the cable without damaging the conductor. It should match the cable size for precise stripping.
4. **Die Set**: If using a crimper that requires interchangeable dies, ensure you have the correct die set for the specific lug and cable size.
5. **Measuring Tape or Ruler**: To measure the correct length of cable to be stripped and crimped.
6. **Heat Gun or Torch**: If the lugs have heat-shrink tubing, a heat gun or torch is needed to shrink the tubing for insulation and protection.
7. **Multimeter**: To test the electrical connection after crimping, ensuring continuity and proper installation.
8. **Safety Gear**: Safety glasses and gloves to protect against sharp cable ends and potential electrical hazards.
9. **Marker or Labeling Tool**: For marking cables and lugs for identification and organization.
10. **Cleaning Supplies**: Such as a wire brush or cloth to clean the cable and lug surfaces before crimping, ensuring a good electrical connection.
These tools ensure a secure and reliable crimping process, essential for electrical safety and performance.
What are the differences between compression lugs and mechanical lugs?
Compression lugs and mechanical lugs are both used to connect electrical conductors to devices or other conductors, but they differ in design, installation, and application.
Compression Lugs:
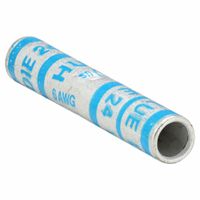
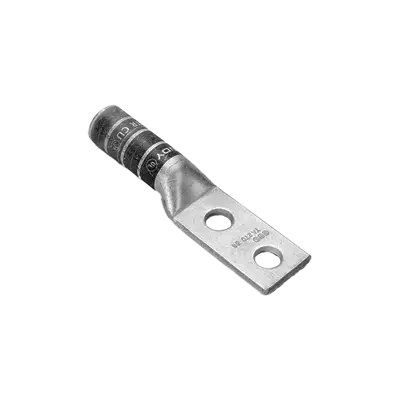
1. **Design**: Made from materials like copper or aluminum, compression lugs have a barrel where the conductor is inserted.
2. **Installation**: Requires a crimping tool to compress the lug onto the conductor, creating a secure connection. The crimping process deforms the lug to tightly grip the conductor.
3. **Application**: Commonly used in permanent installations where a reliable, low-resistance connection is essential. Suitable for high-voltage and high-current applications.
4. **Advantages**: Provides a strong, durable connection with minimal resistance. The crimping process ensures a gas-tight seal, reducing corrosion risk.
5. **Disadvantages**: Requires specific tools and expertise for installation. Once crimped, the connection is not easily removable.
Mechanical Lugs:
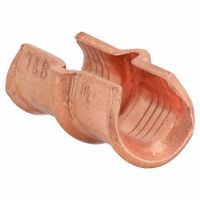
1. **Design**: Typically made from aluminum or copper, mechanical lugs have a set screw or bolt to secure the conductor.
2. **Installation**: The conductor is inserted into the lug, and the set screw or bolt is tightened to hold the conductor in place.
3. **Application**: Used in applications where connections may need to be frequently changed or adjusted. Suitable for lower voltage and current applications.
4. **Advantages**: Easy to install and remove without special tools. Ideal for temporary connections or where adjustments are needed.
5. **Disadvantages**: May not provide as secure a connection as compression lugs. The connection can loosen over time, leading to increased resistance and potential overheating.
In summary, compression lugs offer a more permanent and reliable connection, while mechanical lugs provide flexibility and ease of use for temporary or adjustable connections.
How do you choose the right size of compression lug or connector?
To choose the right size of compression lug or connector, follow these steps:
1. **Conductor Size**: Determine the size of the conductor (wire or cable) you are working with. This is usually measured in American Wire Gauge (AWG) or circular mils for larger cables.
2. **Material Compatibility**: Ensure the lug or connector material is compatible with the conductor material. Common materials include copper and aluminum. Use copper lugs for copper conductors and aluminum lugs for aluminum conductors to prevent galvanic corrosion.
3. **Voltage Rating**: Check the voltage rating of the lug or connector to ensure it matches or exceeds the system's voltage requirements.
4. **Current Rating**: Verify that the lug or connector can handle the current load of the application. This is crucial to prevent overheating and potential failure.
5. **Environmental Conditions**: Consider the environmental conditions such as temperature, moisture, and exposure to chemicals. Choose lugs or connectors with appropriate insulation or plating for harsh environments.
6. **Type of Connection**: Decide on the type of connection needed (e.g., crimp, bolt, or solder) and ensure the lug or connector is designed for that method.
7. **Standards and Certifications**: Look for lugs or connectors that meet industry standards and certifications, such as UL, CSA, or IEC, to ensure safety and reliability.
8. **Physical Space**: Ensure the lug or connector fits within the physical space available in the application, considering factors like bend radius and terminal block spacing.
9. **Tool Compatibility**: Ensure the lug or connector is compatible with the crimping or installation tools you have or plan to use.
10. **Manufacturer Specifications**: Always refer to the manufacturer's specifications and guidelines for the specific lug or connector to ensure proper selection and installation.
What materials are compression lugs and connectors made from?
Compression lugs and connectors are primarily made from materials that offer excellent electrical conductivity and mechanical strength. The most common materials used include:
1. **Copper**: Copper is widely used due to its superior electrical conductivity, thermal conductivity, and corrosion resistance. It is often used in environments where high conductivity is essential. Copper lugs and connectors are typically tin-plated to prevent oxidation and enhance durability.
2. **Aluminum**: Aluminum is another popular choice, especially for applications where weight is a concern. It is lighter than copper and offers good conductivity, though not as high as copper. Aluminum connectors are often used in power distribution systems and are sometimes coated to prevent corrosion.
3. **Bimetallic**: Bimetallic lugs and connectors combine copper and aluminum to leverage the benefits of both materials. These are used to connect copper and aluminum conductors, minimizing galvanic corrosion and ensuring efficient conductivity.
4. **Brass**: Brass, an alloy of copper and zinc, is used for its good conductivity and mechanical properties. It is often used in environments where corrosion resistance is important.
5. **Stainless Steel**: While not as conductive as copper or aluminum, stainless steel is used in applications where high strength and corrosion resistance are required. It is often used in harsh environments.
6. **Nickel-plated or Tin-plated Variants**: To enhance corrosion resistance and conductivity, some lugs and connectors are plated with nickel or tin. This is especially common for copper and aluminum components.
These materials are chosen based on the specific requirements of the application, including electrical load, environmental conditions, and mechanical stress.
How do you ensure a secure connection with compression lugs and connectors?
To ensure a secure connection with compression lugs and connectors, follow these steps:
1. **Material Compatibility**: Use lugs and connectors made from materials compatible with the conductor, typically copper or aluminum, to prevent galvanic corrosion.
2. **Proper Sizing**: Select the correct size of lugs and connectors to match the conductor size. This ensures optimal contact and minimizes resistance.
3. **Clean Surfaces**: Clean the conductor and lug surfaces to remove any oxidation, dirt, or contaminants. Use a wire brush or emery cloth for effective cleaning.
4. **Correct Tools**: Use the appropriate crimping tool designed for the specific lug and connector type. This ensures the correct amount of pressure is applied for a secure connection.
5. **Crimping Technique**: Follow the manufacturer's crimping instructions, including the number of crimps and their placement. Ensure crimps are evenly distributed and properly aligned.
6. **Inspection**: Visually inspect the crimped connection for any signs of deformation or improper crimping. A properly crimped connection should have a uniform appearance.
7. **Tug Test**: Perform a mechanical pull test to ensure the connection is secure. The conductor should not slip out of the lug or connector.
8. **Insulation**: Apply appropriate insulation, such as heat shrink tubing or electrical tape, to protect the connection from environmental factors and prevent short circuits.
9. **Environmental Protection**: Use corrosion inhibitors or sealants if the connection is exposed to harsh environments to prevent moisture ingress and corrosion.
10. **Regular Maintenance**: Periodically inspect and maintain connections, especially in critical applications, to ensure long-term reliability and performance.
By following these steps, you can ensure a secure and reliable connection with compression lugs and connectors.