Call +(254) 703 030 000 / 751 483 999 / 721 704 777
.....Read More
Frequently Asked Questions
What are the different types of electrical boxes?
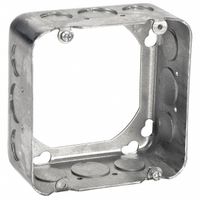
1. **Junction Boxes**: Used to connect multiple wires and protect connections. Typically installed in ceilings or walls.
2. **Switch Boxes**: Designed to house light switches. Available in single-gang or multi-gang configurations to accommodate multiple switches.
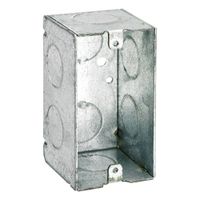
3. **Outlet Boxes**: Used for electrical outlets. Like switch boxes, they come in single-gang or multi-gang options.
4. **Ceiling Boxes**: Specifically for ceiling fixtures like lights or fans. They are robust to support the weight of fixtures.
5. **Weatherproof Boxes**: Designed for outdoor use, these boxes protect electrical connections from moisture and environmental elements.
6. **Floor Boxes**: Installed in floors to provide power or data connections. Useful in open spaces where wall outlets are impractical.
7. **Old Work Boxes**: Also known as retrofit boxes, these are used in existing walls where drywall is already in place. They have mounting tabs to secure them.
8. **New Work Boxes**: Installed during new construction before drywall is applied. They are attached directly to studs or joists.
9. **Metal Boxes**: Made of steel or aluminum, these are durable and often used in commercial applications or where grounding is required.
10. **Plastic Boxes**: Lightweight and non-conductive, suitable for residential use. They are easier to install and do not require grounding.
11. **Gangable Boxes**: Can be joined together to create a larger box, allowing for more switches or outlets.
12. **Non-Gangable Boxes**: Fixed in size and cannot be expanded.
13. **Fan Boxes**: Specifically designed to support ceiling fans, providing extra strength and stability.
14. **Specialty Boxes**: Include boxes for specific applications like data, communication, or audio-visual connections.
How do I choose the right size electrical box?
To choose the right size electrical box, consider the following factors:
1. **Box Type**: Determine the type of box needed (e.g., junction box, switch box, outlet box) based on the application.
2. **Volume Requirements**: Calculate the volume needed to accommodate all wires, devices, and connectors. NEC (National Electrical Code) provides guidelines for volume calculations:
- Count each conductor entering the box as one unit volume.
- Count each device (switch or outlet) as two unit volumes.
- Count all grounding conductors together as one unit volume.
- Count internal clamps as one unit volume.
3. **Wire Gauge**: Consider the wire gauge, as larger wires require more space. For example, 14-gauge wires need less space than 12-gauge wires.
4. **Number of Conductors**: Determine the number of conductors entering the box. More conductors require a larger box.
5. **Device Size**: Consider the size and number of devices (e.g., switches, outlets) to be installed in the box.
6. **Box Fill Calculations**: Use NEC box fill calculations to ensure compliance. Add up the total volume required and compare it to the box's cubic inch capacity.
7. **Future Expansion**: Consider potential future expansions or additional circuits that may require more space.
8. **Material and Location**: Choose the appropriate material (plastic, metal) based on the installation environment (e.g., indoor, outdoor, wet locations).
9. **Code Compliance**: Ensure the box size and installation comply with local electrical codes and standards.
10. **Accessibility**: Ensure the box is accessible for maintenance and future modifications.
By considering these factors, you can select an appropriately sized electrical box that ensures safety, functionality, and compliance with electrical codes.
What materials are electrical boxes made from?
Electrical boxes are typically made from a variety of materials, each chosen for specific properties that suit different applications and environments:
1. **Plastic (PVC or Polycarbonate):** These are lightweight, non-conductive, and resistant to corrosion and moisture, making them ideal for indoor and outdoor use. They are easy to install and often used in residential applications. However, they may not be suitable for high-temperature environments.
2. **Metal (Steel or Aluminum):** Metal boxes are durable and provide excellent grounding and fire resistance. Steel boxes are commonly used in commercial and industrial settings due to their strength and ability to withstand physical impact. Aluminum boxes are lighter and resist corrosion, making them suitable for outdoor and coastal environments.
3. **Fiberglass:** Known for its high strength-to-weight ratio, fiberglass is non-conductive and resistant to chemicals and moisture. It is often used in environments where corrosion resistance is critical, such as in chemical plants or coastal areas.
4. **Cast Iron:** These are extremely durable and provide excellent protection against physical damage and fire. They are typically used in heavy industrial applications where robustness is a priority.
5. **Stainless Steel:** Offering superior corrosion resistance, stainless steel boxes are used in environments where hygiene and cleanliness are crucial, such as in food processing plants and medical facilities.
Each material offers distinct advantages and is selected based on factors like environmental conditions, electrical requirements, and safety standards.
How do I install an electrical box?
1. **Turn Off Power**: Switch off the power at the circuit breaker to ensure safety.
2. **Choose Location**: Decide where you want to install the electrical box. Ensure it complies with local building codes.
3. **Mark the Spot**: Use a pencil to outline the box on the wall or ceiling.
4. **Cut the Opening**: Use a drywall saw to cut along the outline, creating an opening for the box.
5. **Select the Box Type**: Choose a box suitable for your needs (e.g., plastic or metal, old work or new work).
6. **Prepare the Box**: If using a metal box, attach cable clamps. For plastic boxes, ensure knockouts are removed.
7. **Insert the Box**: For old work boxes, insert the box into the hole and tighten the screws to secure the box to the drywall. For new work boxes, attach the box to a stud using nails or screws.
8. **Run the Cable**: Feed the electrical cable through the knockout hole in the box. Leave enough cable length inside the box for connections.
9. **Secure the Cable**: Use cable clamps to secure the cable to the box, ensuring it doesn’t move.
10. **Connect Wires**: Strip the insulation from the wires and connect them to the device (e.g., outlet, switch) using wire nuts or terminal screws.
11. **Mount the Device**: Attach the device to the box with screws.
12. **Attach the Cover Plate**: Secure the cover plate over the device.
13. **Restore Power**: Turn the power back on at the circuit breaker and test the installation.
14. **Check Compliance**: Ensure the installation meets local electrical codes and standards.
What is the purpose of an electrical box cover?
The purpose of an electrical box cover is to provide safety, protection, and organization for electrical connections and devices housed within an electrical box. It serves several key functions:
1. **Safety**: The cover acts as a barrier to prevent accidental contact with live electrical wires and components, reducing the risk of electric shock or injury. It ensures that the electrical connections are not exposed to people or pets.
2. **Fire Prevention**: By enclosing the electrical components, the cover helps contain any sparks or heat generated by electrical faults, reducing the risk of fire. It also prevents flammable materials from coming into contact with electrical connections.
3. **Protection**: The cover shields the electrical box and its contents from dust, moisture, and other environmental elements that could cause corrosion or damage. This is particularly important in areas prone to humidity or where water exposure is possible.
4. **Code Compliance**: Electrical codes and regulations often require the use of covers to ensure installations meet safety standards. Using a cover helps ensure compliance with these legal requirements.
5. **Aesthetic Appeal**: Covers provide a neat and finished appearance to electrical installations, concealing wires and connections that might otherwise be unsightly.
6. **Organization**: Covers help keep the electrical components organized and contained within the box, preventing wires from becoming tangled or damaged.
Overall, an electrical box cover is a crucial component in maintaining the safety, functionality, and appearance of electrical systems.
How do I extend an electrical box?
To extend an electrical box, follow these steps:
1. **Turn Off Power**: Switch off the circuit breaker to the electrical box you plan to extend.
2. **Remove Cover Plate**: Unscrew and remove the cover plate of the existing electrical box.
3. **Test for Power**: Use a voltage tester to ensure the power is off.
4. **Remove Device**: Unscrew and gently pull out the device (e.g., outlet or switch) from the box, keeping the wires connected.
5. **Select Extension Box**: Choose an appropriate box extender or "box extension ring" that matches the size and type of your existing box.
6. **Install Box Extender**: Slide the box extender over the device and into the existing box. Ensure it fits snugly and aligns with the wall surface.
7. **Secure Device**: Reattach the device to the extended box using the original screws or longer ones if necessary.
8. **Check Wiring**: Ensure all wire connections are secure. Use wire nuts if needed.
9. **Attach Cover Plate**: Place the cover plate over the extended box and secure it with screws.
10. **Restore Power**: Turn the circuit breaker back on and test the device to ensure it functions correctly.
11. **Final Check**: Ensure the extended box is flush with the wall and the cover plate is securely attached.
This process ensures a safe and code-compliant extension of your electrical box.
What accessories are available for electrical boxes?
Accessories for electrical boxes include:
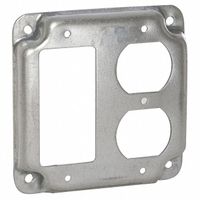
1. **Covers and Plates**: These are used to protect the electrical components inside the box and provide a finished look. They come in various styles, such as blank covers, switch plates, and outlet covers.
2. **Gaskets**: Used to seal the box and prevent moisture or dust from entering, especially in outdoor or damp locations.
3. **Extension Rings**: These are used to extend the depth of an electrical box to accommodate more wiring or devices.
4. **Brackets and Mounting Hardware**: These accessories help secure the electrical box to studs, walls, or ceilings. They include mounting brackets, clips, and screws.
5. **Knockout Seals**: Used to close unused knockout holes in the box, maintaining safety and integrity.
6. **Cable Clamps and Connectors**: These secure cables entering or exiting the box, preventing strain on the connections.
7. **Box Supports and Hangers**: Used to support electrical boxes in suspended ceilings or other non-standard installations.
8. **Insulating Bushings**: Placed on the edges of metal boxes to protect wires from abrasion.
9. **Grounding Accessories**: Include grounding screws, clips, and pigtails to ensure proper grounding of the electrical system.
10. **Weatherproof Covers**: Designed for outdoor boxes to protect against weather elements while allowing access to the outlets or switches.
11. **Divider Plates**: Used in multi-gang boxes to separate different circuits or devices.
12. **Firestop Products**: These are used to maintain the fire-resistance rating of walls or floors when electrical boxes are installed.
13. **Wire Nuts and Connectors**: Used inside the box to safely connect wires.
14. **Labeling and Identification Tags**: Help in identifying circuits and components within the box.
These accessories enhance the functionality, safety, and compliance of electrical installations.