Call +(254) 703 030 000 / 751 483 999 / 721 704 777
.....Read More
Frequently Asked Questions
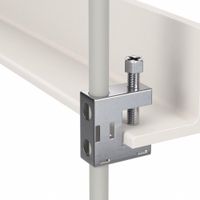
What are beam clamps used for?
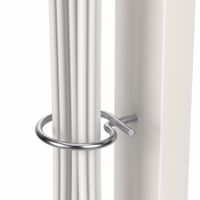
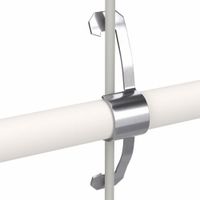
Beam clamps are devices used to secure or attach loads to structural beams, typically in construction, industrial, and rigging applications. They serve as temporary or permanent anchor points for lifting, hoisting, or suspending equipment and materials. Beam clamps are designed to fit over the flanges of I-beams, H-beams, or other structural steel members, providing a secure grip without the need for drilling or welding, which preserves the integrity of the beam.
These clamps are commonly used in scenarios where overhead lifting is required, such as in the installation of HVAC systems, piping, or electrical conduits. They are also employed in the entertainment industry for rigging lighting and sound equipment. Beam clamps can support a variety of loads, from lightweight fixtures to heavy machinery, depending on their design and load capacity.
There are different types of beam clamps, including adjustable, fixed, and swivel models, each suited for specific applications. Adjustable beam clamps can accommodate various beam sizes, while fixed clamps are designed for specific beam dimensions. Swivel beam clamps allow for angular adjustments, providing flexibility in positioning the load.
Safety is a critical consideration when using beam clamps. They must be properly rated for the load they are intended to support, and regular inspections are necessary to ensure their integrity. Proper installation and adherence to manufacturer guidelines are essential to prevent accidents or equipment failure.
In summary, beam clamps are versatile tools that facilitate the secure attachment of loads to structural beams, playing a crucial role in various industries by enabling safe and efficient lifting and rigging operations.
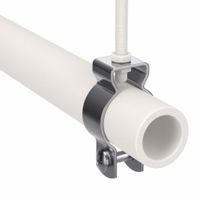
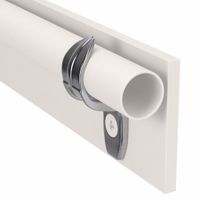
How do you install a conduit clamp?
1. **Select the Right Clamp**: Choose a conduit clamp that matches the size and type of your conduit (e.g., EMT, PVC, or rigid).
2. **Gather Tools and Materials**: You will need a drill, appropriate drill bits, screws or anchors, a screwdriver, a measuring tape, a pencil, and a level.
3. **Plan the Layout**: Determine the path of the conduit and mark the locations where clamps will be installed. Clamps should be spaced according to local electrical codes, typically every 3-4 feet for horizontal runs and within 3 feet of each junction box.
4. **Mark the Mounting Points**: Use a pencil to mark the spots on the wall or ceiling where each clamp will be mounted. Ensure the marks are level and aligned.
5. **Drill Pilot Holes**: If mounting on wood, drill pilot holes slightly smaller than the screws. For masonry or concrete, use a masonry bit to drill holes for anchors.
6. **Install Anchors (if needed)**: Insert anchors into the drilled holes if mounting on surfaces like concrete or brick.
7. **Attach the Clamp**: Position the clamp over the conduit and align it with the marked spot. Insert screws through the clamp holes and into the pilot holes or anchors. Tighten the screws with a screwdriver or drill, ensuring the clamp is secure but not overly tight to avoid damaging the conduit.
8. **Check Alignment**: Use a level to ensure the conduit is straight and properly aligned. Adjust if necessary.
9. **Repeat**: Continue installing clamps along the conduit path, ensuring consistent spacing and secure attachment.
10. **Final Inspection**: Once all clamps are installed, inspect the entire run to ensure stability and compliance with local codes. Adjust any clamps as needed.
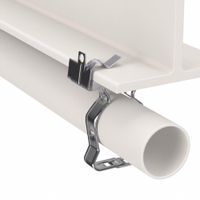
What is the difference between a beam clamp and a purlin clamp?
A beam clamp and a purlin clamp are both devices used to secure loads or structures to beams, but they serve different purposes and are used in different contexts.
A beam clamp is designed to attach directly to the flange of a steel beam. It is commonly used in construction and industrial settings to provide a secure point for lifting or suspending loads. Beam clamps are typically adjustable to fit various beam sizes and can support heavy loads. They are often used in conjunction with hoists, rigging equipment, or other lifting devices. Beam clamps are known for their strength and reliability, making them suitable for heavy-duty applications.
On the other hand, a purlin clamp is specifically designed to attach to purlins, which are horizontal structural members in a roof or wall. Purlin clamps are used to secure lightweight loads, such as electrical conduit, sprinkler systems, or HVAC ductwork, to the purlins. They are generally not intended for heavy lifting but rather for supporting smaller, distributed loads. Purlin clamps are often used in commercial and industrial buildings where purlins are part of the roof structure.
In summary, the primary difference lies in their application and the type of structural member they attach to: beam clamps are for steel beams and heavy loads, while purlin clamps are for purlins and lighter loads.
How do you choose the right size beam clamp?
To choose the right size beam clamp, consider the following factors:
1. **Load Capacity**: Determine the maximum load the beam clamp needs to support. Ensure the clamp's rated capacity exceeds this load to maintain safety and compliance with regulations.
2. **Beam Size and Type**: Measure the width and flange thickness of the beam where the clamp will be attached. Select a clamp that fits these dimensions. Consider the beam type (I-beam, H-beam, etc.) as some clamps are designed for specific profiles.
3. **Application Requirements**: Identify the purpose of the beam clamp, such as lifting, suspending, or securing loads. Different applications may require specific clamp designs or features.
4. **Material and Environment**: Choose a clamp made from materials suitable for the operating environment. For corrosive or outdoor environments, consider clamps with protective coatings or made from stainless steel.
5. **Adjustability and Versatility**: If the application involves varying beam sizes or frequent repositioning, select an adjustable clamp for flexibility.
6. **Compliance and Standards**: Ensure the clamp meets relevant industry standards and regulations, such as those from OSHA or ANSI, to ensure safety and reliability.
7. **Installation and Maintenance**: Consider ease of installation and maintenance. Some clamps offer quick installation features or require minimal maintenance, which can be beneficial for frequent use.
8. **Manufacturer Reputation**: Choose clamps from reputable manufacturers known for quality and reliability. Check for reviews or certifications that attest to the product's performance.
By evaluating these factors, you can select a beam clamp that is safe, efficient, and suitable for your specific needs.
Can beam clamps be used for heavy loads?
Yes, beam clamps can be used for heavy loads, but their suitability depends on several factors. Beam clamps are designed to provide a secure attachment point on structural beams for lifting and rigging applications. They are commonly used in construction, industrial, and maintenance settings.
1. **Load Capacity**: Beam clamps come in various sizes and load capacities. It is crucial to select a beam clamp that is rated for the specific weight of the load you intend to lift. Manufacturers provide load ratings, and it is essential to adhere to these specifications to ensure safety.
2. **Material and Construction**: Beam clamps are typically made from high-strength materials such as steel or alloy, which are capable of withstanding heavy loads. The construction quality, including welds and fasteners, also plays a significant role in determining the clamp's load-bearing capacity.
3. **Design and Type**: There are different designs of beam clamps, such as adjustable, fixed, and swivel types. The choice of design can affect the load capacity and the type of load that can be safely lifted. For heavy loads, a robust design with secure locking mechanisms is preferred.
4. **Installation and Use**: Proper installation is critical for the safe use of beam clamps with heavy loads. They must be correctly positioned and securely fastened to the beam. Regular inspection and maintenance are also necessary to ensure that the clamps remain in good working condition.
5. **Compliance and Standards**: Beam clamps should comply with relevant safety standards and regulations, such as those set by OSHA or other local authorities. Using certified equipment ensures that the clamps have been tested and approved for heavy load applications.
In summary, while beam clamps can be used for heavy loads, it is essential to choose the right type, ensure proper installation, and adhere to safety standards to prevent accidents and ensure safe lifting operations.
What materials are beam clamps made from?
Beam clamps are typically made from a variety of materials, each chosen for its specific properties to ensure strength, durability, and suitability for the intended application. Common materials include:
1. **Steel**: Often used for its high strength and durability, steel beam clamps are typically coated or galvanized to prevent rust and corrosion. They are suitable for heavy-duty applications and environments where high load-bearing capacity is required.
2. **Stainless Steel**: Known for its corrosion resistance, stainless steel is used in beam clamps that are intended for use in harsh environments, such as marine or chemical industries. It offers both strength and longevity.
3. **Malleable Iron**: This material is used for its excellent ductility and impact resistance. Malleable iron beam clamps are often galvanized to enhance their corrosion resistance and are commonly used in construction and industrial applications.
4. **Aluminum**: Lightweight and resistant to corrosion, aluminum beam clamps are used in applications where weight is a concern, such as in aerospace or certain construction scenarios. They are not as strong as steel but offer sufficient strength for lighter loads.
5. **Brass**: Used for its corrosion resistance and non-sparking properties, brass beam clamps are suitable for use in environments where flammable gases or materials are present.
6. **Plastic or Composite Materials**: In some cases, beam clamps may be made from high-strength plastic or composite materials. These are used in applications where electrical insulation is important or where the load requirements are minimal.
Each material offers distinct advantages and is selected based on factors such as load requirements, environmental conditions, and specific industry standards.
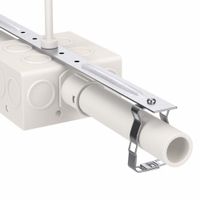
How do you secure conduit to a wall?
To secure conduit to a wall, follow these steps:
1. **Plan the Layout**: Determine the path the conduit will take along the wall. Ensure it is straight and avoids obstacles.
2. **Select the Conduit Type**: Choose the appropriate conduit type (e.g., PVC, EMT, rigid metal) based on the environment and electrical code requirements.
3. **Measure and Cut**: Measure the required length of the conduit and cut it using a hacksaw or conduit cutter. Deburr the edges to remove sharp edges.
4. **Mark the Wall**: Use a pencil or chalk to mark the positions on the wall where the conduit straps or clamps will be installed. Typically, straps are placed every 3 to 4 feet for horizontal runs and every 6 to 8 feet for vertical runs.
5. **Drill Holes**: Using a drill and the appropriate bit for the wall material (e.g., masonry bit for concrete), drill holes at the marked positions. Ensure the holes are deep enough to accommodate the anchors or screws.
6. **Insert Anchors**: If attaching to drywall or masonry, insert wall anchors into the drilled holes to provide a secure hold for the screws.
7. **Attach Conduit Straps**: Position the conduit straps or clamps over the conduit and align them with the drilled holes. Secure them using screws, ensuring they are tight enough to hold the conduit firmly but not so tight as to deform it.
8. **Check Alignment**: Ensure the conduit is straight and properly aligned. Adjust the straps if necessary.
9. **Secure Conduit Ends**: Use appropriate fittings to secure the ends of the conduit to electrical boxes or other conduits, ensuring a continuous and secure path for wiring.
10. **Inspect**: Double-check all connections and fastenings to ensure the conduit is securely attached and meets safety standards.