Call +(254) 703 030 000 / 751 483 999 / 721 704 777
.....Read More


Frequently Asked Questions
What is the difference between a floor scrubber, polisher, and burnisher?
A floor scrubber, polisher, and burnisher are all machines used for floor maintenance, but they serve different purposes and operate differently.
A **floor scrubber** is designed to clean floors by applying water and cleaning solution, scrubbing the surface, and then vacuuming up the dirty water. It is typically used for deep cleaning and is effective on various floor types, including tile, concrete, and vinyl. Floor scrubbers can be walk-behind or ride-on models and are ideal for removing dirt, grime, and stains.
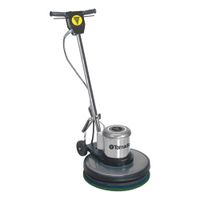
A **floor polisher**, also known as a buffer, is used to clean and maintain the shine of floors. It operates at lower speeds compared to a burnisher, usually between 175 to 300 RPM. Polishers are versatile and can be used for scrubbing, stripping, and buffing floors. They are suitable for applying a finish to floors and can be used on surfaces like wood, tile, and linoleum to maintain a glossy appearance.
A **floor burnisher** is designed to produce a high-gloss finish on floors. It operates at high speeds, typically between 1,000 to 3,000 RPM, which generates heat and friction to polish the floor surface. Burnishers are used after the floor has been cleaned and polished to enhance the shine and are most effective on hard surfaces like vinyl composite tile (VCT) and terrazzo. They are not suitable for deep cleaning or scrubbing.
In summary, floor scrubbers clean and remove dirt, polishers maintain and apply finishes, and burnishers enhance shine. Each machine serves a specific role in floor care, and their use depends on the desired outcome and floor type.
How do I choose the right floor pad or brush for my floor machine?
To choose the right floor pad or brush for your floor machine, consider the following factors:
1. **Floor Type**: Identify the type of flooring you have (e.g., hardwood, tile, concrete, carpet). Different surfaces require specific pads or brushes to avoid damage and ensure effective cleaning.
2. **Cleaning Task**: Determine the task at hand—scrubbing, stripping, buffing, or polishing. Each task requires a different type of pad or brush:
- **Scrubbing**: Use medium to heavy-duty pads or brushes for deep cleaning.
- **Stripping**: Opt for aggressive pads designed to remove old finishes.
- **Buffing**: Choose softer pads to enhance shine without removing finish.
- **Polishing**: Use very soft pads for a high-gloss finish.
3. **Pad/Brush Material**: Consider the material of the pad or brush:
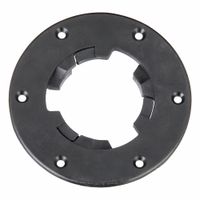
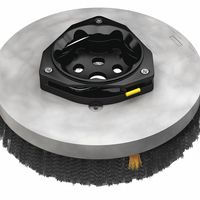
- **Pads**: Typically made of synthetic fibers, available in various colors indicating their aggressiveness (e.g., black for stripping, red for buffing).
- **Brushes**: Made of nylon, polypropylene, or natural fibers, with varying stiffness for different tasks.
4. **Machine Compatibility**: Ensure the pad or brush is compatible with your floor machine’s size and speed. Check the machine’s specifications for recommended pad or brush sizes.
5. **Manufacturer Recommendations**: Follow the floor machine and flooring manufacturer’s guidelines for suitable pads or brushes to avoid voiding warranties or causing damage.
6. **Environmental Considerations**: Consider eco-friendly options if sustainability is a priority. Some pads are made from recycled materials.
7. **Cost and Durability**: Balance cost with durability. Higher-quality pads and brushes may have a higher upfront cost but offer longer life and better performance.
By evaluating these factors, you can select the appropriate floor pad or brush that meets your cleaning needs while protecting your flooring and ensuring efficient machine operation.
How often should I replace floor pads or brushes?
The frequency of replacing floor pads or brushes depends on several factors, including the type of flooring, the intensity of use, the type of cleaning machine, and the specific material of the pads or brushes. Generally, floor pads used for buffing, scrubbing, or polishing should be replaced when they show visible signs of wear, such as thinning, fraying, or loss of effectiveness. This can range from every few days to several weeks, depending on usage.
For high-traffic areas or commercial settings, floor pads might need replacement every 20-25 hours of use. In less demanding environments, they might last up to 100 hours. Brushes, typically more durable than pads, can last longer but should be replaced when bristles become worn down or uneven, which can occur after several months of regular use.
Regular inspection is crucial. Check for wear and tear, and ensure that pads and brushes are cleaned after each use to extend their lifespan. Rotating pads and brushes can also help distribute wear evenly. Always follow the manufacturer's guidelines for specific recommendations on replacement intervals.
Can floor scrubbers be used on all types of flooring?
Floor scrubbers are versatile cleaning machines, but their suitability depends on the type of flooring. They are generally safe for use on hard surfaces like tile, concrete, and vinyl. These floors can withstand the mechanical action and moisture involved in the scrubbing process. However, caution is needed with more delicate surfaces.
For hardwood floors, it's crucial to use a scrubber designed specifically for wood to avoid damage. Excessive water and harsh brushes can harm the wood, leading to warping or scratches. Similarly, laminate flooring can be sensitive to moisture, so a scrubber with controlled water usage is recommended.
Natural stone floors, such as marble or granite, require special attention. Abrasive brushes or harsh chemicals can damage the surface, so using a scrubber with soft brushes and pH-neutral cleaners is advisable.
Carpeted floors are not suitable for traditional floor scrubbers. Instead, carpet extractors or steam cleaners are more appropriate for deep cleaning carpets.
In summary, while floor scrubbers can be used on many types of flooring, it's essential to choose the right machine and settings for each specific floor type to prevent damage.
What maintenance is required for floor machines?
Maintenance for floor machines involves several key tasks to ensure optimal performance and longevity:
1. **Daily Cleaning**: After each use, clean the machine thoroughly. Remove any debris, dust, or residue from the brushes, pads, and squeegees. This prevents buildup that can affect performance.
2. **Inspect Brushes and Pads**: Regularly check brushes and pads for wear and tear. Replace them when they become worn out to maintain effective cleaning. Ensure they are properly attached and aligned.
3. **Check Squeegees**: Inspect squeegees for cracks or damage. Ensure they are clean and free from debris to prevent streaking. Replace them if they are worn out to maintain effective water pickup.
4. **Battery Maintenance**: For battery-operated machines, regularly check the battery charge and water levels (for lead-acid batteries). Clean battery terminals to prevent corrosion and ensure proper connections.
5. **Solution and Recovery Tanks**: Empty and rinse solution and recovery tanks after each use to prevent odors and buildup. Check for leaks or damage and ensure caps and seals are intact.
6. **Inspect Hoses and Filters**: Regularly check hoses for cracks or blockages. Clean or replace filters as needed to maintain suction and prevent motor strain.
7. **Lubrication**: Periodically lubricate moving parts as per the manufacturer’s recommendations to reduce friction and wear.
8. **Check Electrical Components**: Inspect cords and plugs for damage. Ensure all electrical connections are secure and functioning properly.
9. **Calibration and Adjustments**: Regularly check and adjust settings such as brush pressure and pad speed to ensure optimal performance.
10. **Professional Servicing**: Schedule regular professional maintenance checks to address any complex issues and ensure the machine is in top working condition.
By adhering to these maintenance practices, floor machines can operate efficiently and have an extended service life.
How do I achieve a high-gloss finish on my floors?
1. **Clean the Floor**: Start by thoroughly cleaning the floor to remove dirt, dust, and debris. Use a vacuum or broom followed by a damp mop with a suitable floor cleaner.
2. **Repair and Sand**: Inspect the floor for any damage. Repair scratches or dents with wood filler. Sand the floor using a floor sander to remove old finish and create a smooth surface. Start with coarse-grit sandpaper and gradually move to finer grits.
3. **Remove Dust**: After sanding, vacuum the floor and wipe it with a tack cloth to remove all dust particles.
4. **Apply a Sealer**: Apply a wood sealer to the floor to prepare it for the finish. Use a brush or roller for even application. Allow it to dry completely as per the manufacturer's instructions.
5. **Buff the Floor**: Once the sealer is dry, buff the floor using a floor buffer to ensure a smooth surface. This step helps the finish adhere better.
6. **Apply the Finish**: Choose a high-gloss polyurethane or varnish. Stir the finish gently to avoid bubbles. Apply the first coat using a high-quality brush or roller, following the grain of the wood. Allow it to dry completely.
7. **Sand Between Coats**: Lightly sand the floor with fine-grit sandpaper between coats to remove imperfections. Clean the dust with a tack cloth.
8. **Apply Additional Coats**: Apply at least two more coats of finish, sanding lightly between each. More coats may be needed for a higher gloss.
9. **Final Buffing**: Once the final coat is dry, buff the floor with a soft cloth or a buffing machine to enhance the shine.
10. **Cure Time**: Allow the floor to cure for several days before heavy use to ensure the finish hardens properly.
What safety precautions should be taken when using floor machines?
When using floor machines, several safety precautions are essential to ensure both operator safety and effective operation:
1. **Training and Familiarization**: Operators should receive proper training on the specific machine model, including understanding its controls, functions, and safety features.
2. **Personal Protective Equipment (PPE)**: Wear appropriate PPE such as non-slip footwear, gloves, safety goggles, and hearing protection if the machine is noisy.
3. **Pre-Operation Inspection**: Check the machine for any visible damage, loose parts, or frayed cords. Ensure all safety guards are in place and functioning.
4. **Electrical Safety**: Use machines with grounded plugs and ensure outlets are properly grounded. Avoid using machines with damaged cords or plugs.
5. **Work Area Preparation**: Clear the area of obstacles, debris, and any tripping hazards. Ensure the floor is dry to prevent slips.
6. **Proper Handling of Chemicals**: If using cleaning solutions, follow the manufacturer’s instructions for dilution and application. Use only recommended chemicals to avoid damaging the machine or floor.
7. **Safe Operation**: Operate the machine at a safe speed and avoid sudden movements. Keep hands and feet away from moving parts.
8. **Ventilation**: Ensure adequate ventilation when using machines that emit fumes or dust.
9. **Emergency Procedures**: Be familiar with emergency shut-off procedures and have access to first aid kits and fire extinguishers.
10. **Post-Operation Care**: After use, clean the machine, inspect for any damage, and store it properly. Disconnect from the power source when not in use.
11. **Ergonomics**: Adjust handles and controls to suit the operator’s height and comfort to prevent strain or injury.
12. **Awareness of Surroundings**: Be mindful of other people in the area and communicate clearly to prevent accidents.
By adhering to these precautions, operators can minimize risks and ensure a safe working environment.