Call +(254) 703 030 000 / 751 483 999 / 721 704 777
- Home
- Adhesives Sealants And Tape
- Caulks Sealants Gasket Makers
- Spray Foam Sealants
.....Read More
Frequently Asked Questions
What is spray foam sealant used for?
Spray foam sealant is used for insulation and air sealing in residential, commercial, and industrial applications. It is a versatile material that expands upon application to fill gaps, cracks, and voids, providing an effective barrier against air, moisture, and temperature fluctuations. This helps improve energy efficiency by reducing heating and cooling costs, as it minimizes air leakage and enhances the thermal envelope of a building.
In addition to insulation, spray foam sealant is used for soundproofing, as it can dampen noise transmission between rooms or from external sources. It is also employed in sealing around windows, doors, and other penetrations to prevent drafts and water intrusion, thereby protecting the structural integrity of a building.
Spray foam sealant is available in two main types: open-cell and closed-cell. Open-cell foam is less dense, providing good insulation and sound absorption, while closed-cell foam is denser, offering superior insulation, moisture resistance, and structural reinforcement.
The sealant is applied using a spray gun, allowing it to reach difficult areas and conform to irregular shapes. Once cured, it forms a durable, long-lasting barrier that can also deter pests and mold growth due to its airtight properties.
Overall, spray foam sealant is a critical component in modern construction and renovation projects, contributing to energy efficiency, comfort, and building longevity.
How do you apply spray foam sealant?
To apply spray foam sealant, follow these steps:
1. **Preparation**: Wear protective gear, including gloves, goggles, and a mask. Ensure the area is well-ventilated. Clean the surface where the foam will be applied, removing dust, debris, and moisture.
2. **Select the Right Foam**: Choose the appropriate type of spray foam for your project, such as low-expansion foam for small gaps or high-expansion foam for larger cavities.
3. **Shake the Can**: Vigorously shake the spray foam can for about 30 seconds to mix the contents thoroughly.
4. **Attach the Nozzle**: Securely attach the nozzle or straw applicator to the can. Some cans come with a built-in applicator, while others require you to attach it manually.
5. **Test Spray**: Before applying, test the foam on a piece of scrap material to get a feel for the flow and expansion rate.
6. **Application**: Hold the can upside down and insert the nozzle into the gap or crack. Press the trigger gently to release the foam. Apply the foam in layers, filling about 50% of the space to allow for expansion.
7. **Layering**: For deeper gaps, apply the foam in layers, allowing each layer to expand and cure before adding more.
8. **Curing**: Allow the foam to cure completely, which typically takes about 8 to 24 hours, depending on the product and environmental conditions.
9. **Trimming**: Once cured, trim any excess foam with a utility knife for a neat finish.
10. **Clean Up**: Clean the nozzle immediately after use with a solvent like acetone to prevent clogging. Dispose of the can according to local regulations.
11. **Safety**: Store unused cans in a cool, dry place away from direct sunlight and heat sources.
What is the difference between spray foam sealant cans and cylinders?
Spray foam sealant cans and cylinders differ primarily in size, application method, and intended use.
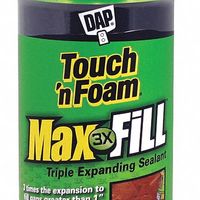
Spray foam sealant cans are typically smaller, handheld containers designed for consumer use. They are convenient for small-scale projects, such as sealing gaps around windows, doors, and other minor cracks. These cans usually come with a straw applicator, making them easy to use for DIY enthusiasts. The foam expands upon application, providing insulation and air sealing. However, the output is limited, and the foam may not be as dense or durable as that from larger systems.
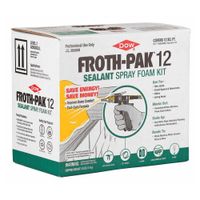
In contrast, spray foam cylinders are larger, often used by professionals for more extensive projects. They require a separate dispensing gun and hose, allowing for greater control and precision during application. Cylinders are ideal for insulating larger areas, such as walls, attics, and crawl spaces. They offer a higher yield and can cover more surface area efficiently. The foam from cylinders tends to be denser and more robust, providing better insulation and structural support.
Additionally, the formulation of the foam may vary between cans and cylinders. Cylinders often contain two-component foam, which cures faster and provides a more consistent finish. Cans typically contain single-component foam, which may take longer to cure and might not offer the same level of performance.
In summary, spray foam sealant cans are suitable for small, quick fixes and are user-friendly for non-professionals. Cylinders, on the other hand, are designed for larger, professional-grade applications, offering superior performance and efficiency.
Can spray foam sealant be used around windows and doors?
Yes, spray foam sealant can be used around windows and doors. It is an effective solution for sealing gaps and cracks, providing insulation, and improving energy efficiency. However, it is crucial to use the right type of spray foam for this purpose. Low-expansion foam, often labeled as "window and door" foam, is specifically designed for these areas. It expands less than high-expansion foam, reducing the risk of warping or damaging window and door frames.
When applying spray foam sealant around windows and doors, follow these steps:
1. **Preparation**: Clean the area to remove dust and debris. Ensure the surfaces are dry for better adhesion.
2. **Application**: Shake the can well before use. Attach the straw applicator if provided. Hold the can upside down and apply the foam in a continuous bead along the gap. Fill the gap only partially, as the foam will expand to fill the space.
3. **Curing**: Allow the foam to cure completely. This usually takes about 8 to 24 hours, depending on the product and environmental conditions.
4. **Trimming**: Once cured, trim any excess foam with a utility knife for a neat finish.
5. **Finishing**: Cover the foam with paint or sealant if desired, to protect it from UV exposure and enhance appearance.
Using spray foam sealant around windows and doors can significantly reduce drafts, improve comfort, and lower energy bills. However, improper application can lead to issues such as frame distortion or difficulty in opening and closing windows and doors. Always follow the manufacturer's instructions and safety guidelines for the best results.
Is spray foam sealant safe for indoor use?
Spray foam sealant is generally safe for indoor use when applied correctly and with proper precautions. It is commonly used for insulation and sealing gaps to improve energy efficiency. However, there are several factors to consider to ensure safety:
1. **Ventilation**: During application, ensure the area is well-ventilated. The chemicals in spray foam can release volatile organic compounds (VOCs) and other fumes that may be harmful if inhaled in large quantities. Proper ventilation helps dissipate these fumes.
2. **Protective Gear**: Applicators should wear appropriate protective gear, including masks, gloves, and goggles, to prevent skin contact and inhalation of fumes.
3. **Curing Time**: Allow the foam to cure completely before occupying the space. Curing times can vary, but it typically takes about 24 hours. Once cured, the foam is inert and poses minimal health risks.
4. **Product Selection**: Choose low-VOC or no-VOC spray foam products to minimize exposure to harmful chemicals. Check for certifications or labels indicating the product is safe for indoor use.
5. **Professional Installation**: Consider hiring professionals for installation. They have the expertise and equipment to apply the foam safely and effectively.
6. **Allergies and Sensitivities**: Individuals with chemical sensitivities or allergies should avoid areas where spray foam is being applied until it is fully cured.
7. **Fire Safety**: Some spray foams are flammable. Ensure the product is rated for fire safety and follow manufacturer guidelines regarding its use near heat sources.
In summary, spray foam sealant can be safe for indoor use if applied with caution, using the right products, and following safety guidelines. Always read and follow the manufacturer's instructions for the best results.
How long does spray foam sealant take to cure?
Spray foam sealant typically takes about 8 to 24 hours to cure completely. The initial curing process, where the foam becomes tack-free, usually occurs within 20 minutes to an hour after application. However, several factors can influence the curing time:
1. **Temperature and Humidity**: Warmer temperatures and higher humidity levels can accelerate the curing process, while cooler and drier conditions may slow it down. Ideally, the ambient temperature should be between 60°F and 80°F (15°C to 27°C) for optimal curing.
2. **Foam Type**: There are different types of spray foam, such as open-cell and closed-cell. Open-cell foam generally cures faster than closed-cell foam due to its lower density and structure.
3. **Application Thickness**: Thicker layers of foam will take longer to cure than thinner applications. It is often recommended to apply the foam in layers, allowing each layer to cure before applying the next.
4. **Ventilation**: Proper ventilation can help speed up the curing process by allowing moisture and gases to escape, which is particularly important in enclosed spaces.
5. **Product Specifications**: Different brands and formulations of spray foam may have varying curing times, so it is essential to follow the manufacturer's instructions for the specific product being used.
For best results, it is advisable to allow the foam to cure fully before subjecting it to any stress or finishing work, such as trimming or painting. This ensures that the foam has reached its maximum strength and insulation properties.
How do you remove excess spray foam sealant?
To remove excess spray foam sealant, follow these steps:
1. **Immediate Cleanup**: If the foam is still wet, use a solvent like acetone or nail polish remover. Apply it to a cloth and gently wipe away the excess foam. Be cautious as acetone can damage some surfaces.
2. **Cured Foam Removal**: Once the foam has cured, it becomes more challenging to remove. Use a utility knife or a serrated blade to carefully cut away the bulk of the excess foam. Ensure you do not damage the surface beneath.
3. **Sanding**: For any remaining foam, use sandpaper to smooth it down. Start with a coarser grit to remove larger pieces, then switch to a finer grit for a smooth finish.
4. **Scraping**: A plastic scraper or putty knife can help remove foam from flat surfaces. Gently scrape the foam, taking care not to scratch the underlying material.
5. **Chemical Removers**: Specialized foam remover products are available and can be effective. Follow the manufacturer's instructions for application and safety precautions.
6. **Cleaning Residue**: After removing the foam, clean the area with soap and water to remove any residue from solvents or foam particles.
7. **Protective Measures**: To prevent future issues, wear gloves and protective eyewear when working with spray foam. Cover surrounding areas with drop cloths or plastic sheeting to catch any overspray.
8. **Disposal**: Dispose of foam pieces and contaminated materials according to local regulations, as they may be considered hazardous waste.
By following these steps, you can effectively remove excess spray foam sealant while minimizing damage to surfaces.


