Call +(254) 703 030 000 / 751 483 999 / 721 704 777
.....Read More

Frequently Asked Questions
What are the different types of dispensing syringes and their uses?
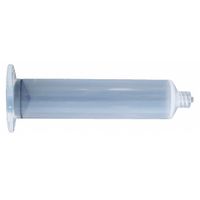
Dispensing syringes are specialized tools used for the precise application of liquids, pastes, or gels. They come in various types, each designed for specific applications:
1. **Manual Syringes**: These are operated by hand and are used for small-scale applications where precision is crucial. They are commonly used in laboratories for dispensing small volumes of liquids.
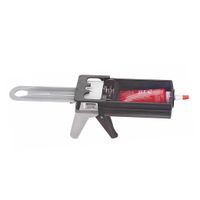
2. **Pneumatic Syringes**: These use air pressure to dispense materials and are ideal for repetitive tasks. They are often used in industrial settings for applying adhesives or sealants.
3. **Electric Syringes**: Powered by electricity, these syringes offer precise control over the dispensing process. They are used in automated systems for high-volume production lines.
4. **Positive Displacement Syringes**: These are designed to handle high-viscosity materials. They are used in applications where consistent volume is critical, such as in the pharmaceutical industry.
5. **Time/Pressure Syringes**: These use a combination of time and pressure to control the amount of material dispensed. They are versatile and used in various industries, including electronics for solder paste application.
6. **Screw-Driven Syringes**: These use a screw mechanism to push the material out, providing high precision. They are used in applications requiring exact dosing, such as in medical device manufacturing.
7. **Jet Dispensing Syringes**: These syringes use a jet mechanism to apply materials without contact. They are used in electronics for applying solder paste or adhesives in hard-to-reach areas.
Each type of dispensing syringe is chosen based on the material being dispensed, the required precision, and the specific application needs.
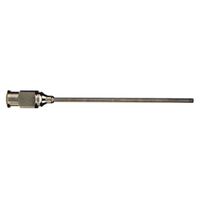
How do I choose the right dispensing syringe tip for my application?
To choose the right dispensing syringe tip for your application, consider the following factors:
1. **Viscosity of Material**: For low-viscosity fluids, use a smaller gauge tip to ensure precision. For high-viscosity materials, a larger gauge tip is necessary to allow the material to flow without excessive pressure.
2. **Type of Material**: Corrosive or reactive materials may require specialized tips made from materials like stainless steel or Teflon to prevent degradation.
3. **Application Precision**: For applications requiring high precision, such as micro-dispensing, use a fine gauge tip. For less precise applications, a larger tip may suffice.
4. **Flow Rate Requirements**: Determine the desired flow rate. A larger tip will generally allow for a higher flow rate, while a smaller tip will restrict flow, providing more control.
5. **Tip Length**: Consider the reach needed for your application. Longer tips can access hard-to-reach areas, while shorter tips offer more control and stability.
6. **Tip Shape**: Choose between straight, angled, or bent tips based on the application area and the angle of approach required.
7. **Material Compatibility**: Ensure the tip material is compatible with the fluid being dispensed to prevent reactions or contamination.
8. **Pressure Requirements**: High-pressure applications may require reinforced tips to withstand the pressure without deforming.
9. **Environmental Conditions**: Consider the operating environment, such as temperature and humidity, which may affect the material properties and dispensing process.
10. **Regulatory Compliance**: Ensure the tip meets any industry-specific standards or regulations, especially in medical or food applications.
By evaluating these factors, you can select a dispensing syringe tip that optimizes performance, accuracy, and efficiency for your specific application.
What are the benefits of using dispensing bottles for adhesives?
Dispensing bottles for adhesives offer several benefits that enhance efficiency, precision, and safety in various applications:
1. **Precision and Control**: Dispensing bottles allow for accurate application of adhesives, minimizing waste and ensuring that the right amount is used. This precision is crucial in tasks requiring detailed work, such as electronics assembly or model making.
2. **Reduced Waste**: By controlling the flow of adhesive, dispensing bottles help reduce excess use and spillage, leading to cost savings and less environmental impact.
3. **Improved Safety**: These bottles often come with features like nozzles or applicator tips that prevent direct contact with the adhesive, reducing the risk of skin irritation or inhalation of fumes.
4. **Ease of Use**: The ergonomic design of dispensing bottles makes them user-friendly, allowing for easy handling and application, even in hard-to-reach areas.
5. **Versatility**: Available in various sizes and with different nozzle types, dispensing bottles can be used for a wide range of adhesives, from thin liquids to thicker gels, accommodating diverse project needs.
6. **Enhanced Shelf Life**: Many dispensing bottles are designed to be airtight, which helps in maintaining the adhesive's quality and extending its shelf life by preventing exposure to air and moisture.
7. **Portability**: Lightweight and compact, these bottles are easy to transport and store, making them ideal for on-site work or mobile repair services.
8. **Consistency**: They ensure a consistent application, which is essential for maintaining the quality and strength of adhesive bonds across different projects.
9. **Customization**: Some dispensing bottles offer adjustable flow rates or interchangeable tips, providing flexibility to adapt to specific application requirements.
Overall, dispensing bottles for adhesives streamline the application process, enhance precision, and contribute to safer and more efficient work environments.
How do I maintain and clean dispensing syringes and tips?
To maintain and clean dispensing syringes and tips, follow these steps:
1. **Disassemble**: Carefully disassemble the syringe and remove the tip. This allows for thorough cleaning of all components.
2. **Rinse Immediately**: After use, rinse the syringe and tip with warm water to prevent residue from drying and hardening. Use distilled water to avoid mineral deposits.
3. **Soak**: For stubborn residues, soak the components in a mild detergent solution. Avoid harsh chemicals that could damage the syringe material.
4. **Brush**: Use a small brush or pipe cleaner to scrub the inside of the syringe barrel and the tip. Ensure all residue is removed, especially in hard-to-reach areas.
5. **Rinse Again**: Rinse all parts thoroughly with distilled water to remove any detergent or remaining residue.
6. **Dry**: Allow the components to air dry completely on a clean, lint-free cloth or paper towel. Ensure no moisture remains, as it can affect the dispensing accuracy.
7. **Inspect**: Check for any signs of wear or damage, such as cracks or deformations. Replace any compromised parts to maintain precision.
8. **Reassemble**: Once dry, reassemble the syringe and tip carefully, ensuring all parts fit snugly and function properly.
9. **Storage**: Store the syringe and tips in a clean, dry place, preferably in a protective case to prevent contamination and damage.
10. **Regular Maintenance**: Establish a routine cleaning schedule based on usage frequency. Regular maintenance ensures longevity and consistent performance.
11. **Calibration**: Periodically check the calibration of the syringe to ensure accurate dispensing, especially if used for precise applications.
By following these steps, you can maintain the functionality and extend the lifespan of your dispensing syringes and tips.
What factors should I consider when selecting a dispensing bottle for sealants?
When selecting a dispensing bottle for sealants, consider the following factors:
1. **Material Compatibility**: Ensure the bottle material is compatible with the sealant to prevent chemical reactions or degradation. Common materials include polyethylene, polypropylene, and fluorinated plastics.
2. **Viscosity**: Choose a bottle that can handle the sealant's viscosity. High-viscosity sealants may require bottles with wider necks or specialized dispensing mechanisms.
3. **Dispensing Mechanism**: Select a dispensing mechanism that suits the application needs, such as squeeze bottles, pump dispensers, or precision tips for controlled application.
4. **Capacity**: Determine the appropriate bottle size based on the volume of sealant needed for your application to minimize waste and ensure efficiency.
5. **Seal and Closure**: Ensure the bottle has a secure seal and closure to prevent leaks and maintain the sealant's integrity. Options include screw caps, snap-on lids, or tamper-evident seals.
6. **Ease of Use**: Consider ergonomic designs for user comfort and efficiency, especially for repetitive tasks.
7. **Environmental Conditions**: Assess the bottle's ability to withstand environmental factors such as temperature, humidity, and UV exposure, which could affect the sealant's performance.
8. **Regulatory Compliance**: Ensure the bottle meets industry standards and regulations, particularly if used in specialized fields like medical or food industries.
9. **Cost**: Balance quality and budget constraints, considering both initial costs and potential savings from reduced waste or increased efficiency.
10. **Supplier Reliability**: Choose a reputable supplier to ensure consistent quality and availability of the dispensing bottles.
11. **Customization Options**: Consider if customization is needed for branding or specific application requirements, such as color coding or labeling.
12. **Reusability and Sustainability**: Evaluate options for reusable or recyclable bottles to align with sustainability goals.
How do I prevent clogging in adhesive dispensing tips?
To prevent clogging in adhesive dispensing tips, follow these strategies:
1. **Proper Storage**: Store adhesives in a cool, dry place and ensure the container is sealed tightly to prevent exposure to air, which can cause curing.
2. **Use Appropriate Tips**: Select the right size and type of dispensing tip for the adhesive being used. Smaller tips are more prone to clogging, so match the tip size to the viscosity of the adhesive.
3. **Regular Cleaning**: Clean the dispensing tips regularly with appropriate solvents that dissolve the adhesive. This prevents buildup and hardening inside the tip.
4. **Purge the System**: After each use, purge the dispensing system by running a small amount of solvent or adhesive through the tip to clear any residual material.
5. **Use Anti-Clogging Tips**: Consider using tips designed to resist clogging, such as those with non-stick coatings or specialized geometries.
6. **Control Environment**: Maintain a controlled environment with stable temperature and humidity to prevent premature curing of the adhesive.
7. **Use Fresh Adhesive**: Always use adhesive within its shelf life. Expired adhesive is more likely to cause clogs.
8. **Cap Tips When Not in Use**: Use tip caps to seal the dispensing tip when not in use, preventing air exposure and curing.
9. **Adjust Pressure and Speed**: Optimize the dispensing pressure and speed to ensure a smooth flow of adhesive without causing turbulence that can lead to clogs.
10. **Regular Maintenance**: Implement a routine maintenance schedule for the dispensing equipment to ensure all components are functioning properly and free of obstructions.
By following these practices, you can significantly reduce the risk of clogging in adhesive dispensing tips, ensuring a smooth and efficient application process.
What are the best practices for storing adhesives in dispensing bottles?
1. **Temperature Control**: Store adhesives in a cool, dry place to prevent premature curing or degradation. Avoid exposure to direct sunlight and extreme temperatures.
2. **Humidity Management**: Keep the storage area dry. High humidity can affect the adhesive's properties and shelf life.
3. **Proper Sealing**: Ensure that dispensing bottles are tightly sealed when not in use to prevent contamination and evaporation of volatile components.
4. **Labeling**: Clearly label bottles with the type of adhesive, date of purchase, and expiration date to ensure proper usage and inventory management.
5. **Upright Storage**: Store bottles upright to prevent leakage and ensure the adhesive remains at the dispensing end for easy use.
6. **Avoid Cross-Contamination**: Use separate bottles for different types of adhesives to prevent chemical reactions and contamination.
7. **Regular Inspection**: Periodically check bottles for signs of damage, leaks, or degradation. Replace any compromised containers immediately.
8. **Controlled Dispensing**: Use bottles with precision tips or nozzles to control the amount of adhesive dispensed, reducing waste and mess.
9. **Material Compatibility**: Ensure that the dispensing bottle material is compatible with the adhesive to prevent reactions that could degrade the bottle or adhesive.
10. **Ventilation**: Store in a well-ventilated area to disperse any fumes that may escape, ensuring a safe environment.
11. **Shelf Life Awareness**: Be mindful of the adhesive's shelf life and use older stock first to minimize waste.
12. **Safety Precautions**: Follow all safety guidelines, including wearing protective gear when handling adhesives, to prevent accidents and health hazards.